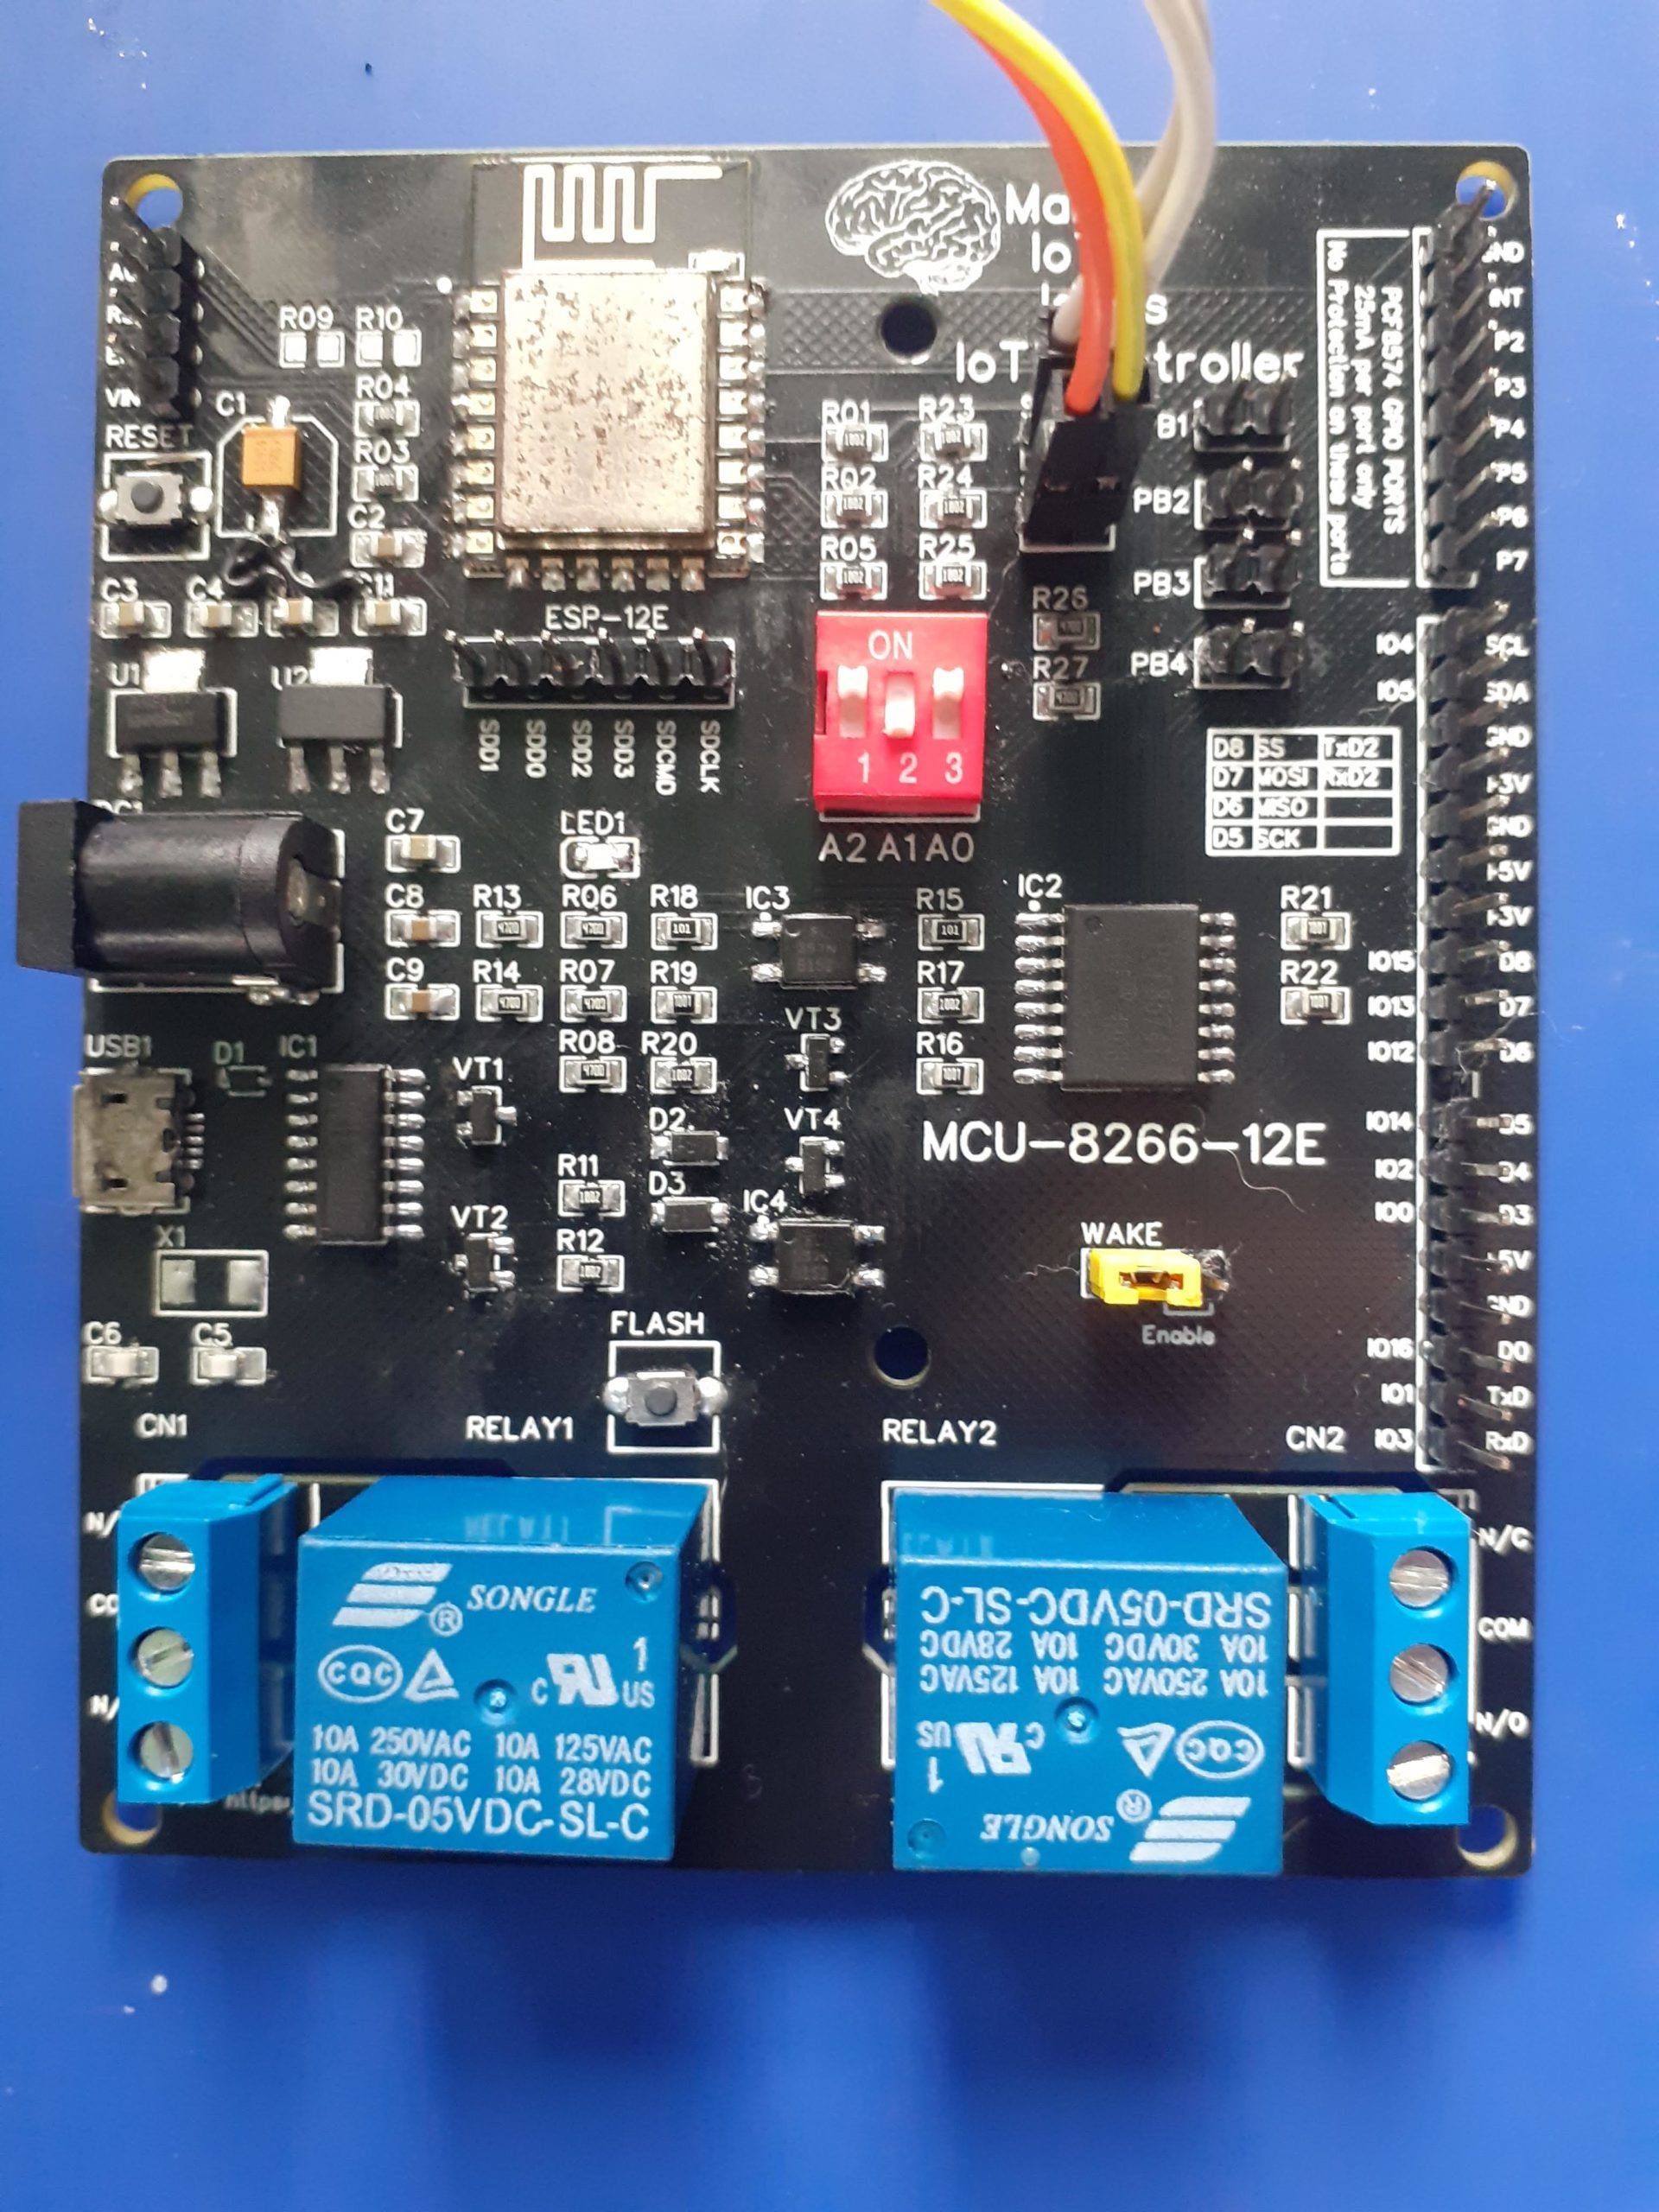
Welcome to Part 3 of this build. If you are new to this series, Part1 and Part2 can be found by clicking on the respective links. Today, we will look at the completed PCB for our IoT Controller. Full disclosure, There are some issues, ranging from components that have still (15 days after being ordered, not been delivered), as well as 3 minor errors on the PCB ( That is entirely my fault ). We will look at how I have overcome the problems to still end up with a functionals PCB. Please note that the errors in the PCB Artwork have BEEN CORRECTED and that the version for public download does not contain any errors. You can thus order it with confidence.
Let us get started
Errors on the PCB
Powering on the PCB
Integrating and Testing with Home Assistant
Tasmota
Order this PCB for yourself
Conclusion and Further steps
Errors on the PCB

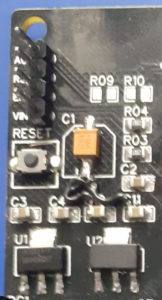
During the design phase, I have forgotten to add a ground to the 5v regulator, and its supporting smoothing capacitors. These components were not initially included in my design, but, while added in later after I decided that since I will be designing the PCB to operate from many different voltage inputs, a reliable 5v source that is not dependent on USB power should be added… The components were added to the schematic, and I forgot to add the ground. It went undetected on the PCB design, as the Ground plane is a copper area…
In the picture above, you can see that I have temporarily fixed it with two wire links from the ground of C1, to the grounds of C10 and C11 respectively. These grounds connect back to U2.
C1 is another issue. Originally designed as a 100uf Electrolytic capacitor, I had to settle for a 10uf Tantalum. The reason being that the ordered capacitors are still floating in logistics space… with no definite ETA.

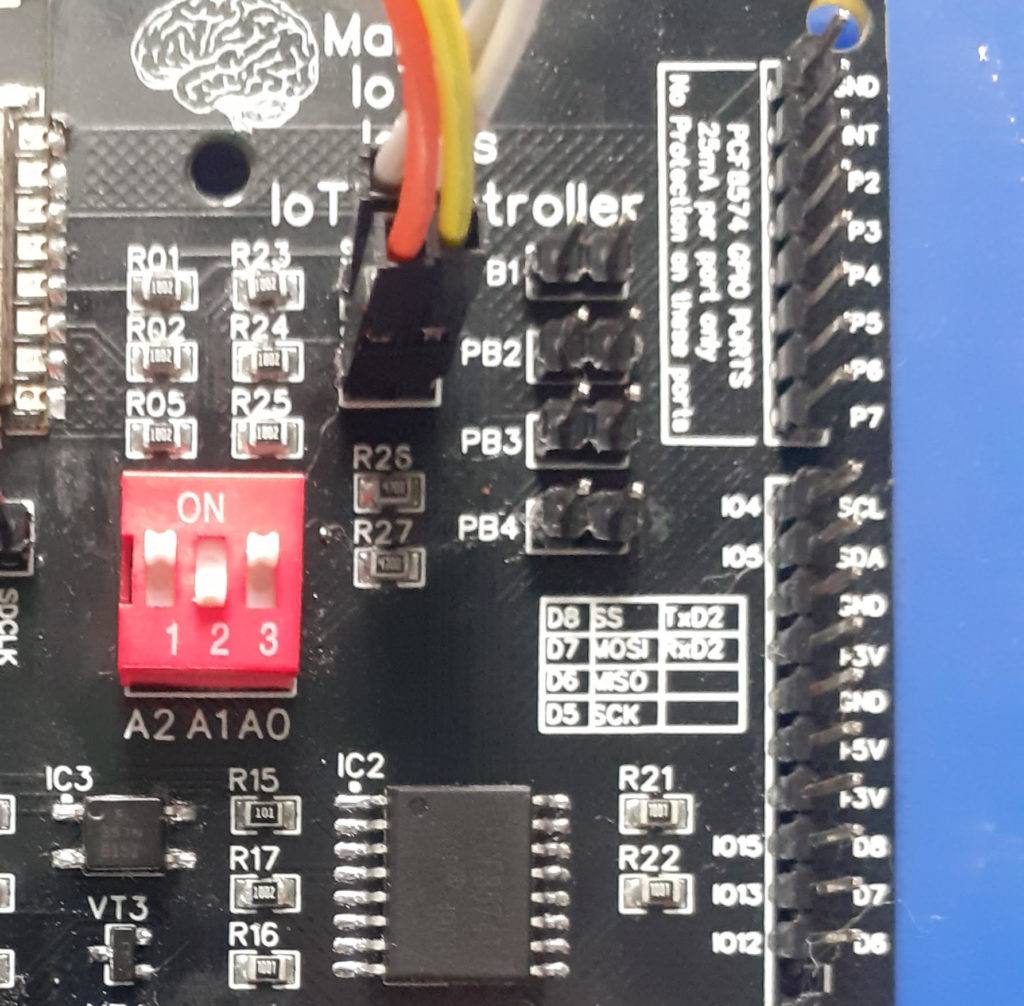
The following error was not so easy to spot. It gave me quite a headache to find. As I normally use netlabels on all the pins of any IC that I use, I have correctly labelled ESP12-E GPIO5 as SCL and GPIO4 as SDA. These netlabels were then transferred onto the PFC8574’s pins but in reverse! Note to self: Always re-read the pinout in the datasheet! To make matters worse, I flipped the SCL and SDA labels on the pin header…
How to fix:
I am fortunate that the ESP12-E, like all other ESP Modules, does not have fixed I2C pins. If this was an Atmega based project, the boards would have been useless if tracks could not be cut and reconnected!
On the ESP12-E, I2C is however software allocated to any desired GPIO pin. It was thus easily fixed by just swapping the two pins in software.
The third problem encountered is another logistics issue. This is in the process of being resolved, but, as you will soon see, is not actually a problem at all…
I have added support for an onboard USB to Serial converter, via a CH340G chip. The chip requires a 12Mhz resonator or crystal. My dear supplier accidentally sent me an 8 Mhz version. I have thus decided to depopulate the entire USB to Serial circuit, leaving just the USB Port and protection diode on the board. (To allow for powering via USB).
This does mean that programming the board becomes a little more complicated, connecting an external USB to Serial Adapter, and pressing and holding the flash button while pressing and releasing reset for each upload, followed by a manual reset afterwards. This is a pain, but, as I will be using these boards with ESPHome, only required once. All future uploads will be OTA anyway, and the correct components can be retrofitted when they arrive at a later stage.
Powering on the PCB
The PCB was first powered on with an external USB to serial converter and using the Arduino IDE, a simple sketch testing the I2C addressing of the chip, as well as the functioning of all onboard relays and LEDs.
The board was then flashed with ESPHome, using the procedure described in Part 1.
I then proceeded to measure the current required by the board, to make sure that it is as designed.
Current Requirements
Powered from 9V to 12V DC via the DC Barrel Connector
Standby, Wifi Connected to Home Assistant, All relays and LEDs off 75mA
All relays energised, status LEDs all on 255mA
Integrating and Testing with EspHome and Home Assistant
The configuration for ESPHome was updated and uploaded to the device OTA. I decided to add a monitor for the VCC input of the ESP12-E, a remote Restart button, and an external DHT11 Temperature and Humidity sensor.
The updated code is available below
esphome:
  name: iot-controller-8266-01
  platform: ESP8266
  board: nodemcuv2

# Enable logging
logger:

# Enable Home Assistant API
api:

ota:
  password: "2f8a73f47f1893f3f7baa391c4d0ba96"

wifi:
  ssid: "<your ssid>"
  password: "<your password>"

  # Enable fallback hotspot (captive portal) in case wifi connection fails
  ap:
    ssid: "Iot-Controller-8266-01"
    password: "y4aaH7vMITsC"

captive_portal:
#--- DO NOT COPY ANYTHING ABOVE THIS LINE ---

# when using this, you need to reassign the status LED to another GPIO
#deep_sleep:
#  run_duration: 5min
#  sleep_duration: 2min

i2c:
  sda: GPIO5
  scl: GPIO4
  scan: true
  id: i2c_bus_a

pcf8574:
  - id: 'pcf8574_hub'
    address: 0x22
    pcf8575: false

status_led:
    pin:
      number: GPIO16
      inverted: true
# Reassign this LED to another GPIO when using deep sleep mode !

sensor:
# Monitor VCC on the ESP12-E
  - platform: adc
    pin: VCC
    name: "Device Input Voltage"
    unit_of_measurement: "V"
# Monitor the WiFi Signal Strength at the device
  - platform: wifi_signal
    name: "WiFi Signal Sensor"
    unit_of_measurement: "dBm"
    update_interval: 240s
# Add Temperature and Humidity Sensor
  - platform: dht
    pin: GPIO2
    temperature:
      name: "Room Temperature"
      unit_of_measurement: "°C"
      icon: "mdi:temperature"
      device_class: "temperature"
      state_class: "measurement"
      accuracy_decimals: 2

    humidity:
      name: "Room Humidity"
      unit_of_measurement: "%"
      icon: "mdi:water-percent"
      device_class: "humidity"
      state_class: "measurement"
      accuracy_decimals: 2
    update_interval: 60s

# Outputs to control relays and led's

output:
 - platform: gpio
   id: relay_1
   pin:
      pcf8574: pcf8574_hub
      number: 0
      mode: OUTPUT
      inverted: true
 - platform: gpio
   id: relay_2
   pin:
      pcf8574: pcf8574_hub
      number: 1
      mode: OUTPUT
      inverted: true
 - platform: gpio
   id: led_status_1
   pin:
      pcf8574: pcf8574_hub
      number: 2
      mode: OUTPUT
      inverted: true
 - platform: gpio
   id: led_status_2
   pin:
      pcf8574: pcf8574_hub
      number: 3
      mode: OUTPUT
      inverted: true
# Monitor the two local control pushbuttons on the device
binary_sensor:
  -  platform: gpio
     id: push_button_1
     name: 'Relay1 Pushbutton'
     device_class: ''
     pin:
        pcf8574:  pcf8574_hub
        number: 4
        mode: INPUT
        inverted: true
     on_press:
      then:
        - switch.toggle: switch_relay1
     filters:
       -  delayed_on_off: 50ms

  -  platform: gpio
     id: push_button_2
     name: 'Relay2 Pushbutton'
     device_class: ''
     pin:
        pcf8574:  pcf8574_hub
        number: 5
        mode: INPUT
        inverted: true
     on_press:
      #min_length: 50ms
      #max_length: 500ms
      then:
        - switch.toggle: switch_relay2
     filters:
       -  delayed_on_off: 50ms

# Allow control from inside Home Assistant

switch:
  - platform: output
    id: switch_relay1
    name: "Relay No. 1 (#0)"
    output: relay_1
    on_turn_on:
    - output.turn_on: led_status_1
    on_turn_off:
    - output.turn_off: led_status_1
  - platform: output
    id: switch_relay2
    name: "Relay No. 2 (#1)"
    output: relay_2
    on_turn_on:
    - output.turn_on: led_status_2
    on_turn_off:
    - output.turn_off: led_status_2
 # Add a remote Reboot switch
  - platform: restart
    name: "Reboot Me"
After uploading this configuration, Home Assistant was configured to reflect the changes.

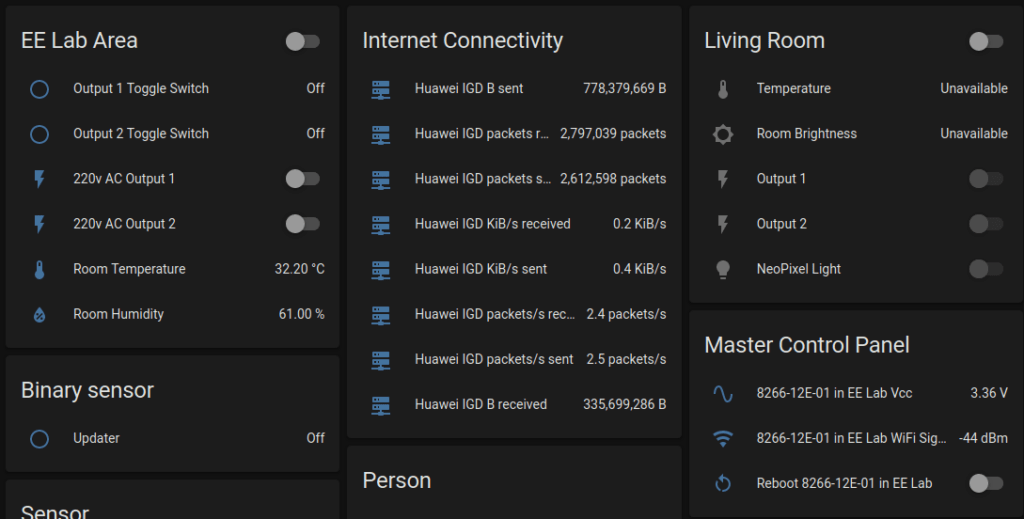
I have decided to split the different status and control outputs from the device into two cards, One in the EE Lab Area, which will later be moved into the actual room(s) where the device will be deployed, as well as on a Master Control Panel. From here, I can reboot individual devices, see their voltages and WiFi Status
Tasmota
As promised before, I did test the device with Tasmota. I had to do a custom compile to get support for the PCF8574. Performance was however VERY poor. ESPHome is snappy and quick, even in local mode. Tasmota seemed to have at least a one-second delay on doing anything.
I thus abandoned it, and won’t be making use of it in this project anymore. The flexibility of ESPHome to do what I want, how I want it, is definitely missing in Tasmota. Hopefully, that will change in the future?
Order this PCB for yourself
You can order this PCB from PCBWay as a shared Project, by clicking here.
New users will get a $5 USD coupon for use with their first order if they follow the link below to sign up for an account.
I would also like to thank Wendy at PCBWay for once again being a star. The project went smoothly and was very well produced. Make sure to consider using PCBWay for your next PCB order.
Conclusion and further steps
I am in the process of building and assembling another 2 of these devices. I have also ordered and received PolyCarbonate enclosures to mount them in. As this is an ongoing project, I still plan to add I2C temperature measurement chips to each, to measure the temperature inside the enclosure. An Air quality sensor, as well as a CO2 sensor, is also planned, with a possible Display Shield to provide test output locally at the device. This display, at the moment at least, is planned as an I2C Oled or similar. There are also plans to do an option to directly power the unit from 220V AC via an additional base-board for now, or a complete redesign, incorporating everything on one board.
Thank you for following along, I hope that you found it educational and entertaining.
Please consider joining us on Patreon. We are in the process of creating exclusive content for that platform, as well as for http://144.126.248.244. Most of the content will also remain free for all as usual.


