
As part of an ongoing project, this tiny boost converter was designed to be used to power some of my projects, as well as become a part of a much-needed add-on circuit to the single-cell 18650 charger PCB that I designed a while ago.

I received a lot of very useful comments from readers about the circuit below ( the single-cell 18560 Lipo charger). Most of these comments were related to adding a boost converter to the circuit, to add a little more versatility to the circuit.

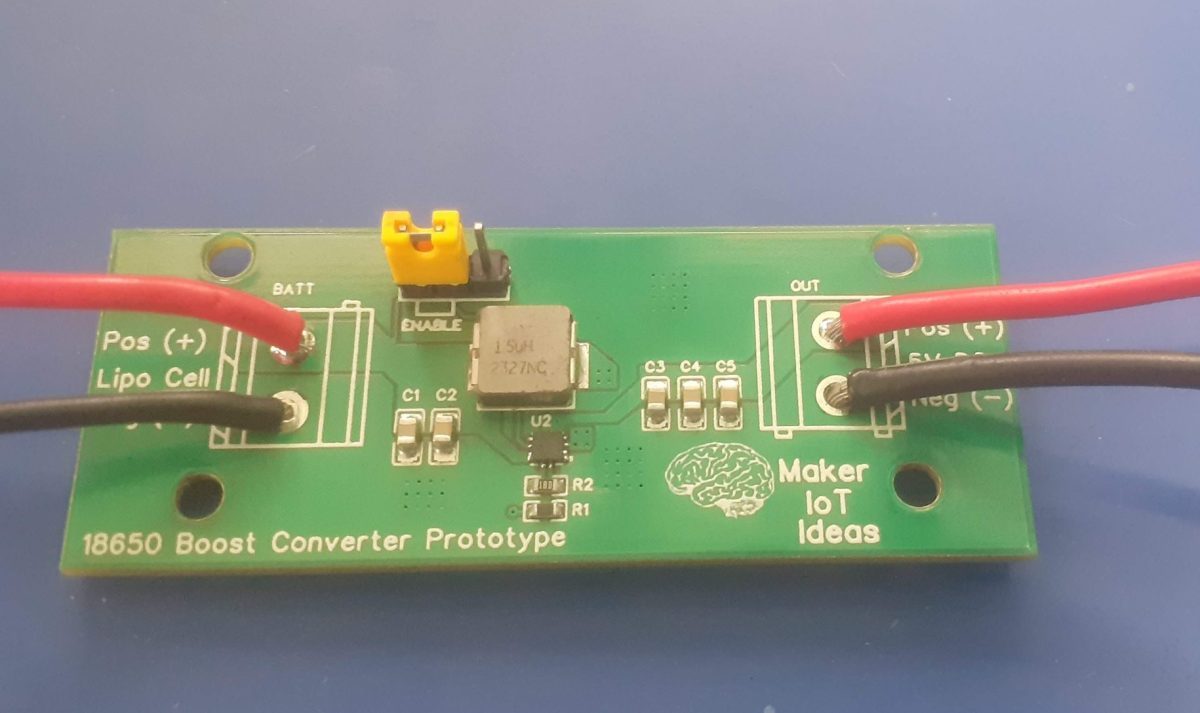
I never just add something though, and as such, this boost converter prototype was designed to test out the components and design before incorporating it into the main design. That way, I can iron out any problems before adding it to a bigger circuit.
The boost converter is based on the MP3423GG-Z, from MPS. I have decided to stay very close to their recommended application notes, so the circuit is stock standard. Another way to ensure that performance is what I want it to be, and also, to be frank, because I don’t believe I need to make any changes to the manufacturer-recommended circuit.


Some other comments suggested the use of “ideal diodes” at the output , in order to be able to daisy-chain the chargers. That will be addressed in a later post this month, as I am also currently testing out one of the many “ideal diode” integrated circuit chips available – in this case the MAX40200.
Being a “prototype” I did not bother with adding proper connectors to this version, as it will only be used for a short while. Soldering the supply and output wires directly to the PCB will thus be sufficient for the time being.
Design and Manufacturing
I choose PCBWay for my PCB manufacturing. Why? What makes them different from the rest?
PCBWay‘s business goal is to be the most professional PCB manufacturer for prototyping and low-volume production work in the world. With more than a decade in the business, they are committed to meeting the needs of their customers from different industries in terms of quality, delivery, cost-effectiveness and any other demanding requests. As one of the most experienced PCB manufacturers and SMT Assemblers in China, they pride themselves to be our (the Makers) best business partners, as well as good friends in every aspect of our PCB manufacturing needs. They strive to make our R&D work easy and hassle-free.
How do they do that?
PCBWay is NOT a broker. That means that they do all manufacturing and assembly themselves, cutting out all the middlemen, and saving us money.
PCBWay’s online quoting system gives a very detailed and accurate picture of all costs upfront, including components and assembly costs. This saves a lot of time and hassle.
PCBWay gives you one-on-one customer support, that answers you in 5 minutes ( from the Website chat ), or by email within a few hours ( from your personal account manager). Issues are really resolved very quickly, not that there are many anyway, but, as we are all human, it is nice to know that when a gremlin rears its head, you have someone to talk to who will do his/her best to resolve your issue as soon as possible.
Find out more here

Assembly
This PCB really would benefit from having a stencil available when you assemble it by hand. The MP3423GG-Z is super tiny, so having a guide to apply just the right amount of solder paste to the pads will go a long long way to make sure that there is no reworking needed.

All of the other components are quite manageable, being only a couple of 0805 and 0603 resistors, and an inductor. I reflow soldered everything at the same time with a hotplate. It is worth noting that I did have to remove and replace the MP3423GG-Z once during the reflow process… tiny solder bridges formed between some pins, but carefully lifting it up with a pair of tweezers, and placing it onto the pads again got rid of those completely.
We may be tempted to “leave it off the board, wait for the solder to flow and then place the component onto the molten solder…” I am not too sure about the thermal stresses that that method may or may not induce in the component… so, I prefer having it heat up slowly with the rest of the components/ and then make a quick adjustment if needed… Comments on this anyone?
Testing and final thoughts
Testing the boost converter went without any problems. It delivers a stable 5.15v DC at the output, from an input voltage of 3.3v to 4.2v. I did not test it lower than that yet… Current output seems quite stable, and the voltage does not fluctuate under load ( I tested with 2 LED COB lights, each drawing 600mA, connected in series – thus 1.2A — That is definitely the maximum current that I intend to draw from this device, although it is rated at 3A
Ripple current seems to be within the 100mV stated in the datasheet.
In summary, I believe the device performs the intended duty that i set out to design. The assembly is a bit tricky due to the small size of the MP3423GG-Z, as well as my “not-so-good” eyesight. All that aside, I am ready to advance to the next phase of the overall project – revision 2 of the Single Cell 18650 Lipo Charger.