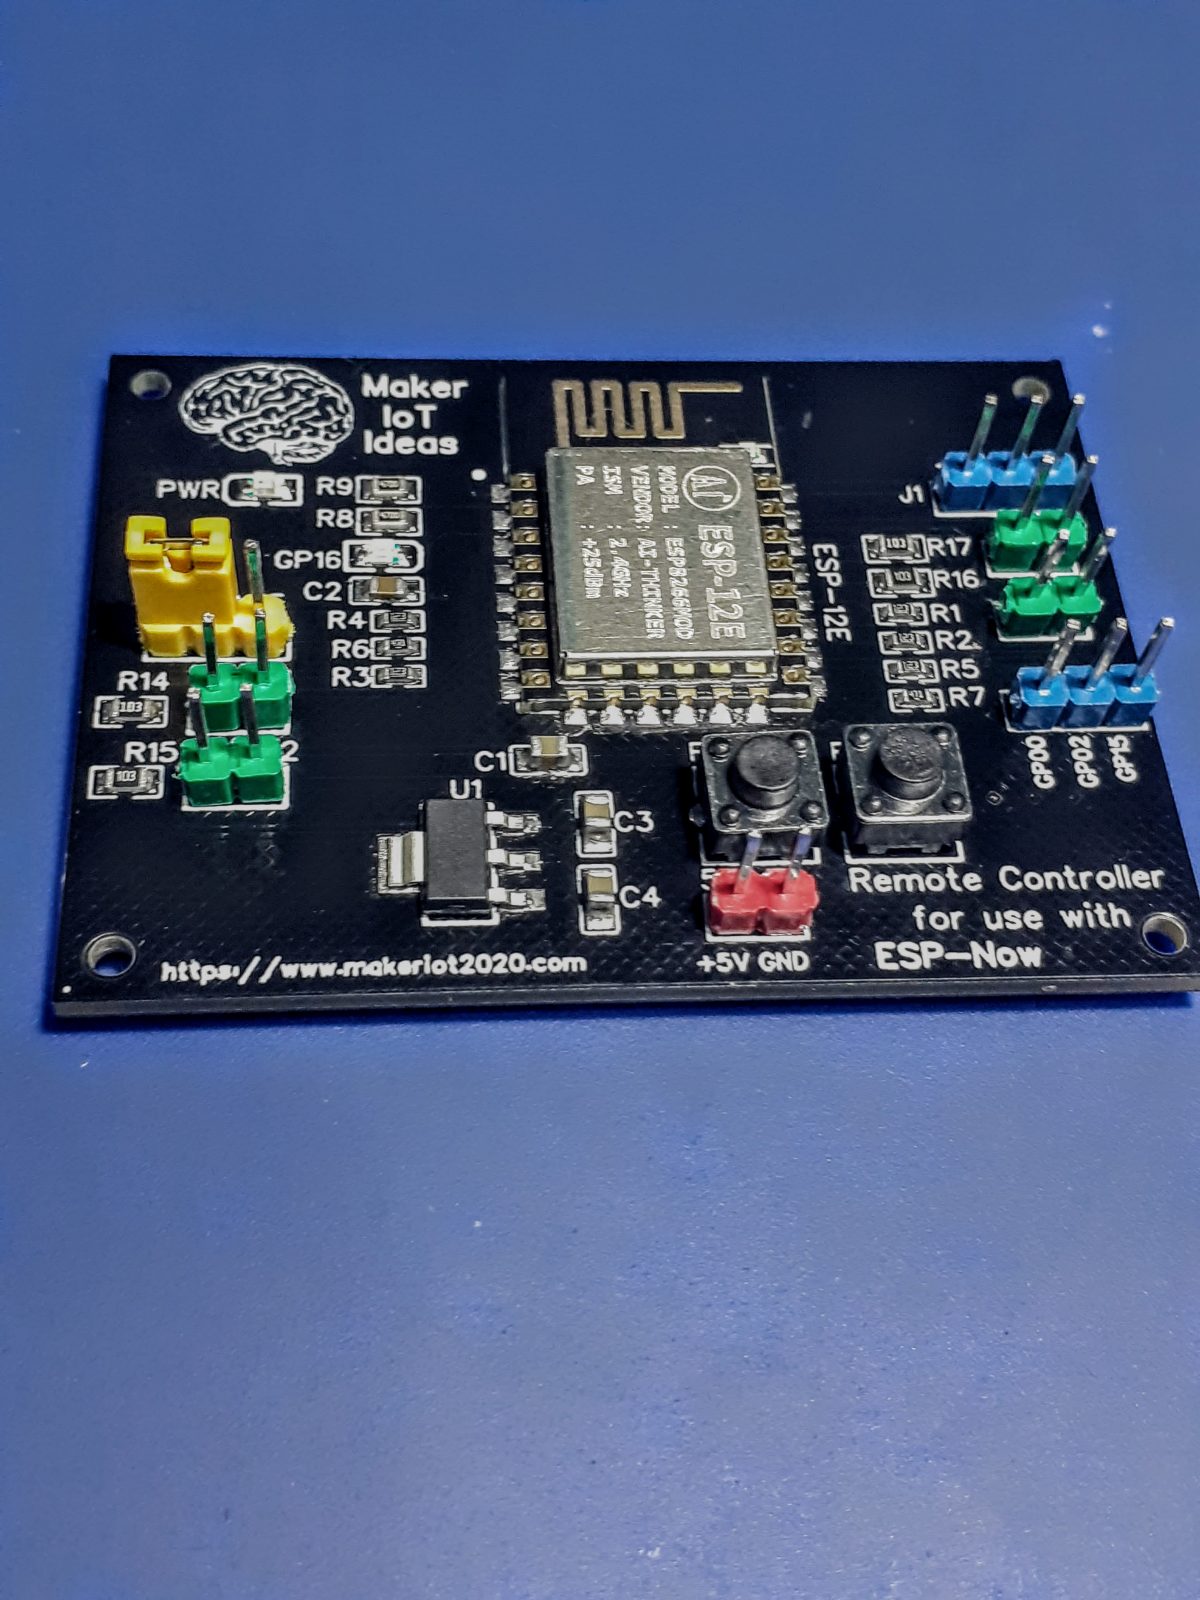
Today we will look at the remote control unit for the Robotic Toy Car – Part 6.
The project is close to being completed, and as such, there are quite a lot of final things that need to be taken care of.
One of these will definitely be the final coding, which I will release in the final part of the project, so with that in mind, let us take a look at the remote control unit.
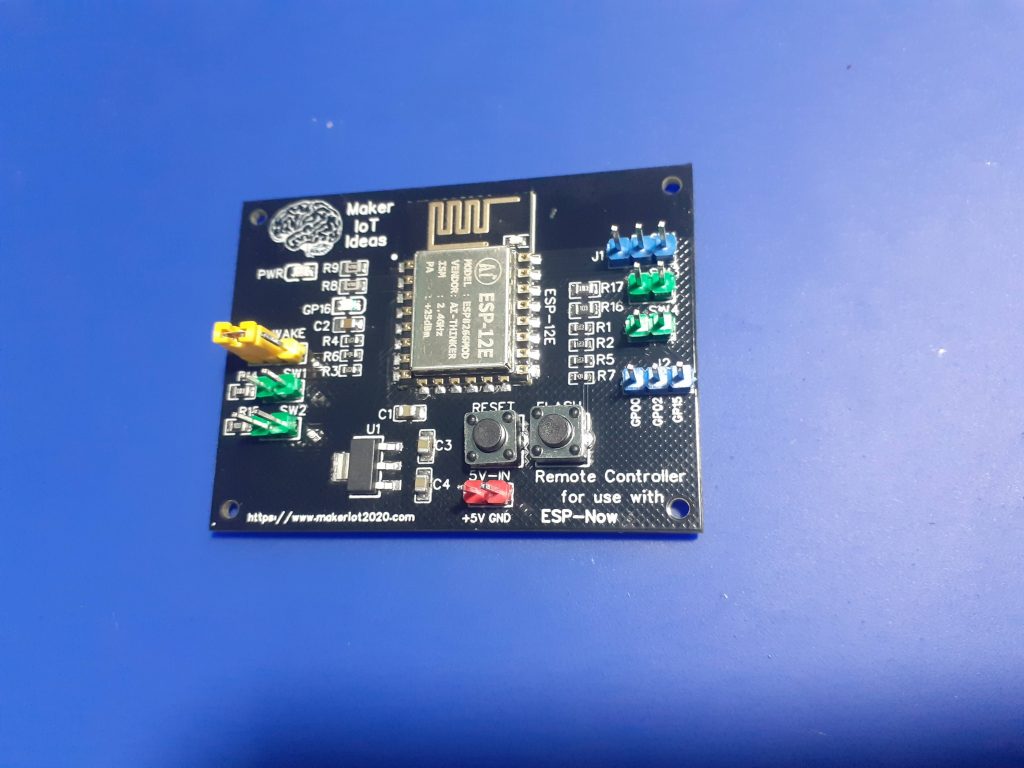
I have decided to do something completely different from standard remote control units, being that I will use ESP-Now, a protocol developed by Espressif.
ESP-Now runs on the Wifi hardware of the ESP8266 or ESP32 and is basically a peer-to-peer protocol, that does not require Wifi but can co-exist with it on the same device. Outdoors, ESP-Now has a range of about 100m, which should work very well for my intended use.
The Remote control, as designed, will have 4 dedicated buttons: forward, reverse, left and right, divided into two groups to make two-handed control easier, similar to a standard game controller. No input on either of the two groups will result in stopping the vehicle, in the case of forwards and backwards, and centring the steering, in the case of the left-right axis.

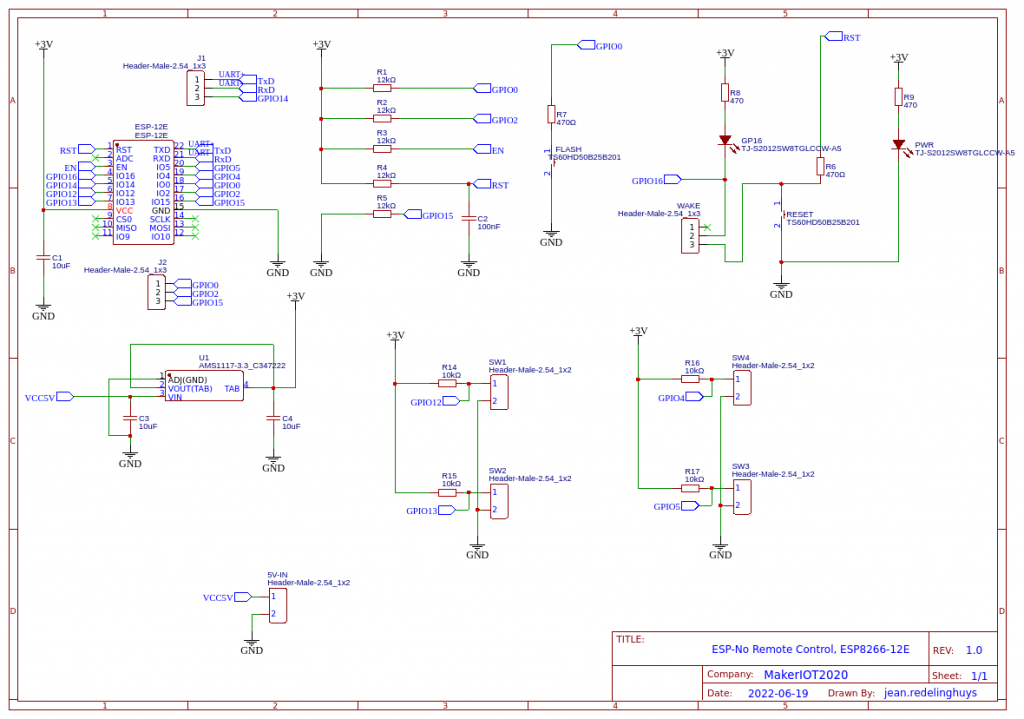
As I always try to make my designs somewhat reusable for other purposes, I have also broken out most of the unused GPIO pins to header pins, with also adding a jumper on GPIO16 to make deep-sleep wakeup mode possible., You can also re-use the switch pins for other purposes, just remember to first remove the 10k pull-up resistors at R14, R15, R16, and R17…
SW4 -> R16 , SW4 = GPIO4
SW3 -> R17 , SW3 = GPIO5
SW2 -> R15 , SW2 = GPIO13
SW1 -> R14 , SW1 = GPIO12
GPIO16 can be reused as well, just remove the jumper, but remember that it is pulled up through a LED and a 470ohm resistor…
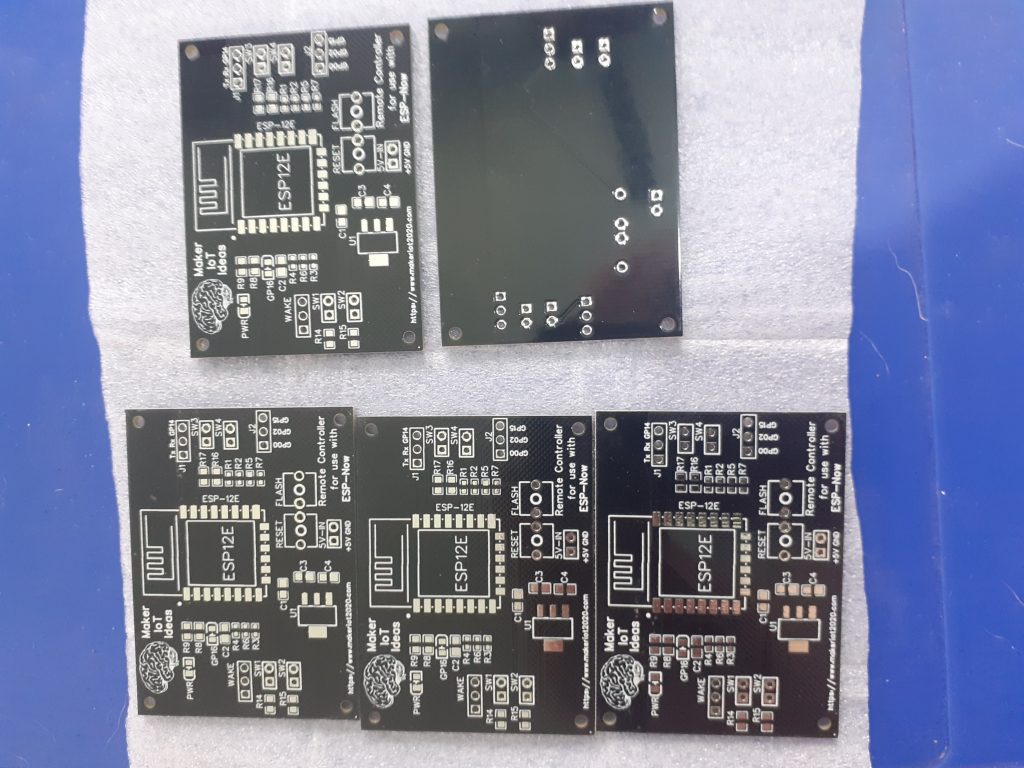
There is no USB-to-serial converter onboard, I have been having quite a lot of headaches with them over the last few months, with almost all CH340G chips that I have purchased, being fake, or dead-on arrivals that don’t work… Sending them back to the suppliers, unfortunately, results in unpleasantries, because even placing them in verified working circuits, still proves them to be not working… This is however not an issue, as it is quite easy to upload the board with an external adapter.
The Schematic
Manufacturing the PCB
Over the past eight years, PCBWay has continuously upgraded their MANUFACTURING plants and equipment to meet higher quality requirements, and now THEY also provide OEM services to build your products from ideas to mass production and access to the market.
The PCB for this project has been manufactured at PCBWay.
Please consider supporting them if you would like your own copy of this PCB, or if you have any PCB of your own that you need to have manufactured.

If you would like to have PCBWAY manufacture one of your own, designs, or even this particular PCB, you need to do the following…
1) Click on this link
2) Create an account if you have not already got one of your own.
If you use the link above, you will also instantly receive a $5USD coupon, which you can use on your first or any other order later. (Disclaimer: I will earn a small referral fee from PCBWay. This referral fee will not affect the cost of your order, nor will you pay any part thereof.)
3) Once you have gone to their website, and created an account, or login with your existing account,
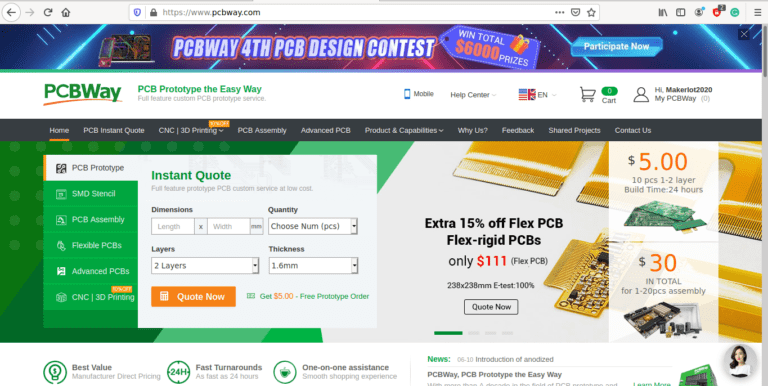
4) Click on PCB Instant Quote

5) If you do not have any very special requirements for your PCB, click on Quick-order PCB

6) Click on Add Gerber File, and select your Gerber file(s) from your computer. Most of your PCB details will now be automatically selected, leaving you to only select the solder mask and silk-screen colour, as well as to remove the order number or not. You can of course fine-tune everything exactly as you want as well.


7) You can also select whether you want an SMD stencil, or have the board assembled after manufacturing. Please note that the assembly service, as well as the cost of your components, ARE NOT included in the initial quoted price. ( The quote will update depending on what options you select ).

8) When you are happy with the options that you have selected, you can click on the Save to Cart Button. From here on, you can go to the top of the screen, click on Cart, make any payment(s) or use any coupons that you have in your account.
Then just sit back and wait for your new PCB to be delivered to your door via the shipping company that you have selected during checkout.

