
So many people asked me which Lora Module I use for my projects. In this part of the series, I will show you, as well as shed some light on another module, that although seemingly cheap, is, unfortunately, according to me, a complete waste of time and money.
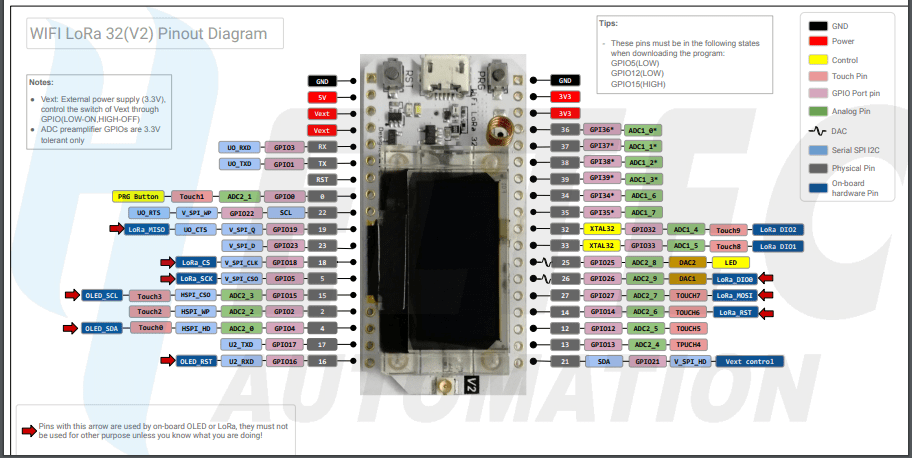
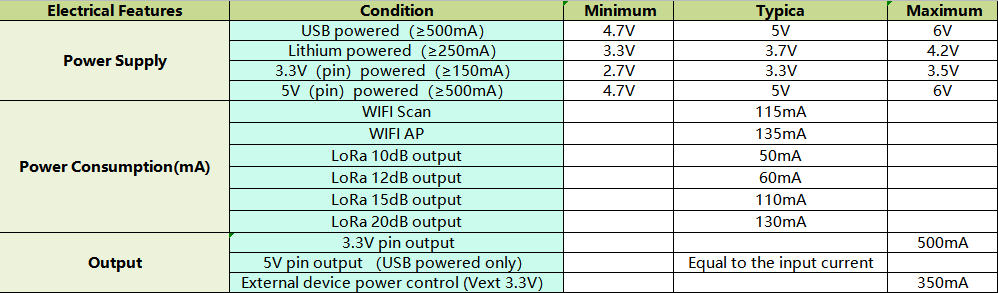
Heltec LoRa 32 v 2 – The good stuff ( according to me at least)


Installation in Arduino IDE:
Installation of the libraries into the Arduino IDE is quite easy, just follow the link to heltec…
The Bad ( according to me )
The following module, is, according to me, an absolute waste of time and money. Documentation is impossible to find, and that that you do find, as often incorrect. The pin-outs are wrong, with no definite standard.
I am talking about the TTGO Lora V1 or V2 or what ever ??? can seem to even find that answer reliably. I was initially attracted to this module, as it was allegedly compatible with the heltec version, and did not have the oled screen, which, to be honest, is not always needed in every project. It was also about 25% cheaper, and could be sourced locally, without enriching the greedy shipping companies 😉 (I just have to rant about this, as 25USD to ship 100g worth of stuff is a ripoff. Either that or 60 to 90 days of guess-if-it-will-arrive mail is not on ( and even that is 10 USD!)
So, having high hopes, I ordered one of these boards, hoping to use it together with my heltec boards… It arrived, and that was well the top came of.. I could immediately see that the quality of the PCB was quite bad. Documentation was missing, and even the supplier sent me to a heltec pinout, which, after a quick test were definitely not correct…
Google turned up mixed results, and eventually I found a sort of accurate pinout …
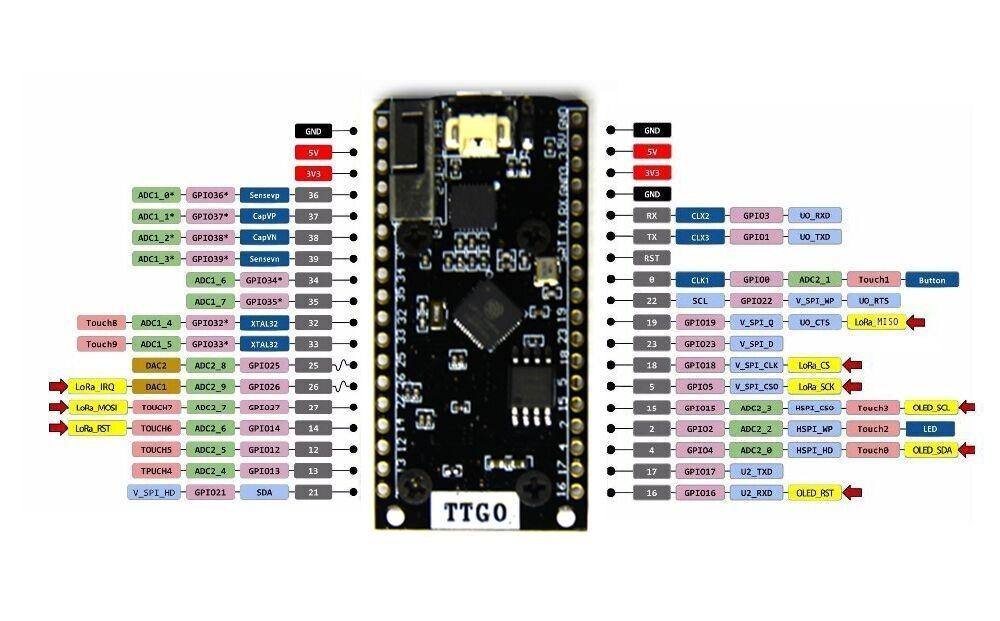
This pinout also turned out to be only about 50% correct, and after manually trying to map out the pins, I was sort of confident enough to test it further…
Further problems arose, LoRa does not work, I2C does not work, SPI does not work shall I continue…? 🙂 It now seems clear that the board that I bought was a clone of a clone, and a very bad one at that …
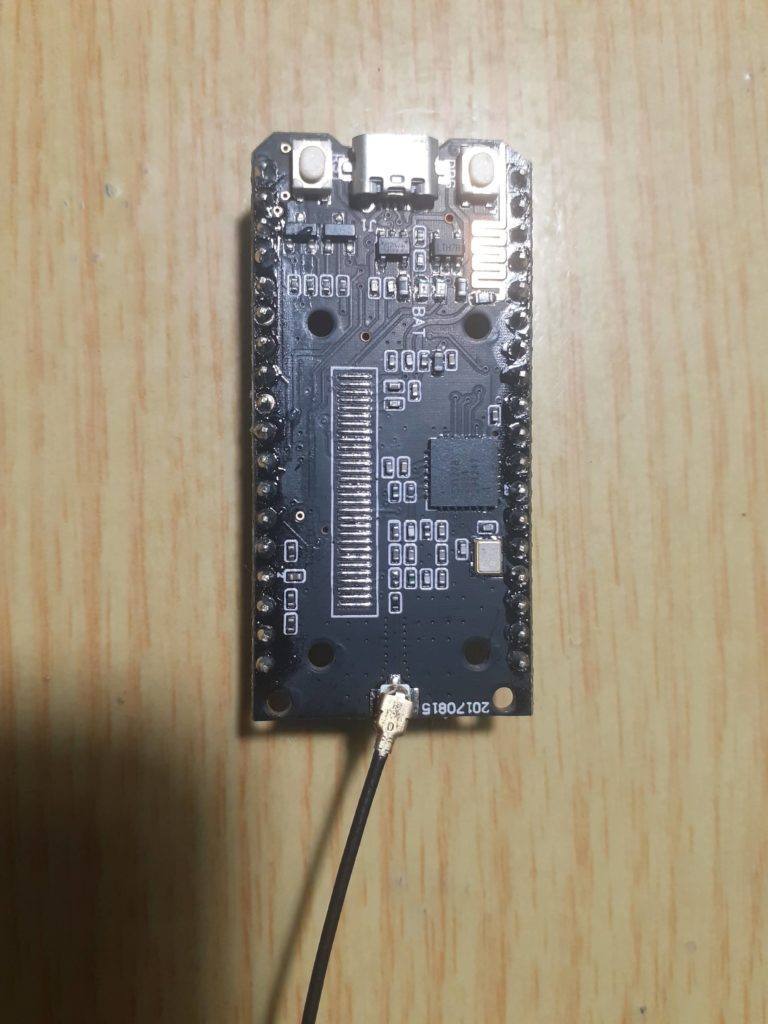
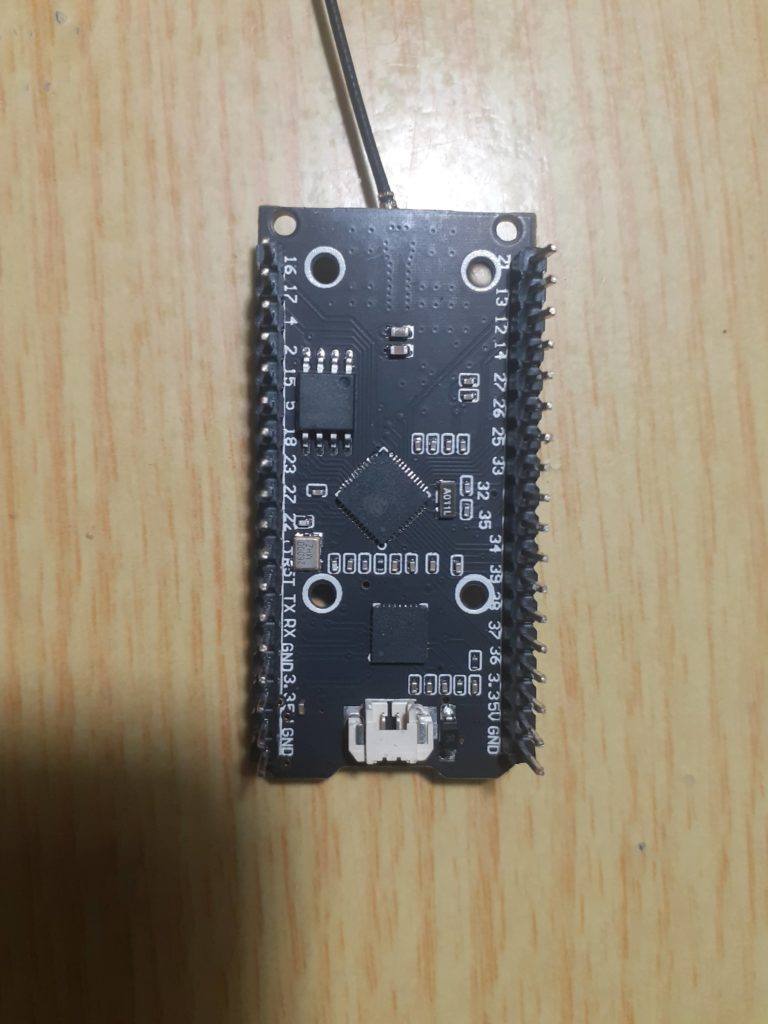
I will post a picture of the actual board below, in the interest of education, to inform others not to get duped as well. Likewise, If I am the mistaken party, and you have had success with this board, please give me a message/yell and lets share some knowledge
The Front (Top Side) of the Module
I hope that you found this useful and that I will see you for part 3 of the series, where I will get into the actual coding.