ATMEGA4808 – An Improvement on my previous design? Or Not…

Atmega4808 Development Card in Acrylic Shell

When I first started playing around with the ATMEGA4808, I was impressed as well as disappointed by the Arduino Every “Clone” that I got online. Impressed with the Microprocessor, but disappointed in the way the development board worked, the lack of documentation etc.

I set out to change that by doing my own version, something that I do quite a lot. If I don’t like something, and it is in my ability to create/design my own version, minus any of the perceived(in my opinion mostly) flaws of the original design, I usually do just that.

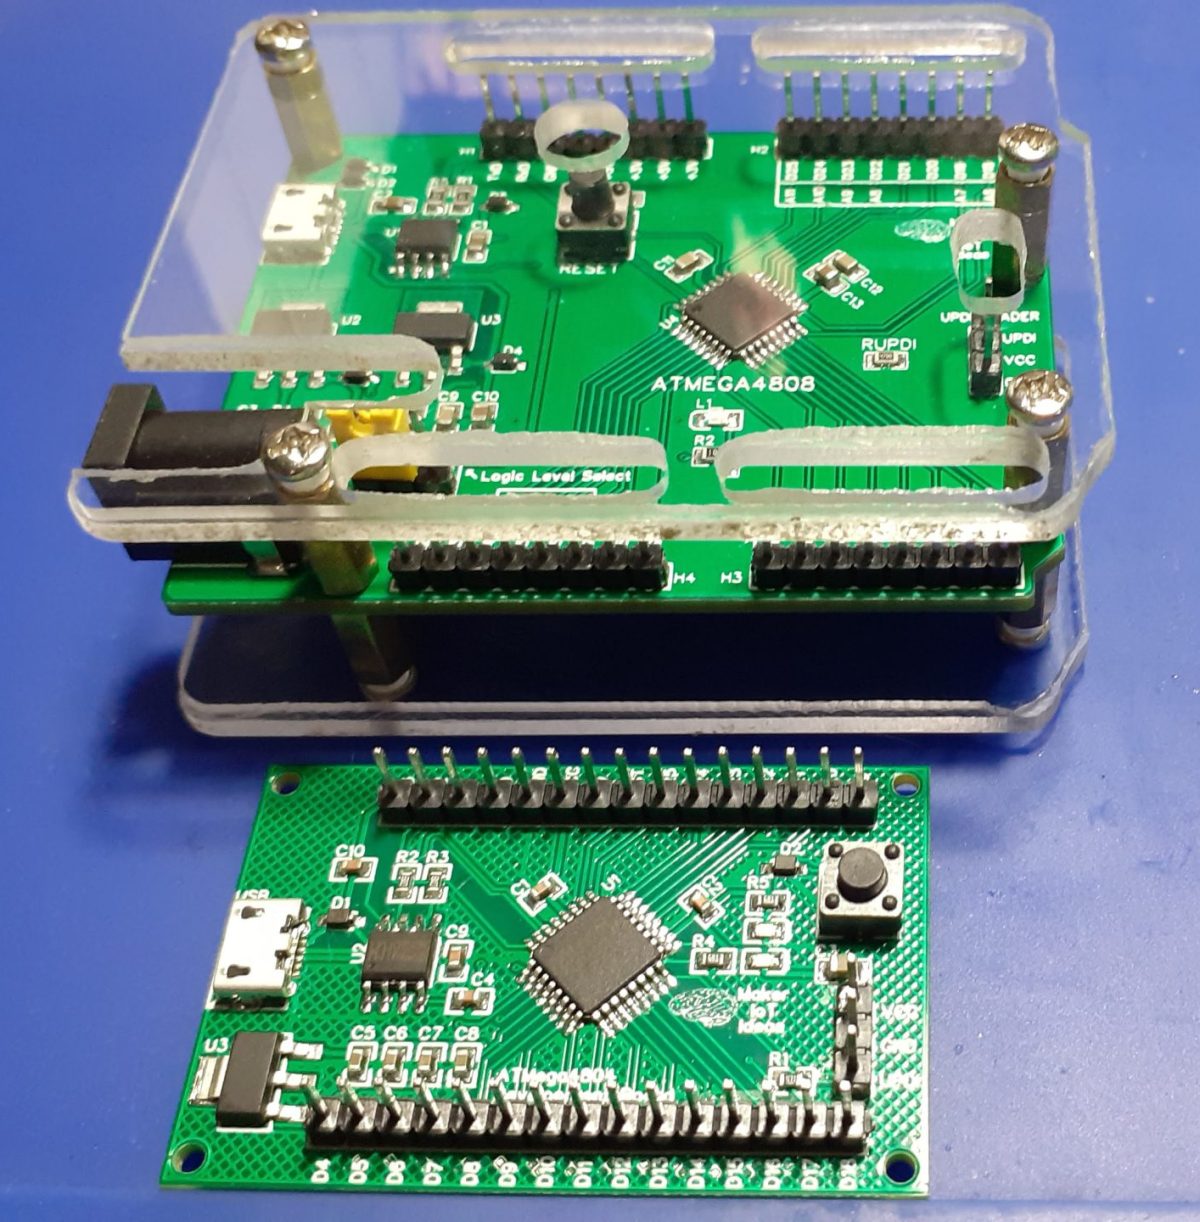
With that mindset firmly in place, a few weeks ago, I did indeed redesign an ATMEGA4804-based development module, and it worked flawlessly…

As time went by, that little irritating voice in my head got louder and louder… add this, change that, what if it was like this etc… Many makers will know exactly which little voice I am talking about.

Two Atmega4808 Modules, side-by-side

So what did I change?

The short answer to that is a lot. the long and detailed, well let’s see…

  1. Added an additional LDO voltage regulator, to provide more current.
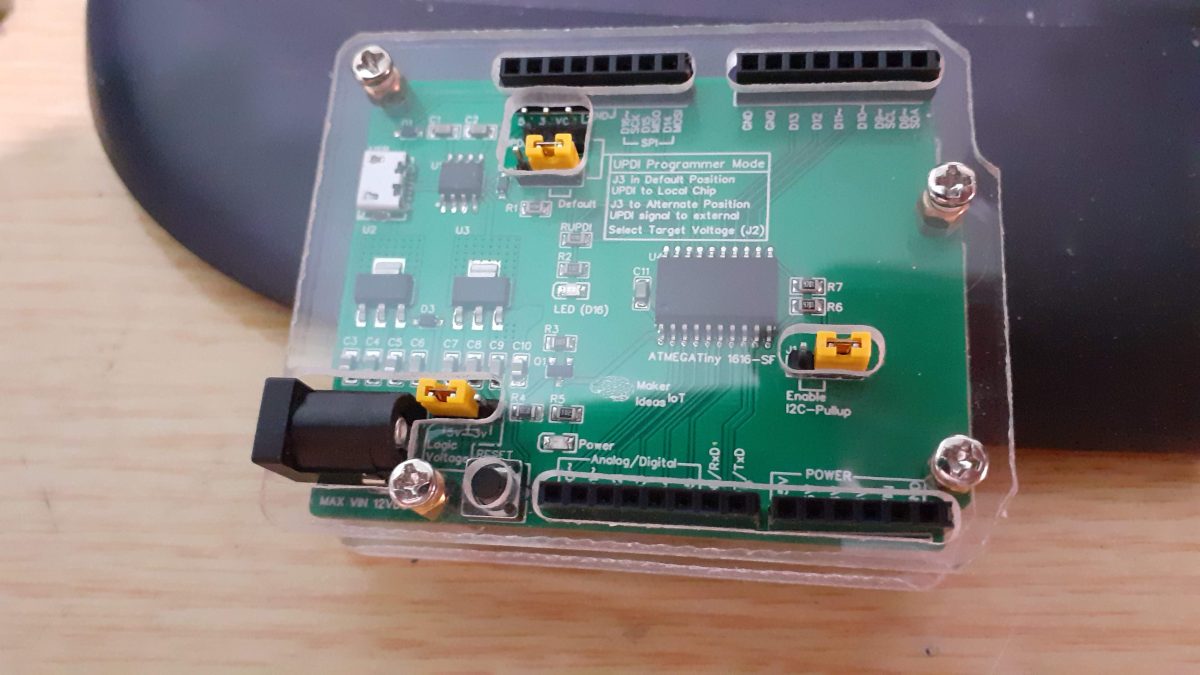
  2. A DC barrel jack was included, enabling us to power this from 7v to 12vDC
  3. Changeable logic level ( switching entire board between 3.3v and 5v operation )
    with a single jumper.
  4. Improved labelling of GPIO functions (on the back of the PCB), listing alternative functions etc for each GPIO
  5. Put all that into the standard Arduino Uno Footprint…

So, did any of that really matter?

Once again, two answers, one long, one short… so here goes…

The added DC barrel jack, with the two dedicated LDO voltage regulators, adds flexibility to power the device externally, opening up possibilities to use it in a stand-alone project, not only on the bench.

The Logic level switching, which at the time, seemed like a very very good idea, now no longer seems so important…

Using the Arduino Uno footprint, yeah, so what, it is a neat layout, but apart from using a somewhat ” traditional” footprint, is only cosmetic…

That leaves only the updated silkscreen on the back of the PCB, as well as better labelling on the front…

Back Silkscreen
Front silkscreen

As far as information goes, yes, this is a great help. It will definitely save some time reading datasheets and looking up other stuff…

Does this mean the project was a failure?

Definitely not. I am not negative, but instead, have a tongue-in-the-cheek attitude about how sidetracked I became. I mean, this is basically the exact same board, with just a different form factor. So, in that case, think about it in the context of an Arduino UNO and Arduino NANO. Both of them use the exact same processor but only differ in footprint. ( as well as a few other cosmetic things and functions – the nano having additional analog inputs etc.).\

I am sure that the new form factor will appeal to some, and others will feel it was a completely unneeded design.

The Schematic

ATMEGA4808 Schematic

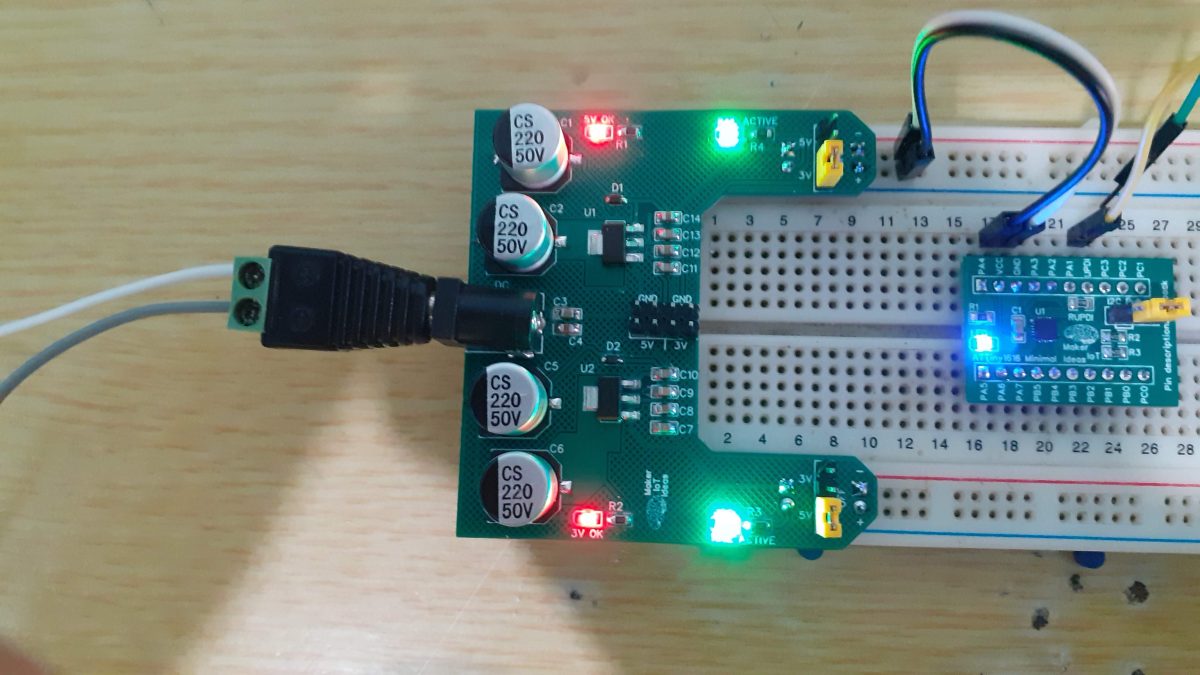
The schematic does not contain any surprises. everything is basically similar to my initial breakout module design, with the exception of the power section. I tried something different, and the jury is still out on how well it actually worked.

When powered from USB, the 3.3v LDO Voltage regulator gets fed directly from the USB Voltage, through a protection diode of course.. Similarly, when powering the device using the DC power jack, both LDO regulators are once again fed separately… for the time being, it seems to work well. Time will tell if it was the correct way to do things.

PCB Design

Top Layer
Bottom Layer

A lot of care was taken to attempt routing of all tracks at the shortest distance possible, as well as using differential pairs for the UART, SPI and I2C peripherals. PCB heatsinks for the LDO regulators, as well as ground planes on both side of the PCB, was also implemented.

Manufacturing

I choose PCBWay for my PCB manufacturing. Why? What makes them different from the rest?

PCBWay‘s business goal is to be the most professional PCB manufacturer for prototyping and low-volume production work in the world. With more than a decade in the business, they are committed to meeting the needs of their customers from different industries in terms of quality, delivery, cost-effectiveness and any other demanding requests. As one of the most experienced PCB manufacturers and SMT Assemblers in China, they pride themselves to be our (the Makers) best business partners, as well as good friends in every aspect of our PCB manufacturing needs. They strive to make our R&D work easy and hassle-free.

How do they do that?

PCBWay is NOT a broker. That means that they do all manufacturing and assembly themselves, cutting out all the middlemen, and saving us money.

PCBWay’s online quoting system gives a very detailed and accurate picture of all costs upfront, including components and assembly costs. This saves a lot of time and hassle.

PCBWay gives you one-on-one customer support, that answers you in 5 minutes ( from the Website chat ), or by email within a few hours ( from your personal account manager). Issues are really resolved very quickly, not that there are many anyway, but, as we are all human, it is nice to know that when a gremlin rears its head, you have someone to talk to that will do his/her best to resolve your issue as soon as possible.

Find out more here

Assembly

The assembly of the ATMEGA4808 development card, as I named the creation, can be done entirely with a standard soldering iron and steady hands, but I chose to order a stencil with the PCB and reflow the PCB on a hotplate.

Stencil for SMD assembly

I prefer this way of assembly, as it is generally faster, looks neater, and ultimately uses less solder paste. This particular build did however give me a few headaches, which may be the underlying reason for my tongue-in-the-cheek attitude towards this PCB…

Let us take a look at some of the issues that I encountered

The Micro USB B connector that I used, seems to be quite sensitive to heat. I have a few different batches of these, and some are good, while others are just terrible. ( this happens because I did not buy them all from a reputable supplier, but opted for an online supplier instead – NOT LCSC as I normally do).

This resulted in having to change USB connectors a few times.

The second issue was the CH340N USB to Serial chip. Due to availability issues, I was once again forced to use an online supplier, and ended up receiving only two working chips out of a batch of 20! The fact that they were super cheap, with super fast shipping should have alerted me that something was wrong…

These two issues caused quite a lot of headaches and ultimately cost me an ATMEGA4808 chip, that for reasons unknown, died without any explanation, with the board pulling a crazy 3.5A at 5v for a few seconds. Subsequent testing revealed a failed 5.0v LDO regulator, which after being replaced by a new one, resulted in a perfectly working board. ( after sorting the CH340N and USB connector issue of course)

Conclusion

This build gave me a lot of problems, tested my diagnostic skills, as well as provided proof that you definitely get what you pay for. Electronics component supplies are still not quite at the level of availability that we are used to, with huge lead times and delays being a big issue.
This presents us with the tempting solution of buying a few components from dubious online companies; sometimes you get a good deal and sometimes you get only headaches like I was rudely reminded with this build.

As far as the PCB is concerned, there are absolutely no issues. Everything works as expected, and while no real changes were made between the two versions, It has already earned a permanent place on the bench, having replaced my old Arduino Uno clone as my goto development board when doing something ATMEGA related.

Some More Pictures

A complete ATTiny1616 Dev Solution

A few weeks ago, I started looking into alternative development solutions to reduce the effect of hard-to-get or more expensive-than-usual ATMEGA328 chips. One of the chips that I found to have potential was the ATTiny1616.

There seemed to be quite a lot of stock, and the prices were reasonable. Some additional hardware, like a dedicated UPDI programmer, had to be designed or bought, as the ATTiny1616 required UPDI to upload and flash code.

Setup to program ATTiny1616 Breakout Module – Power Module ( Left – Optional) ATTiny1616 Breakout – Center, UPDI programmer ( Right)

While the breakout worked flawlessly, I found the programming setup awkward and cumbersome. That was the cue to take the next step and create something that was easier to work with.

Old versus new. ATTiny1616 breakout module and programmer (Top) versus the all-new ATTiny1616 Development board, with all required hardware, included.

The new PCB offers a development cycle that is very similar to a standard Arduino UNO or Nano. Plug it into a USB port, write code, upload and repeat…

What is on the PCB?

Top view- In acrylic Case

Starting at the Top Lefthand corner, we have a USB port, with a CH340N Chip. Note that this IS NOT A SERIAL UART. This is an integrated UPDI programmer, that can also be used in stand-alone mode to program external devices. (by moving J3 to the left, and using the UPDI header).

Below that is the power supply section, featuring two LDO Voltage regulators, providing 3.3v and 5v DC to the system. A DC barrel jack is included, to supply between 7v and 12v external DC voltage to the system. ( NOT to be used together with a USB cable)

Jumper J2 (next to the DC barrel jack) is used to switch the entire board logic level between 3.3v and 5v DC. A power indicator LED, as well as a standard user LED ( on pin D16), is also included. The rest of the PCB is dedicated to the ATTiny 1616 -SF, this time in a TSOP form factor. ( The original breakout used a QFN, but I realised that that may push away a lot of potential users, as QFN packages are quite difficult to solder without the proper equipment. A TSOP package is more accessible to everyone)


A total of 17 GPIO ports are available, of which each is labelled with an Arduino compatible label (D0 – D15), PWM ~ capable pins, and alternate functions like UART, SPI and I2C. Please Note that the onboard USB port IS NOT A UART

Features on the PCB – Summary

  • Reset Circuit with Push button – The ATTiny1616 shares its Reset pin with the UPDI programming pin. This will cause problems, requiring an HV UPDI programmer to fix. To resolve this issue, a reset circuit, comprising of a p-channel logic level Mosfet, that is wired to be constantly on, is connected via a suitable resistor on its gate, to a push-button to ground. pressing the button pulls the gate to ground, switching off the Mosfet, and thus the supply voltage to the chip, which equates to a power cycle reset. It is worth noting that the UPDI programming sequence also auto-resets the chip after every upload.
  • DC barrel jack for powering the device from an external source – 7v to 12DC
  • Onboard I2C pull-up resistors, selectable with a jumper ( J1)
  • Onboard UPDI programmer, which can also be used in stand-alone mode.
  • Selectable voltage logic level between 3.3v and 5.0v ( J2)

Manufacturing

I choose PCBWay for my PCB manufacturing. Why? What makes them different from the rest?

PCBWay‘s business goal is to be the most professional PCB manufacturer for prototyping and low-volume production work in the world. With more than a decade in the business, they are committed to meeting the needs of their customers from different industries in terms of quality, delivery, cost-effectiveness and any other demanding requests. As one of the most experienced PCB manufacturers and SMT Assemblers in China, they pride themselves to be our (the Makers) best business partners, as well as good friends in every aspect of our PCB manufacturing needs. They strive to make our R&D work easy and hassle-free.

How do they do that?

PCBWay is NOT a broker. That means that they do all manufacturing and assembly themselves, cutting out all the middlemen, and saving us money.

PCBWay’s online quoting system gives a very detailed and accurate picture of all costs upfront, including components and assembly costs. This saves a lot of time and hassle.

PCBWay gives you one-on-one customer support, that answers you in 5 minutes ( from the Website chat ), or by email within a few hours ( from your personal account manager). Issues are really resolved very quickly, not that there are many anyway, but, as we are all human, it is nice to know that when a gremlin rears its head, you have someone to talk to that will do his/her best to resolve your issue as soon as possible.

Find out more here

Assembly

Stencil for Assembly

While this board can definitely be assembled completely by hand soldering, I chose to make use of a stencil, from PCBWay. This helps me by ensuring that the solder paste is applied in exactly the correct amount and place. Hot air or reflow soldering afterwards is a quick easy task. I prefer to use a hot plate to reflow the board, especially since it has a tiny USB connector, which can be quite a pain to solder with hot air, I won’t even go there with a normal soldering iron, as it is beyond what my eyes can handle at this stage.

Some more pictures

Breadboard Power Module – Custom designed

Breadboard Power modules are nothing new or exciting at all. I own a few commercial ones, and they are usually quite similar. They can be picked up for a few bucks and usually do what they are supposed to do, providing power to a project on a breadboard.

A common commercial breadboard power module – with quite a bit of wear and tear…


I decided to do my own version of one of these, as there were quite a few irritating flaws on all of the commercial versions that I have purchased over the years.
– They never fit my breadboard – This may seem strange, as I use a standard breadboard, but was never able to buy a power module that was a perfect fit.
– They contain unneeded components, like USB ports that take up a lot of space and a switch that all seem to fail in a very short time.
– The voltage regulators seem to all overheat, even at the minimum required input voltage

This got me to a point where I stopped using them at all, and started thinking about doing my own version. What I came up with, while not pretty, does exactly what I want it to, has decent smoothing capacitors on all power lines,
and does not overheat. I got rid of the switch, the bench power supply has a switch already, and also added LED status indicators for each rail, as well as the main DC power input.

The overheating problem was solved by giving the voltage regulators a big copper PCB heatsink each, which is many times the size of the actual regulator.
That change, having used the same technique on many other PCBs before, immediately got rid of the heat issue, even at a 15v DC input, which is right at the maximum input voltage allowed.

The Custom designed Breadboard power module is however not perfect yet. on the cosmetic side, it is still not exactly symmetrical, with some weird irregular shapes on the PCB. This will be fixed in future, but for now, I am quite happy with its performance, which is actually all that I really care about.

The Schematic

Schematic

This is the schematic, which is straightforward, with nothing complicated.
Two Low Dropout Voltage Regulators, AMS1117-3.3 and AMS1117-5.0 are individually fed from a 7-12v DC supply, with jumper selectable outputs of 3.3v or 5.0v on each of the Power rails. Led Indicators on each regulator output, as well as on the power rail outputs.

Smoothing capacitors are placed on the inputs and outputs of each regulator.

PCB Layout

The resulting PCB is a two-layer board, with most power tracks routed on the top layer where possible. A solid (bottom) and hashed (top) ground plane ensures a proper ground connection. Big copper pours on the output of the regulators serves as PCB heatsinks, reducing the amount of heat generated quite significantly.

PCB Top – Rendered
PCB Bottom – Rendered

Manufacturing

I choose PCBWay for my PCB manufacturing. Why? What makes them different from the rest?

PCBWay‘s business goal is to be the most professional PCB manufacturer for prototyping and low-volume production work in the world. With more than a decade in the business, they are committed to meeting the needs of their customers from different industries in terms of quality, delivery, cost-effectiveness and any other demanding requests. As one of the most experienced PCB manufacturers and SMT Assemblers in China, they pride themselves to be our (the Makers) best business partners, as well as good friends in every aspect of our PCB manufacturing needs. They strive to make our R&D work easy and hassle-free.

How do they do that?

PCBWay is NOT a broker. That means that they do all manufacturing and assembly themselves, cutting out all the middlemen, and saving us money.

PCBWay’s online quoting system gives a very detailed and accurate picture of all costs upfront, including components and assembly costs. This saves a lot of time and hassle.

PCBWay gives you one-on-one customer support, that answers you in 5 minutes ( from the Website chat ), or by email within a few hours ( from your personal account manager). Issues are really resolved very quickly, not that there are many anyway, but, as we are all human, it is nice to know that when a gremlin rears its head, you have someone to talk to that will do his/her best to resolve your issue as soon as possible.

Find out more here

Some more Pictures