

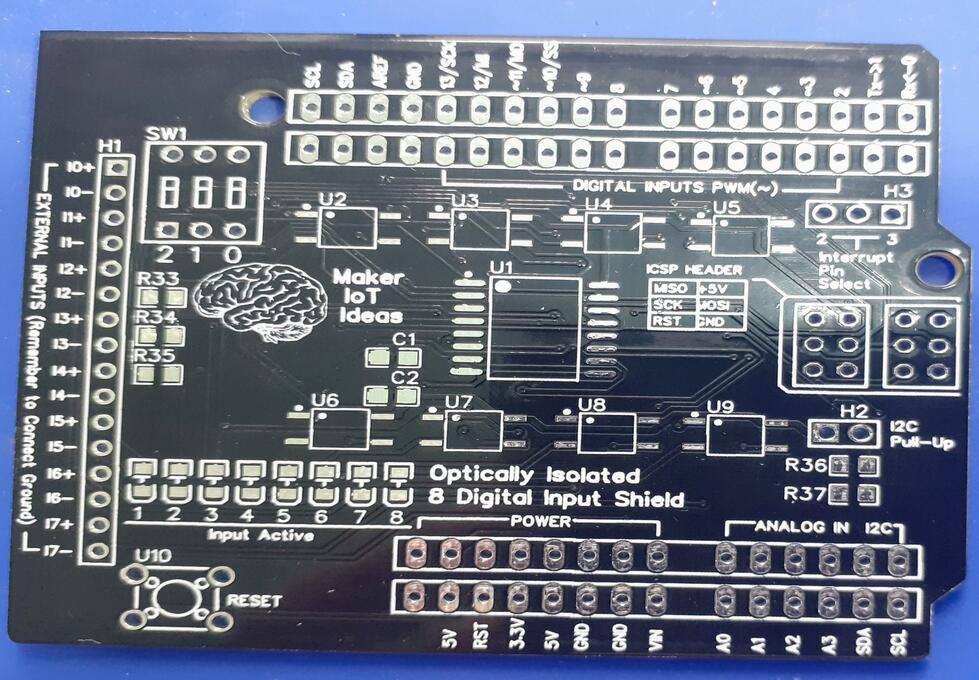
Welcome to the final instalment of my 8 DI Optically Isolated Arduino Shield. Today I will show you some of the assembly pictures, as well as look at the coding to use this shield. I will also provide you with a link to the manufacturing files, in case you want to make your own.
These PBC’s were manufactured at PCBWAY.

You can order your own version of this board for just $5 USD if you click here
PCBWay makes it quite easy to order prototypes for your PCB’s… Just upload the Gerber files on their website, select your desired options for the PCB and order. The turn-around time is great. I received these boards, ordered together with a stencil for SMD assembly, in exactly 5 days, shipping from China to Thailand 🙂 That is super fast, as it arrived 4 days faster than the components that were ordered locally from Bangkok! Be sure to consider using their services next time you need a PBC made…
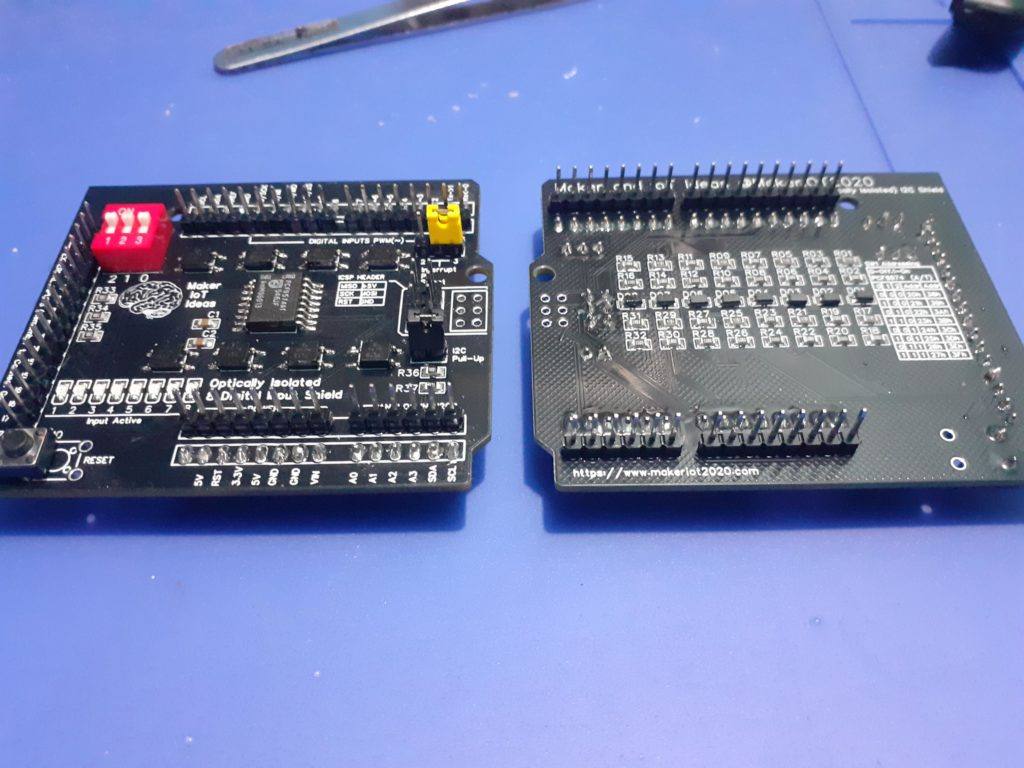
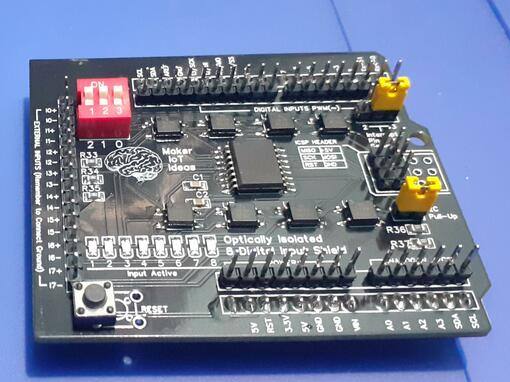
Some notes on assembly: The reset switch will seem misplaced, and indeed, it is 🙂 The reason for this is that I could not get any 4 pin tactile switches 🙁 So I had to either leave it unpopulated or use a two-pin tactile switch. As I will be using these shields myself, I decided that although it doesn’t look perfect, the two pin switch will still provide me with the functionality that I want.
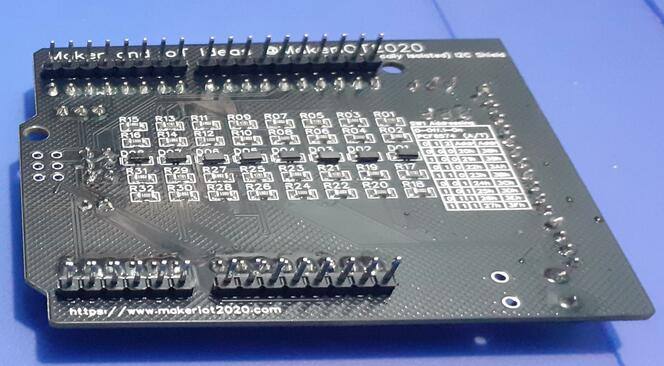
On the bottom of the board, you can still see some blobs of flux, as the pictures were taken right after assembly, and have not been cleaned up yet. Some solder joints have also not been cleaned up yet.

Testing and Coding
The testing of the board is quite straightforward. I first checked all the power rails with a multimeter to make sure there are no open circuits of shorts. Then I checked connections to all the chips and other components, yes, it takes a while to do that, but rather safe than sorry. After assembly, I repeated this process, making sure that all the components receive the correct power level, and that all switches ( like for addressing and the reset button ) actually do what I intended them to do. The next tests were the individual inputs with the optocouplers. This is done by connecting an input source (between 5.5v and 32v) to each individual input and then physically testing on the pins of the optocoupler in question, for the correct voltage input.
The shield is then powered from 5v and the input test is repeated while checking with a multimeter that the input signal does indeed get transferred by the optocoupler to the PCF8574 chip. I found that with the particular batch of PCF8574 chips that I got, that the IC would only respond reliably with a voltage between 5.5v and 32v. The original design was for 3.0v to 32v. I found that the Optocoupler EL357N seems to be unable to switch itself on at the low current allowed through the resistor divider at the input. This can be fixed by lowering the value of R1, R5, R9, R13, R17, R21, R25, R27 from 4k7 to whatever value you need. Note that that will reduce the top-level input voltage that you can safely use. For my application, however, 5.5v to 24v will be perfect, so I will leave it as is.
The shield is now connected to an Arduino with DuPont Wires, to test the I2C addressing of the PCF8574. The chip address is changed with the 3-way dip switch at SW1. All eight addresses are available. It should be noted that I have used a pull-up configuration on the address lines. That will reverse your logic.. Switching the dip switch on will pull the pin to GND, not to VCC as you would normally expect. Thus as an example, all switches off will give an address 0f 0x3f, while all on will give 0x38.
Coding
You can use the standard Arduino IDE with the Wire.h library to code the shield, or you can use one of the many PCF8574 libraries that are available. I coded my tests with the Embeetle IDE, as it gives me much better control over my code. I will show you a short, interrupt enabled sketch, in Arduino C++ below
#include <Wire.h>

byte _portStatus = 0b00000000;
boolean _readI2C = false;

void MyISR() { // Interrupt service routine
  //Serial.println("Interrupt Occured on Pin2");
  if (_readI2C != true) {
    _readI2C = true;
  }
}

void setup() {
  // put your setup code here, to run once:
  pinMode(2,INPUT_PULLUP);
  attachInterrupt(digitalPinToInterrupt(2),MyISR,FALLING);
  Serial.begin(115200);
  Wire.begin();
  Wire.beginTransmission(0x20);
  Wire.write(0xFF); // set all pins to 1, needed to make them inputs
  Wire.endTransmission();
}

void loop() {
  // put your main code here, to run repeatedly:

  byte _data;
  if (_readI2C == true) {
    _readI2C = false;
    Wire.requestFrom(0x20,1);
    if (Wire.available()) {
      _data = Wire.read();
    }
  }
  if (_portStatus != _data) {
    Serial.print("Port Data Changed : 0xb");
    Serial.print(_portStatus,BIN);
    Serial.print(" changed to : 0xb");
    Serial.println(_data,BIN);
    _portStatus = _data;
    delay(50);
  } else {
    _portStatus = _portStatus;
  }

}
Conclusion
This turned out to be a very interesting and fun project to do. From designing the circuit to getting it manufactured and hand assembling it myself was a very satisfying experience. I would like to take this opportunity to thank Wendy Wu, from PCBWay‘s Marketing department, for her assistance with the manufacturing of the board. The speed and efficiency with which she handled this project were fantastic.