
Introduction
When designing IoT solutions, we all encounter the problem of connecting our device(s) to each other, either directly, or through the internet. In Urban areas, it is quite easy to use WiFi or even GSM to achieve this, but these solutions often come with additional costs in the form of subscriptions. Although it is possible to run your own WiFi network free of charge, you will soon run into issues with the range…
Enter LoRa (short for Long Range) Radio communication. LoRa is a radio technology derived from chirp spread spectrum technology. It uses an ISM band, meaning it is unregulated in most countries, if you use the correct frequency for your country, that is.
It is also extremely low power, making it ideal for use with battery-powered devices.
The technology is available in Node-to-Node, as well as Node-to -Gateway modes.
In this series, I will show you how to use a few of the existing LoRa Modules available on the market.
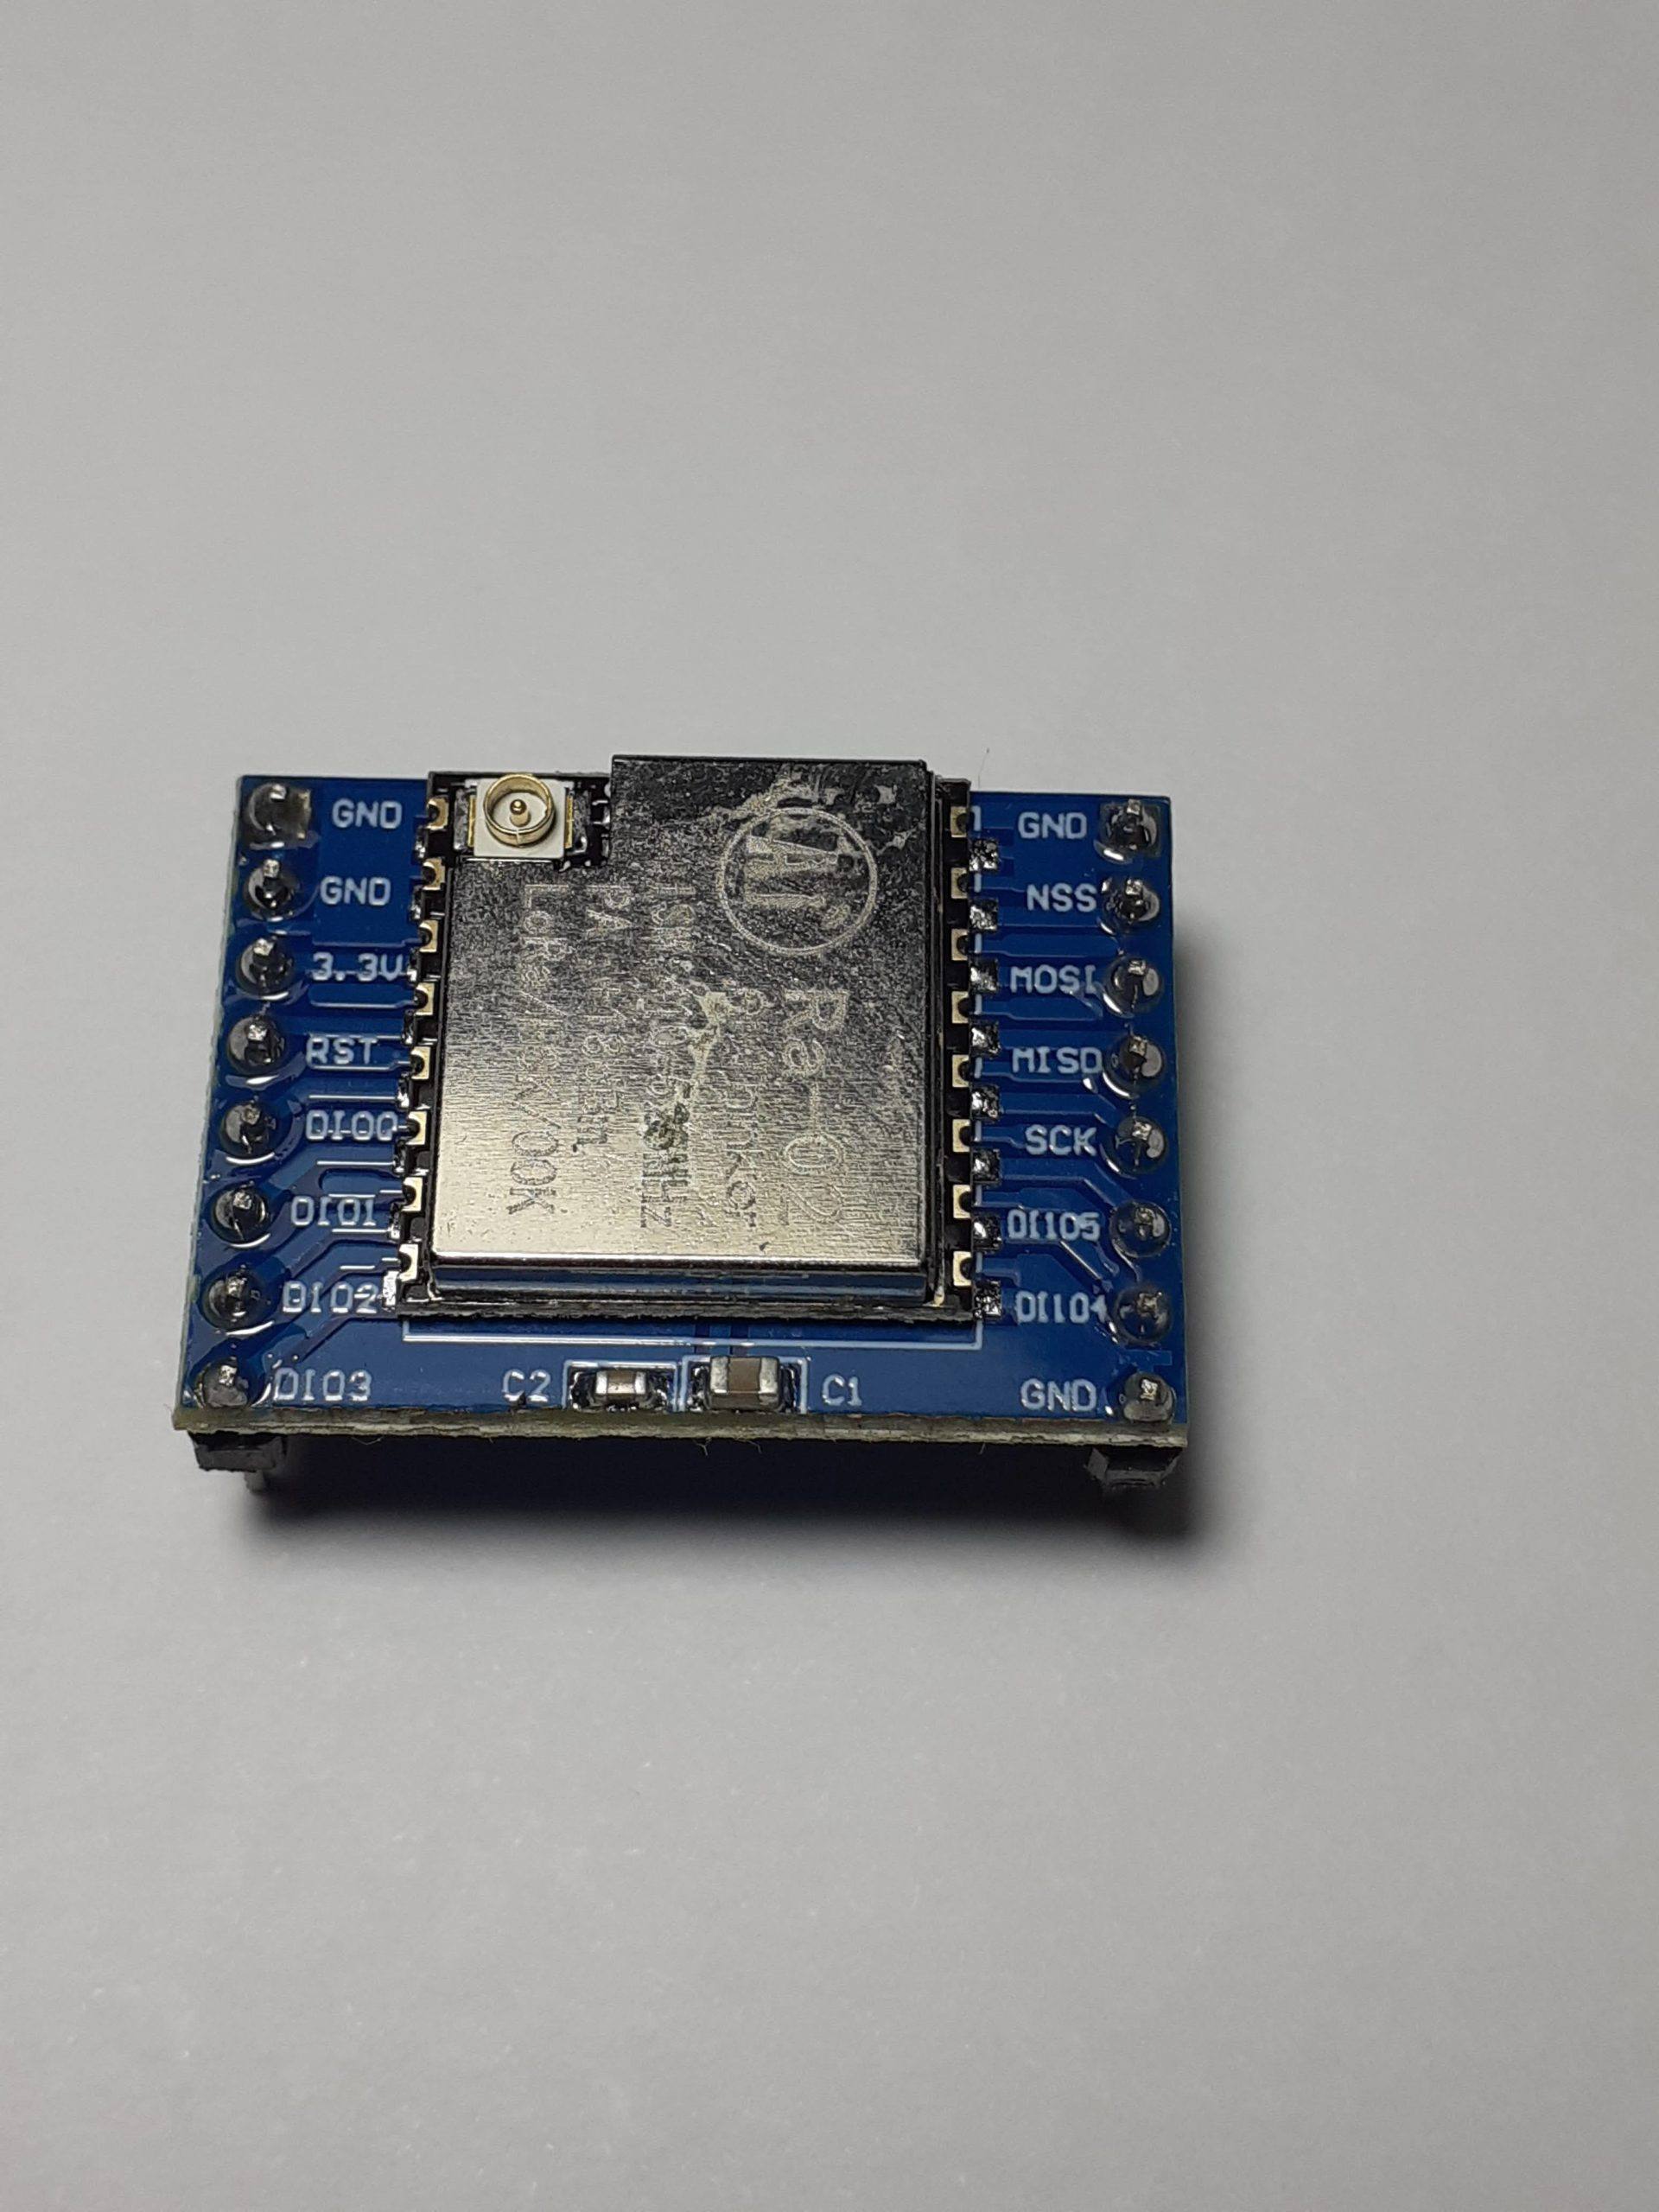
Ai-Tinker Ra-02 (Sx1278)
This Module is conveniently broken-out onto a breakout board. It is sort of bread-board friendly (depending on the size of your bread-board) and is nicely labelled. It is also extremely cheap ( around $USD5 each, depending on where you buy from).
Caveats
There are quite a few important things that you should know about these modules before you start using them.
Disclaimer: The caveats listed below are by no means complete, or even valid. They are the result of experimentation by myself, with the intent to destroy a few modules, to see how hardy they are. Also take into mind, that living in SE Asia, it is quite common to buy something from a shop, where the seller has no or only a very limited idea of what he or she is selling, and are thus usually quite unable to provide any technical support.
To summarise: USE YOUR HEAD. If I did leave out something, it is quite possible that I forgot, or decided not to include it on purpose. This is a general guide, and you should ideally do your own research as well. That is the best way to learn.
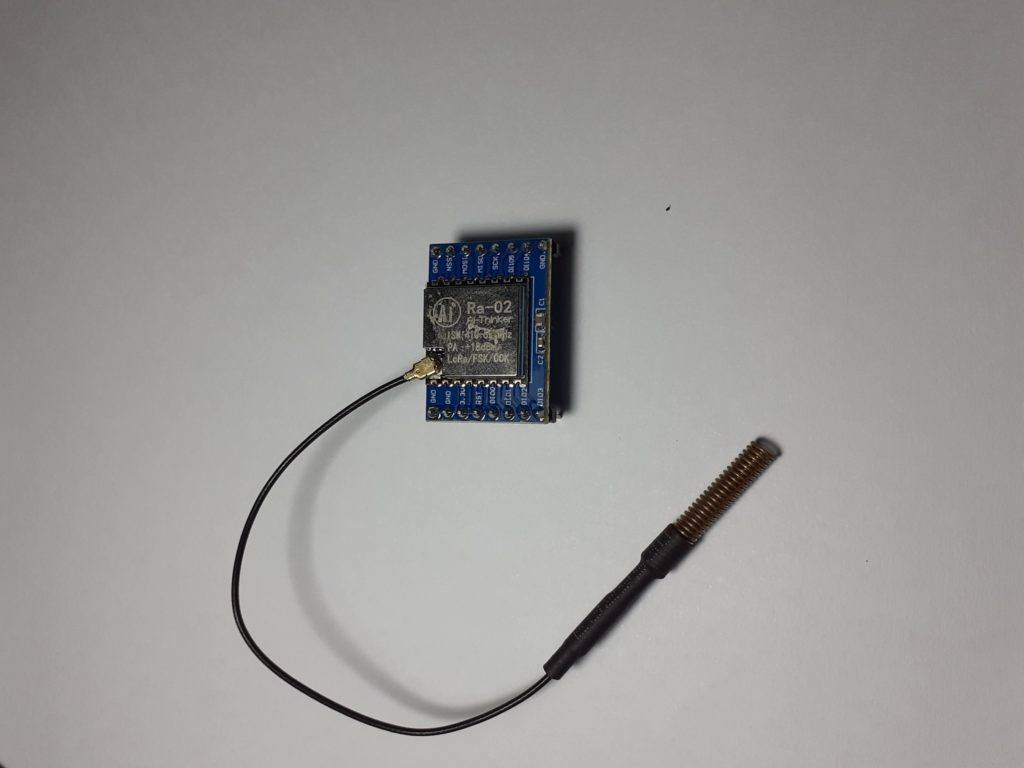
1) Always connect an Antenna. This may seem like a logical one, but it is extremely important. The module is capable of quite a lot of transmission power, and operating it without an antenna will quickly damage the module, permanently.
2) ONLY use 3.3v, even on the control lines (the module uses SPI). This is quite important, as it is not very clearly stated by the suppliers, and will result in very short-lived component operation 😉 If you absolutely have to use 5v, use a level converter. (There are examples available on the internet, where they use this chip directly from an Arduino Uno. I can confirm that that approach does work, BUT, not for very long. I have purposely sacrificed a pair of transceiver modules so that you don’t have to. You can also adjust the SPI frequency, in the event that your level converter is not capable of running at a high SPI frequency.
3)Make sure that you connect ALL the ground pins on the device. This is another area that is not fully explained by the user manual and does “unexplainably” result in damaged modules.
4) Use short, good quality cables, and if possible, keep the module off the breadboard.
While testing the modules, I found that the usual DuPont wires, as everyone should know by now, are quite unreliable. Combine that with a bread-board that has seen its share of use,
and it is a definite recipe for headache 🙂
5) LoRa Antennas are polarised, make sure you have your antennas in the same orientation.
Although this will not prevent it from working over short distances, it makes sense to just do it correctly. Good RF practices never hurt anybody 🙂
Connecting to Arduino
A Note on Power:
It is important to power this module from a decent dedicated 3.3v power-supply.
The Arduino Uno does sometimes have a 3.3v regulator on-board. From my tests, it is however not always up to the task, as the module may spike up to 120mA when transmitting. It is thus also recommended to have a nice fat capacitor across the power lines (decoupling cap) to soak up any spikes.
As mentioned above, a level converter is mandatory for a 5v Arduino. You may do without it if you use a 3.3v Arduino, but once again, your mileage will vary 🙂
Both the transmitter and receiver uses the same connections, which are listed below:
| LoRa SX1278 Module | Arduino Board |
| 3.3V | – |
| Gnd | Gnd |
| En/Nss | D10 |
| G0/DIO0 | D2 |
| SCK | D13 |
| MISO | D12 |
| MOSI | D11 |
| RST | D9 |
Remember that you NEED a Level converter between the LoRa Module and the Arduino.
Software Library
The software library that we will use in our example is the excellent library from Sandeep Mistry. We will just include this into the Arduino IDE, and then use a slightly modified version of the examples for our experiment. It is also important to note that we will use Node-to Node communication, NOT LoRaWan. This means that all your communications will essentially be unencrypted, and not addressed. This does however allow you the flexibility to design and implement your own addressing scheme.
LORA code for Transmitting Side

#include <SPI.h>
#include <LoRa.h>

int counter = 0;

void setup() {
  Serial.begin(115200);
  while (!Serial);

  Serial.println("LoRa Sender");

  if (!LoRa.begin(433E6)) { // Set the frequency to that of your  //module. Mine uses 433Mhz, thus I have set it to 433E6
    Serial.println("Starting LoRa failed!");
    while (1);
  }

  LoRa.setTxPower(20);

}

void loop() {
  Serial.print("Sending packet: ");
  Serial.println(counter);

  // send packet
  LoRa.beginPacket();
  LoRa.print("hello ");
  LoRa.print(counter);
  LoRa.endPacket();

  counter++;

  delay(5000);
}
LORA code for Receiver Side
#include <SPI.h>
#include <LoRa.h>
void setup() {
Serial.begin(115200);
while (!Serial);
Serial.println("LoRa Receiver");
if (!LoRa.begin(433E6)) {
Serial.println("Starting LoRa failed!");
while (1);
}
}
void loop() {
// try to parse packet
int packetSize = LoRa.parsePacket();
if (packetSize) {
// received a packet
Serial.print("Received packet '");
// read packet
while (LoRa.available()) {
Serial.print((char)LoRa.read());
}
// print RSSI of packet
Serial.print("' with RSSI ");
Serial.println(LoRa.packetRssi());
}
}Where to from here?
If all went well, you will see packets being received in the serial monitor of the Arduino IDE, connected to the receiver module. You will also see that the data from this example is sent as a string… It is however also possible to send binary data, by using the LoRa.write() function.
In the next part of this series, I will show you how to use LoRa with the ESP32/ESP8266,
as well as a working example with binary data transmission and an addressing scheme in part 3.
Thank you