LoRa Base Module with ATMEGA328P

I had a need to build a reliable LoRa device, in order to do some testing regarding range etc, for an upcoming project on a friend’s farm. The device needs to be ultra-cheap to manufacture, as well as little power as possible. To achieve this, I decided on using the RA-02 ( From AI Tinker, not sponsored) as well as an ATMEGA328P, which consumes very little current when put to sleep… ( The radio will be on standby the whole time though..)

Building this with a standard Arduino, or another ATMEGA powered development board can be quite messy ( as the picture below shows… )

RA-02 LoRa module with ATMEGA328P PCB – Quite messy !!

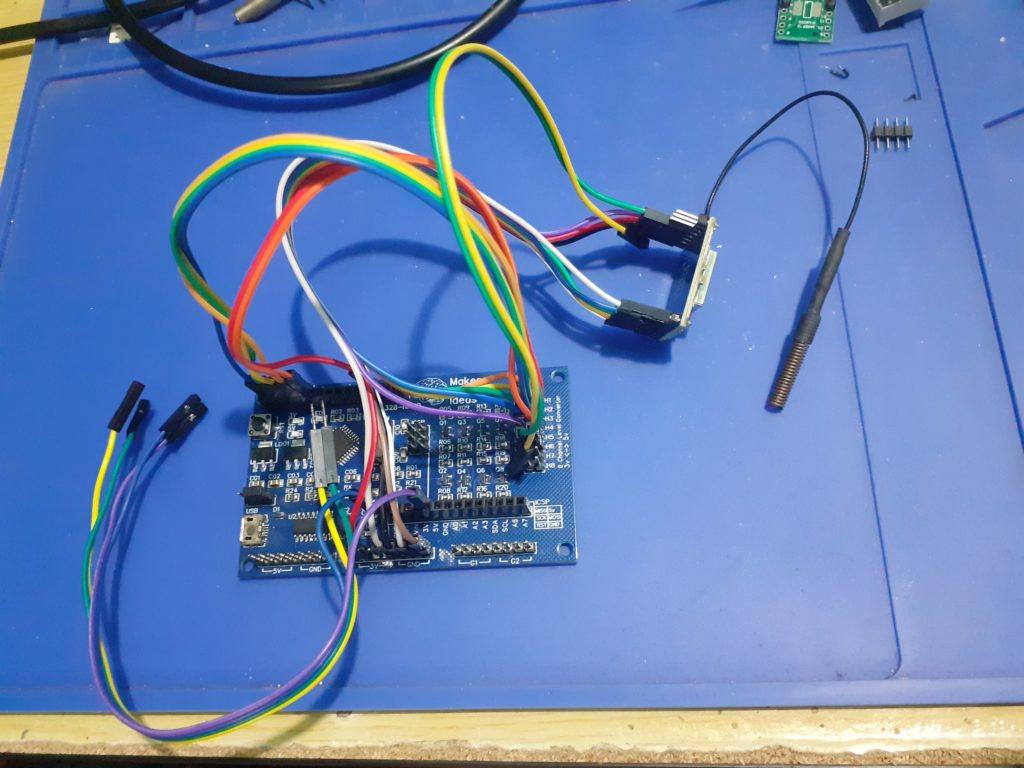
A standard Arduino will be even worse, as you need level conversion on the SPI pins, due to the fact that the RA-02 is a 3.3v device, with the GPIO, not being 5v tolerant (Yes, this is true, some other posts on Youtube and similar conveniently leave out this very important little caveat… )

This problem thus warranted a dedicated custom PCB, to be designed in stages, and thoroughly tested of course… And while doing that, I needed to design something that was modular and useable.

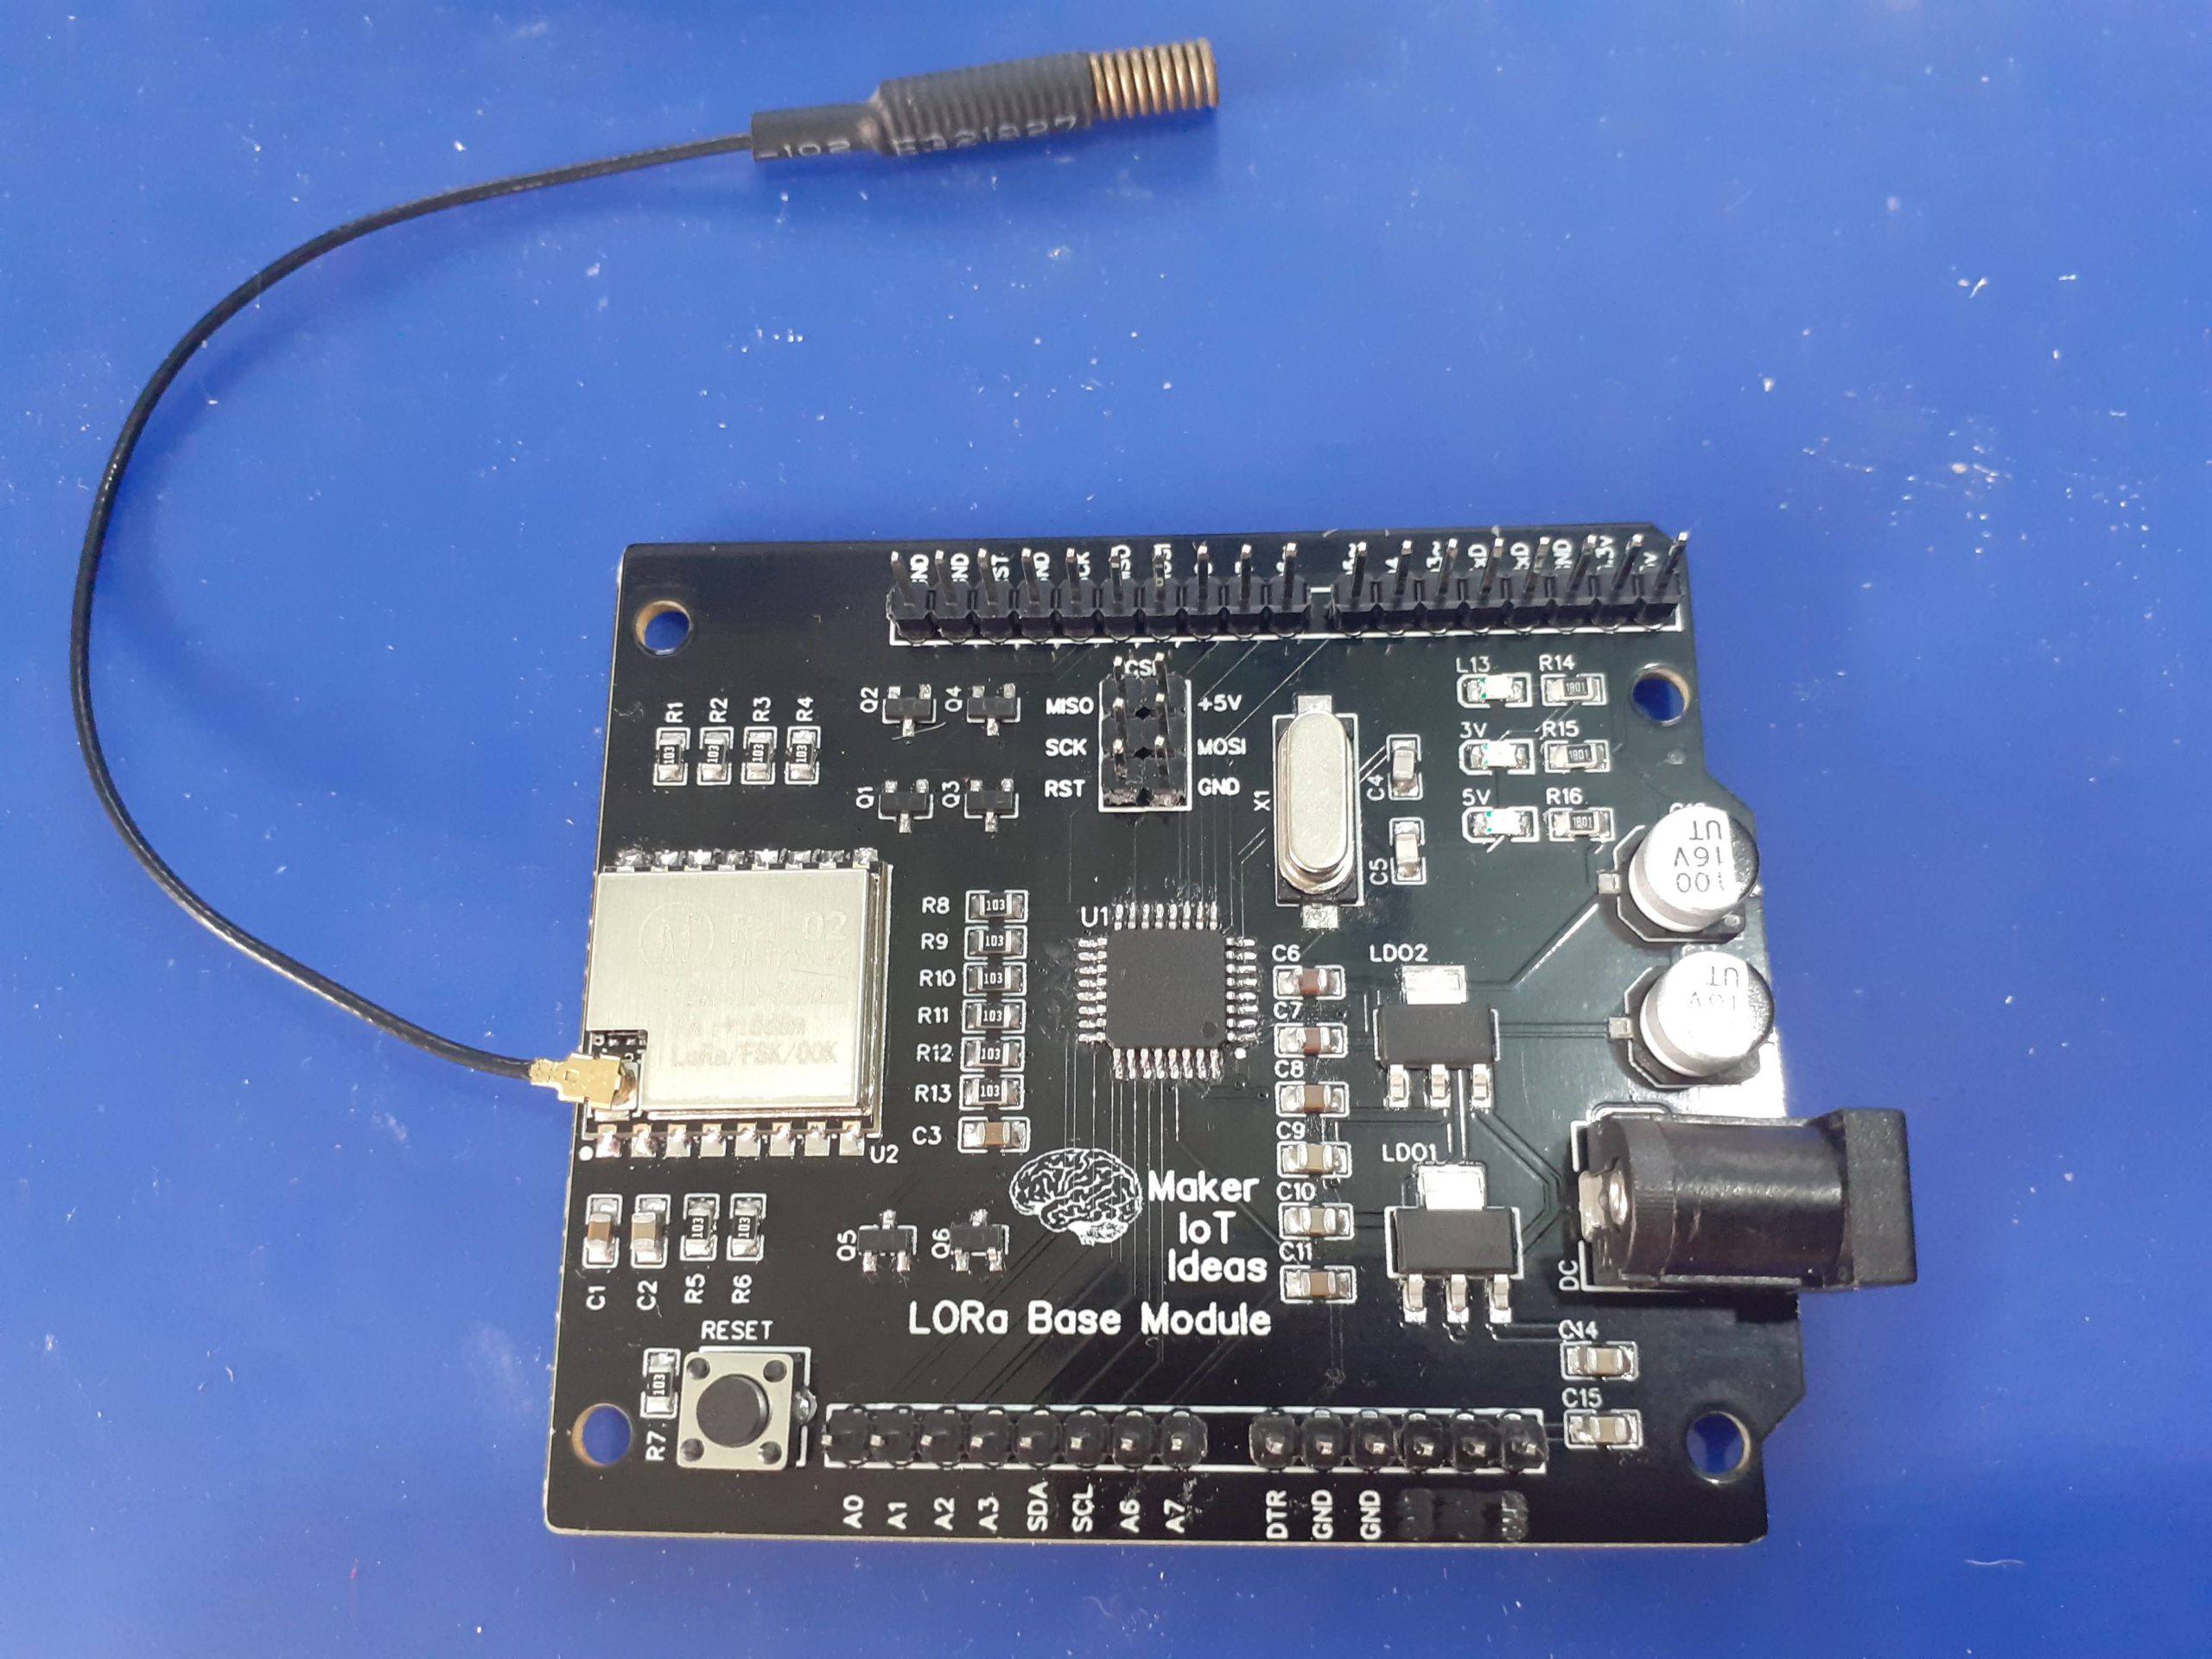
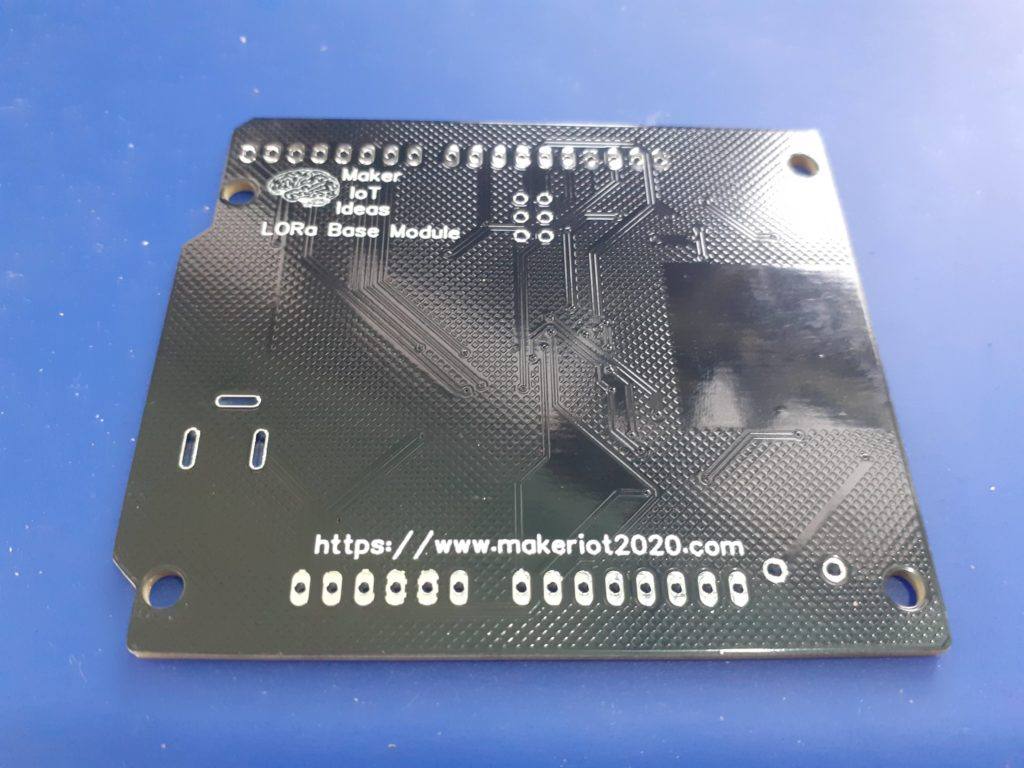
I came up with the following design, as a stage one prototype:

Stage 1 LoRa Base Module Prototype

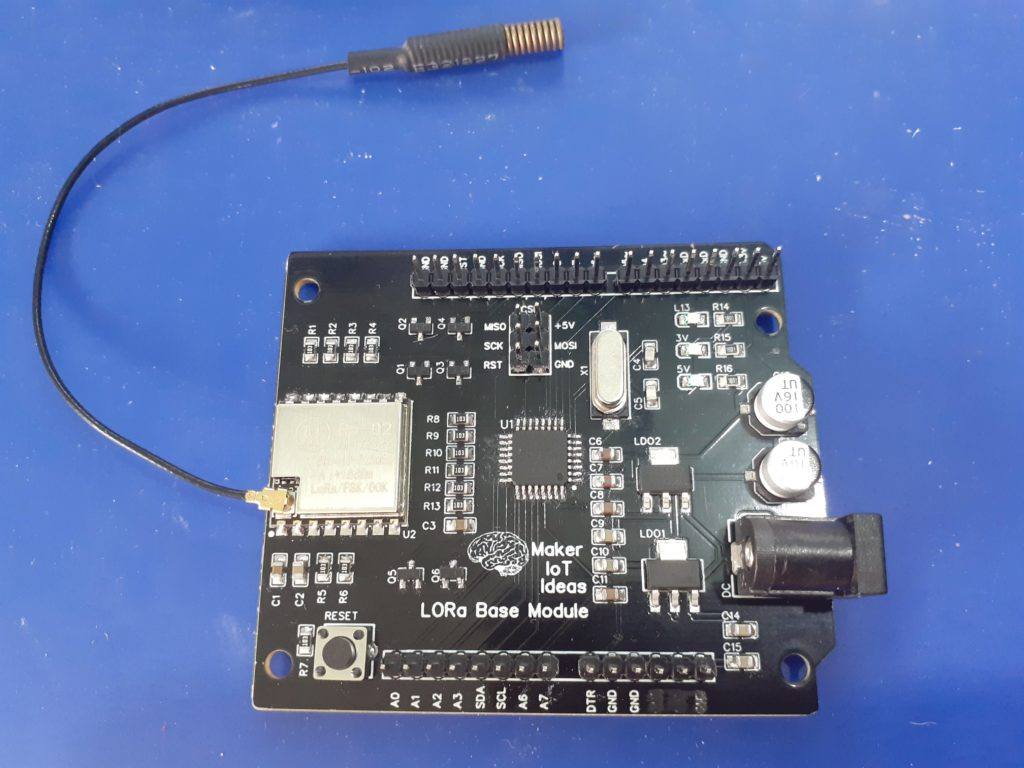
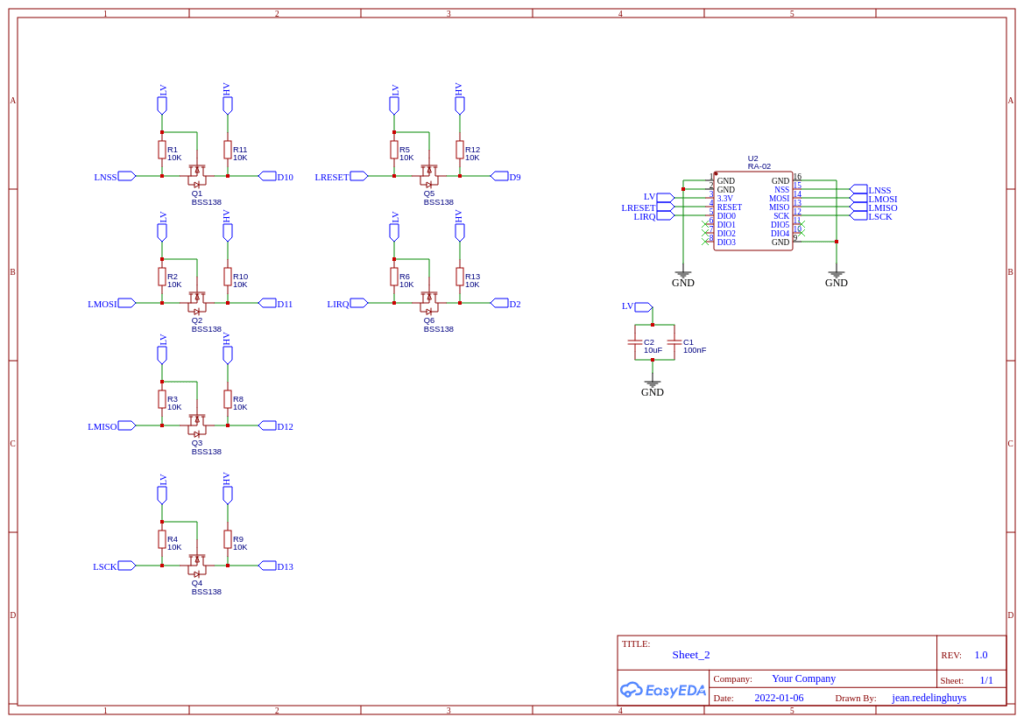
The PCB is basically an Arduino Nano style PCB ( as far as IO is concerned ), with level conversion on the SPI lines ( SCK, MISO, MOSI, SS) as well as a Lora reset and IRQ pin ( which will be essential to wake up the processor later ).

As the prototype will mostly be used in the lab, with some outdoor tests later, provision was not made for battery charging circuitry. Two LDO regulators, 5v and 3.3v provide power to the ATMEGA328P and RA-02 from a DC input of 7.5 to 12v.

Level conversion is fixed at bi-directional 5v to 3v logic levels.

All unused GPIO’s are broken out onto headers.

Code can be uploaded to the MCU via ICSP or a USB-to-serial converter, as I did not add those on board, to save space and power later.

Control Pins are as follows:

RA-02 ModuleATMEGA328P
SCKD13
MISOD12
MOSID11
NSSD10
RESETD9
IQR(DIO0)D2 ( Interrupt 0 )
DIO1Not broken out on stage 1 Prototype
DIO2Not broken out on stage 1 Prototype
DIO3Not broken out on stage 1 Prototype
DIO4Not broken out on stage 1 Prototype
Pin connections between RA-02 and ATMEGA328P

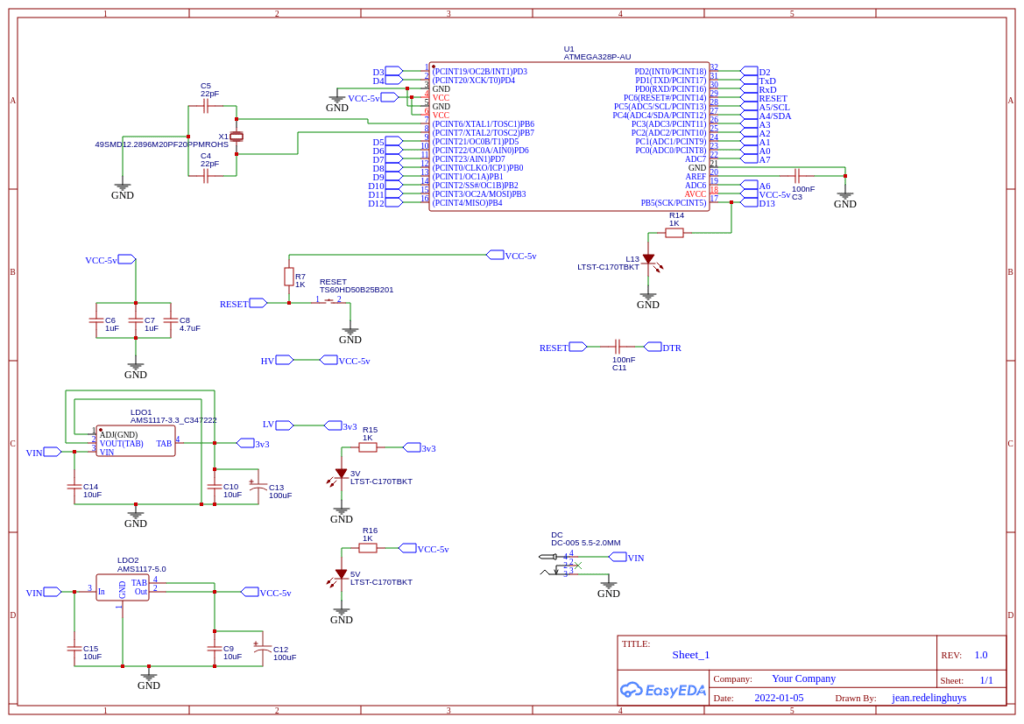
The Schematic diagram are listed below

Schematic Diagram – Page 1
Schematic Diagram – Page 2
PCB – Top
PCB – Bottom

Software

The board is compatible with the LoRa library from Sandeep Mistry. Other libraries may work as well but were not tested yet.

A very basic test sketch follows below:
Note that this sketch does not have any power-saving. It is purely used to do a very basic radio test…
More detailed code will be released in later stages of the project ( more on that later )

#include <SPI.h>              // include libraries
#include <LoRa.h>

const int csPin = 10;          // LoRa radio chip select
const int resetPin = 9;       // LoRa radio reset
const int irqPin = 2;         // change for your board; must be a hardware interrupt pin

byte msgCount = 0;            // count of outgoing messages
int interval = 2000;          // interval between sends
long lastSendTime = 0;        // time of last packet send

void setup() {
  Serial.begin(9600);                   // initialize serial
  while (!Serial);

  Serial.println("LoRa Duplex - Set spreading factor");

  // override the default CS, reset, and IRQ pins (optional)
  LoRa.setPins(csPin, resetPin, irqPin); // set CS, reset, IRQ pin

  if (!LoRa.begin(433E6)) {             // initialize ratio at 433 MHz
    Serial.println("LoRa init failed. Check your connections.");
    while (true);                       // if failed, do nothing
  }

  LoRa.setSpreadingFactor(8);           // ranges from 6-12,default 7 see API docs
  Serial.println("LoRa init succeeded.");
}

void loop() {
  if (millis() - lastSendTime > interval) {
    String message = "LoRa TEST";   // send a message
    message += msgCount;
    sendMessage(message);
    Serial.println("Sending " + message);
    lastSendTime = millis();            // timestamp the message
    interval = random(2000) + 1000;    // 2-3 seconds
    msgCount++;
  }

  // parse for a packet, and call onReceive with the result:
  onReceive(LoRa.parsePacket());
}

void sendMessage(String outgoing) {
  LoRa.beginPacket();                   // start packet
  LoRa.print(outgoing);                 // add payload
  LoRa.endPacket();                     // finish packet and send it
  msgCount++;                           // increment message ID
}

void onReceive(int packetSize) {
  if (packetSize == 0) return;          // if there's no packet, return

  // read packet header bytes:
  String incoming = "";

  while (LoRa.available()) {
    incoming += (char)LoRa.read();
  }

  Serial.println("Message: " + incoming);
  Serial.println("RSSI: " + String(LoRa.packetRssi()));
  Serial.println("Snr: " + String(LoRa.packetSnr()));
  Serial.println();
}

Future Plans

Future plans for this project include the following:
– Integration of a LiPo battery charging module, with a boost converter, to enable the device to run on battery power.
– Integration with an ESP32 or similar, to build a simple GATEWAY device
– CAN-BUS controller integration, to allow for adding multiple sensors to one radio module
– IO card, with galvanically isolated inputs, as well as Relay outputs, for remote control and monitoring applications.


The PCB can be ordered, or the design files downloaded ( a free download ) from my Projects page at PCBWay soon…

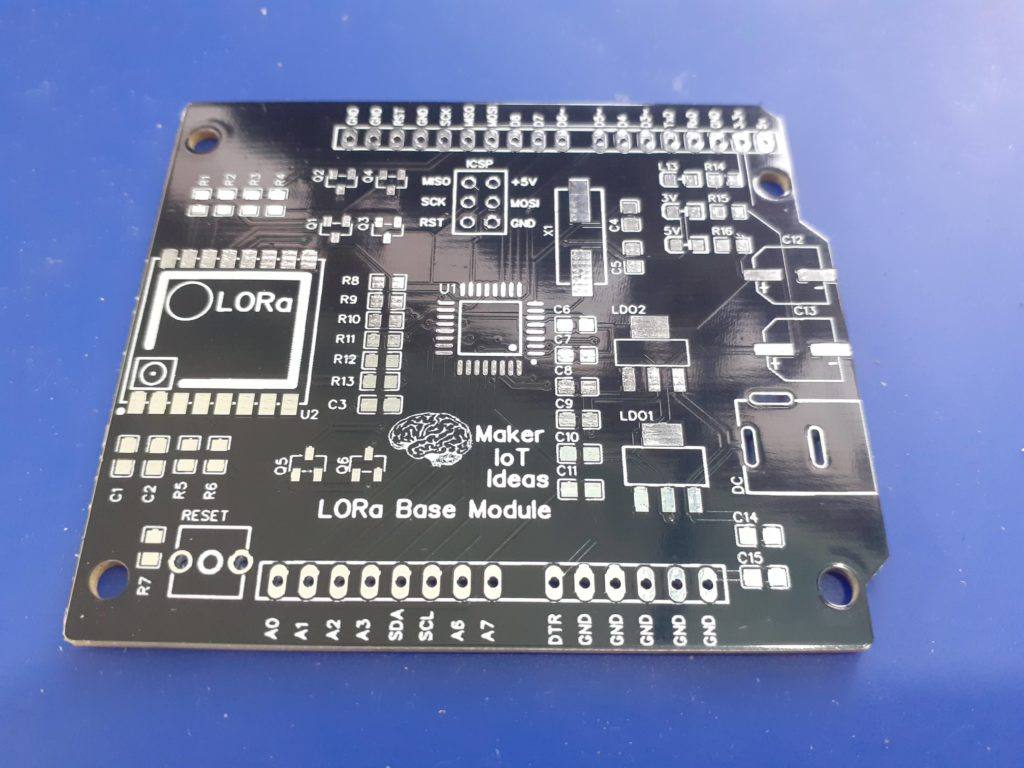
This PCB was manufactured at PCBWAY. The Gerber files and BOM, as well as all the schematics, will soon be available as a shared project on their website. If you would like to have PCBWAY manufacture one of your own, designs, or even this particular PCB, you need to do the following…
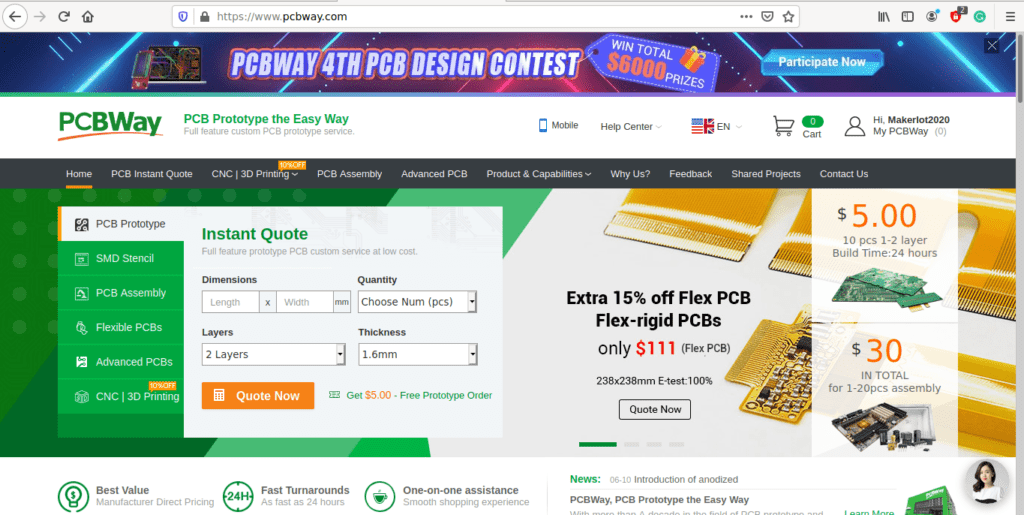
1) Click on this link
2) Create an account if you have not already got one of your own.
If you use the link above, you will also instantly receive a $5USD coupon, which you can use on your first or any other order later. (Disclaimer: I will earn a small referral fee from PCBWay. This referral fee will not affect the cost of your order, nor will you pay any part thereof.)
3) Once you have gone to their website, and created an account, or login with your existing account,

4) Click on PCB Instant Quote

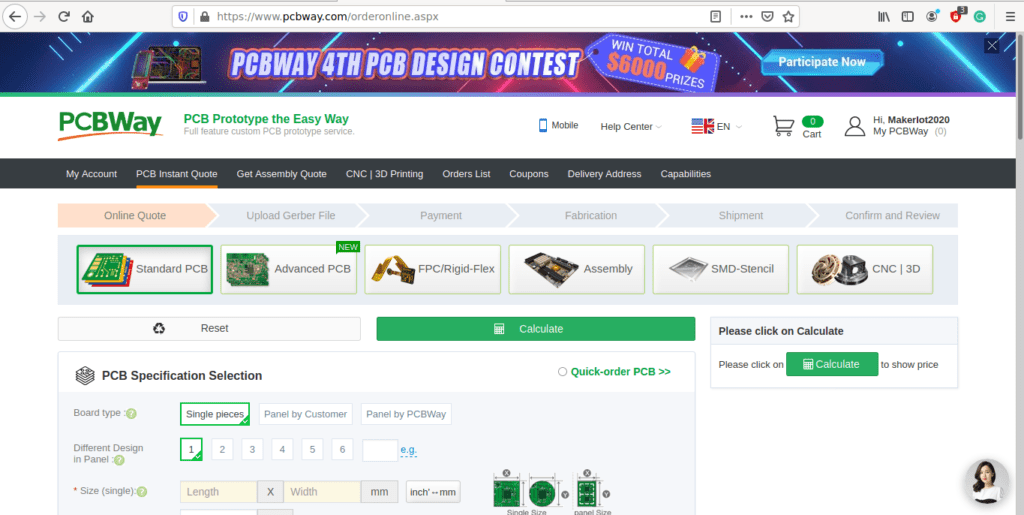
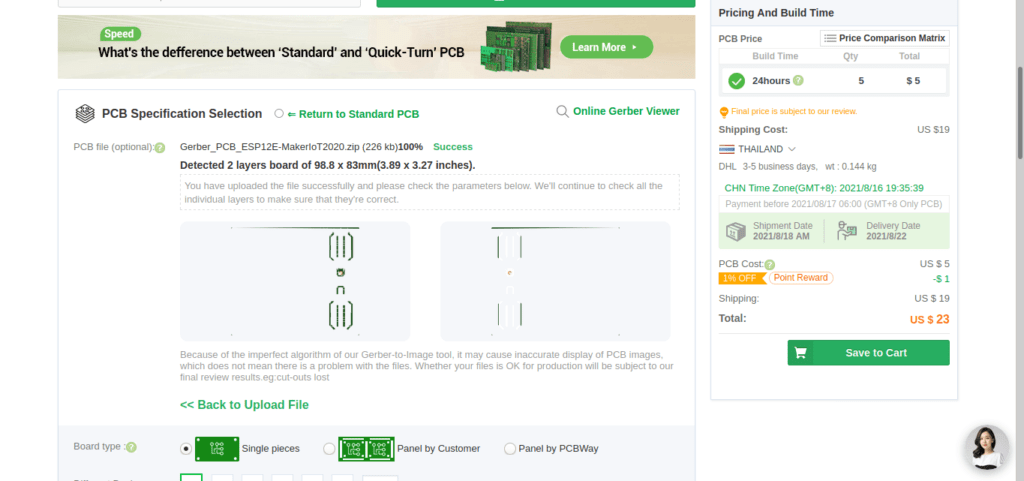
5) If you do not have any very special requirements for your PCB, click on Quick-order PCB

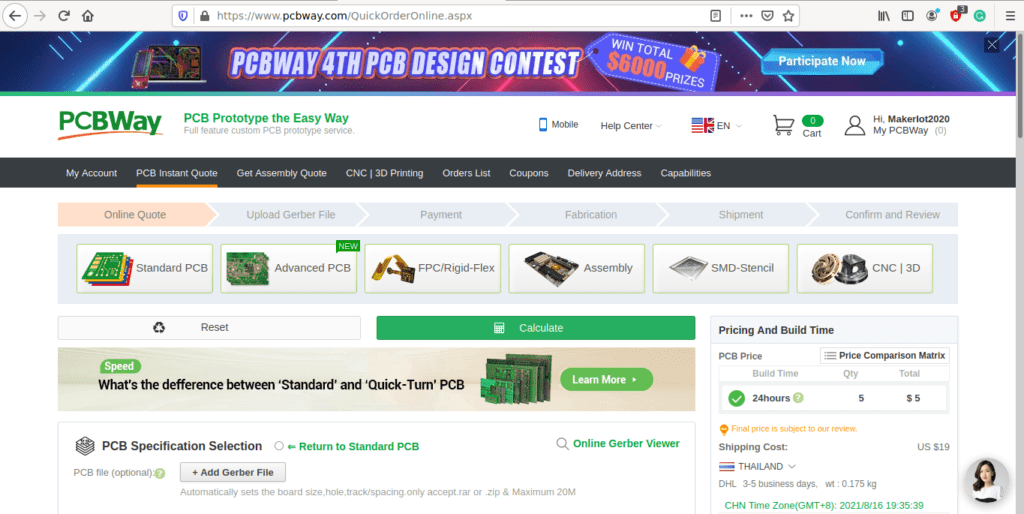
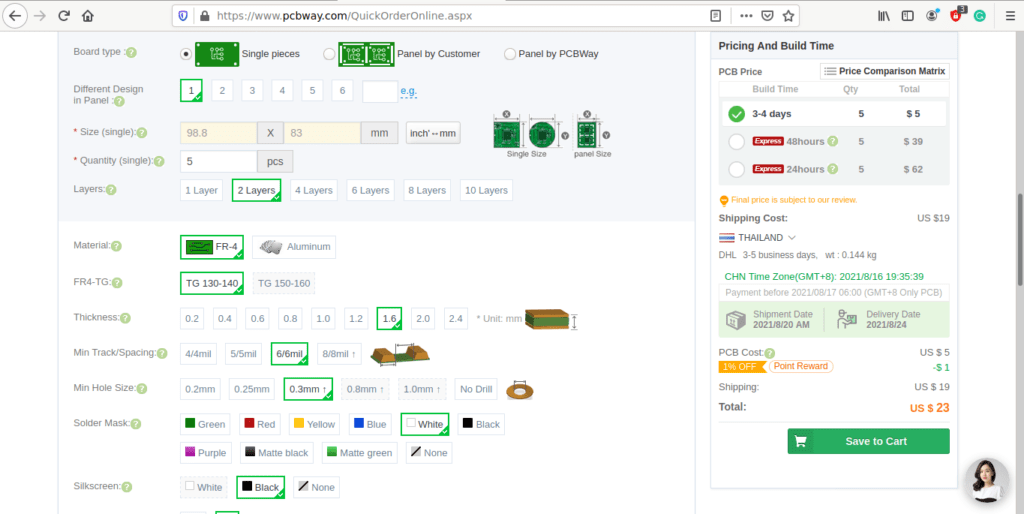
6) Click on Add Gerber File, and select your Gerber file(s) from your computer. Most of your PCB details will now be automatically selected, leaving you to only select the solder mask and silk-screen colour, as well as to remove the order number or not. You can of course fine-tune everything exactly as you want as well.

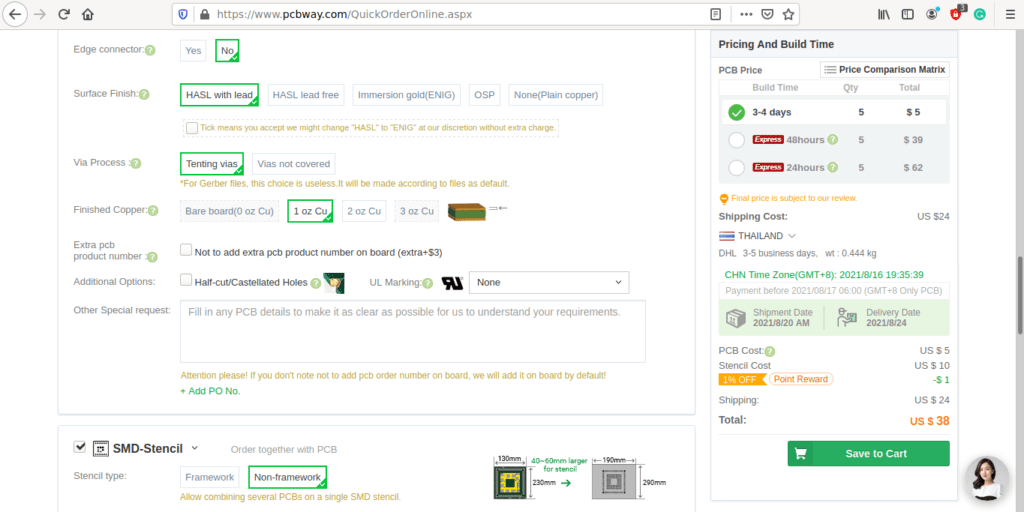
7) You can also select whether you want an SMD stencil, or have the board assembled after manufacturing. Please note that the assembly service, as well as the cost of your components, ARE NOT included in the initial quoted price. ( The quote will update depending on what options you select ).

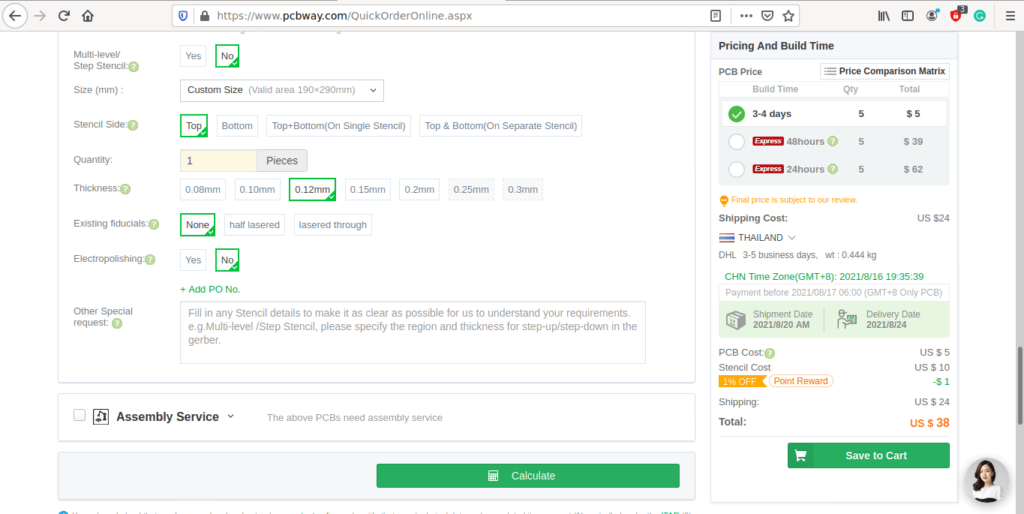
8) When you are happy with the options that you have selected, you can click on the Save to Cart Button. From here on, you can go to the top of the screen, click on Cart, make any payment(s) or use any coupons that you have in your account.

Then just sit back and wait for your new PCB to be delivered to your door via the shipping company that you have selected during checkout.


Getting Started with the Raspberry Pi Pico — Part 2 of the Pico Series…

Welcome to Part two of my RPi Pico Series. You can buy yours from Cytron Technologies.
In this post, we will look at some more of the features of the board, as well as how to get started using this development board. I will focus on MicroPython in this post, and cover C/C++ in the next post.

But before we do that, lets run over some of the specifications of the board first…
The Python Stuff will be at the end of this post…

Board Specifications

Raspberry Pi Pico is a low-cost, high-performance microcontroller board with flexible digital interfaces. Key features include:

  • RP2040 microcontroller chip designed by Raspberry Pi in the United Kingdom
  • Dual-core Arm Cortex M0+ processor, flexible clock running up to 133 MHz
  • 264KB of SRAM, and 2MB of on-board Flash memory
  • Castellated module allows soldering direct to carrier boards
  • USB 1.1 with device and host support
  • Low-power sleep and dormant modes
  • Drag-and-drop programming using mass storage over USB
  • 26 × multi-function GPIO pins
  • 2 × SPI, 2 × I2C, 2 × UART, 3 × 12-bit ADC, 16 × controllable PWM channels
  • Accurate clock and timer on-chip
  • Temperature sensor
  • Accelerated floating-point libraries on-chip
  • 8 × Programmable I/O (PIO) state machines for custom peripheral support

Utilities

What is on your Pico?

If you have forgotten what has been programmed into your Raspberry Pi Pico, and the program was built using our Pico C/C++ SDK, it will usually have a name and other useful information embedded into the binary. You can use the Picotool command line utility to find out these details. Full instructions on how to use Picotool to do this are available in the ‘getting started‘ documentation.

Pico Github Repo

Debugging using another Raspberry Pi Pico

It is possible to use one Raspberry Pi Pico to debug another Pico. This is possible via picoprobe, an application that allows a Pico to act as a USB → SWD and UART converter. This makes it easy to use a Pico on non-Raspberry Pi platforms such as Windows, Mac, and Linux computers where you don’t have GPIOs to connect directly to your Pico. Full instructions on how to use Picoprobe to do this are available in the ‘getting started‘ documentation.

PicoProbe Github Repo

Resetting Flash memory

Pico’s BOOTSEL mode lives in read-only memory inside the RP2040 chip, and can’t be overwritten accidentally. No matter what, if you hold down the BOOTSEL button when you plug in your Pico, it will appear as a drive onto which you can drag a new UF2 file. There is no way to brick the board through software. However, there are some circumstances where you might want to make sure your Flash memory is empty. You can do this by dragging and dropping a special UF2 binary onto your Pico when it is in mass storage mode.

The Code for the flash eraser is available below


/**
 * Copyright (c) 2020 Raspberry Pi (Trading) Ltd.
 *
 * SPDX-License-Iden
/**
 * Copyright (c) 2020 Raspberry Pi (Trading) Ltd.
 *
 * SPDX-License-Identifier: BSD-3-Clause
 */

// Obliterate the contents of flash. This is a silly thing to do if you are
// trying to run this program from flash, so you should really load and run
// directly from SRAM. You can enable RAM-only builds for all targets by doing:
//
// cmake -DPICO_NO_FLASH=1 ..
//
// in your build directory. We've also forced no-flash builds for this app in
// particular by adding:
//
// pico_set_binary_type(flash_nuke no_flash)
//
// To the CMakeLists.txt app for this file. Just to be sure, we can check the
// define:
#if !PICO_NO_FLASH
#error "This example must be built to run from SRAM!"
#endif

#include "pico/stdlib.h"
#include "hardware/flash.h"
#include "pico/bootrom.h"

int main() {
    flash_range_erase(0, PICO_FLASH_SIZE_BYTES);
    // Leave an eyecatcher pattern in the first page of flash so picotool can
    // more easily check the size:
    static const uint8_t eyecatcher[FLASH_PAGE_SIZE] = "NUKE";
    flash_range_program(0, eyecatcher, FLASH_PAGE_SIZE);

    // Flash LED for success
    gpio_init(PICO_DEFAULT_LED_PIN);
    gpio_set_dir(PICO_DEFAULT_LED_PIN, GPIO_OUT);
    for (int i = 0; i < 3; ++i) {
        gpio_put(PICO_DEFAULT_LED_PIN, 1);
        sleep_ms(100);
        gpio_put(PICO_DEFAULT_LED_PIN, 0);
        sleep_ms(100);
    }

    // Pop back up as an MSD drive
    reset_usb_boot(0, 0);
}tifier: BSD-3-Clause
 */

// Obliterate the contents of flash. This is a silly thing to do if you are
// trying to run this program from flash, so you should really load and run
// directly from SRAM. You can enable RAM-only builds for all targets by doing:
//
// cmake -DPICO_NO_FLASH=1 ..
//
// in your build directory. We've also forced no-flash builds for this app in
// particular by adding:
//
// pico_set_binary_type(flash_nuke no_flash)
//
// To the CMakeLists.txt app for this file. Just to be sure, we can check the
// define:
#if !PICO_NO_FLASH
#error "This example must be built to run from SRAM!"
#endif

#include "pico/stdlib.h"
#include "hardware/flash.h"
#include "pico/bootrom.h"

int main() {
    flash_range_erase(0, PICO_FLASH_SIZE_BYTES);
    // Leave an eyecatcher pattern in the first page of flash so picotool can
    // more easily check the size:
    static const uint8_t eyecatcher[FLASH_PAGE_SIZE] = "NUKE";
    flash_range_program(0, eyecatcher, FLASH_PAGE_SIZE);

    // Flash LED for success
    gpio_init(PICO_DEFAULT_LED_PIN);
    gpio_set_dir(PICO_DEFAULT_LED_PIN, GPIO_OUT);
    for (int i = 0; i < 3; ++i) {
        gpio_put(PICO_DEFAULT_LED_PIN, 1);
        sleep_ms(100);
        gpio_put(PICO_DEFAULT_LED_PIN, 0);
        sleep_ms(100);
    }

    // Pop back up as an MSD drive
    reset_usb_boot(0, 0);
}

Getting Started with MicroPython on the RPi Pico

Drag and drop MicroPython

You can program your Pico by connecting it to a computer via USB, then dragging and dropping a file onto it, so we’ve put together a downloadable UF2 file to let you install MicroPython more easily. Following the procedure below, you can install MicroPython onto the Pico in a few seconds…

1. Download and unzip the UF2 file below into a folder on your computer.

2. Hold down the Bootsel button on the Pico, and connect it to a USB cable that was already connected to your computer. ( This means, connect ons side of the usb cable to the computer, but dont connect the Pico yet. then hold down BOOTSEL, and connect the cable to the pico)

3. Now, release the BootSEL button

4. After a few Seconds, you will have a new USB storage device on your computer, called RPI-RP2

5. Drag the UF2 file into this USB Storage device. The Pico will reboot… You have now installed MicroPython on your RPi Pico

Accessing the MicroPython REPL

You can now access REPL from a serial terminal, or a MicroPython IDE , like Thonny…
I will show you how to do it from the Linux Terminal below.

The Pico will show up as a USB device called ttyACM0
you can find it by issuing the ls /dev/tty* command

Start minicom or your preferred serial terminal emulator

Press enter a few times, and you should get a REPL prompt

You can now test MicroPython on your Pico, by typing the following commands:

The complete MicroPython SDK for the RPi Pico is available for download at the link below…

In the next part of this series, we will look at using the Thonny IDE, as well as C/C++ to program the Pico

Welcome to our New Site

Welcome to our new website on www.makeriot2020.com. It has been a while, but I finally managed to get the domain and hosting issues sorted out. (It took some time as I am doing everything myself, as I believe that hiring a developer to do something as easy as a simple blog type site is a wasted opportunity to do something myself.)

I have become a bit rusted with these ICT skills, as I did not need to do these things for a few years now. This site will bring much-needed refreshing of my skills 🙂

As far as my older posts are concerned, the will stay available on the old google sites platform, as I don’t think it is good practice to move them here. The effort with recreating them, as well as updating all the links in previous posts to Facebook, is not quite worth the effort. That combined with some of the limitations on what is possible with google sites, made me believe that this is the best way to go, Old posts stay on old site, and new stuff goes here.

Feel free to tell me what you think about that in the comments below 🙂