
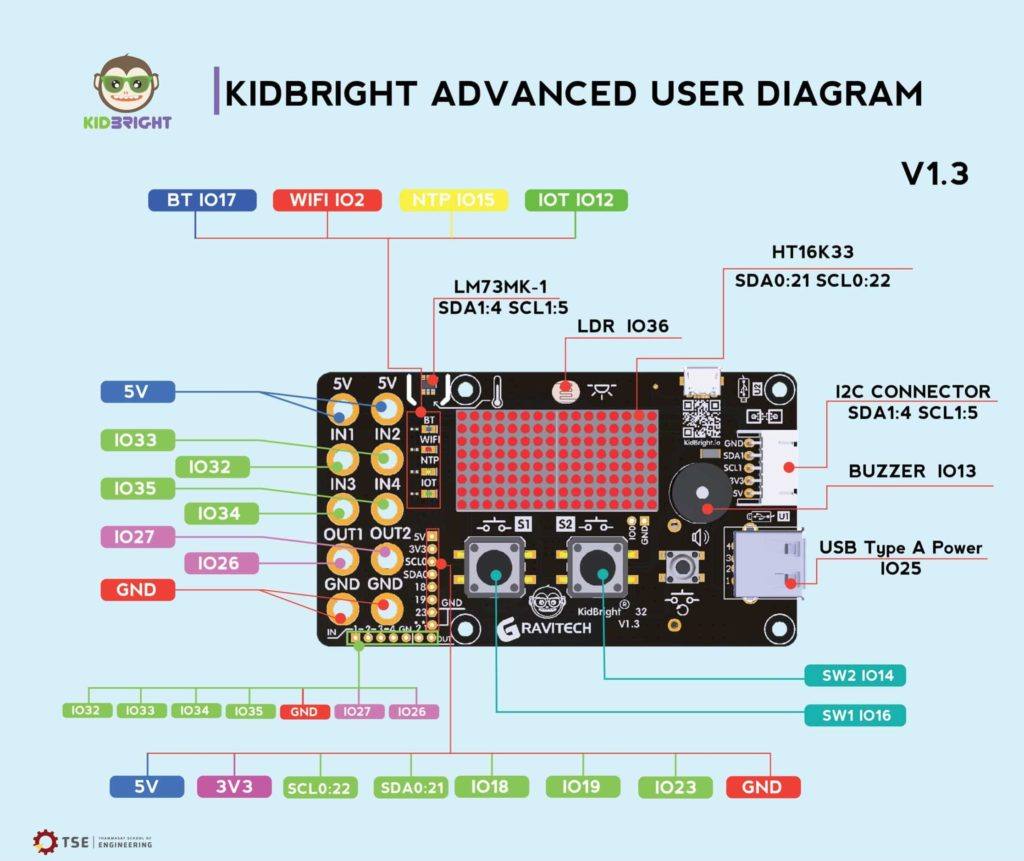
Today I will show you how to do a very quick IoT relay controller using IFTTT and Adafruit IO. I will be using the Kid Bright v 1.3 Development board, from Gravitec in Thailand. These boards sell for about $USD 25 to 35 each, quite expensive as far as I am concerned, for the amount of functionality that you get.
I will also post a link to the Video Tutorial at the bottom of this tutorial.

You can find out more about this board on the Kid Bright Website. Please note that you will need Google Translate, as the site is in the Thai Language.
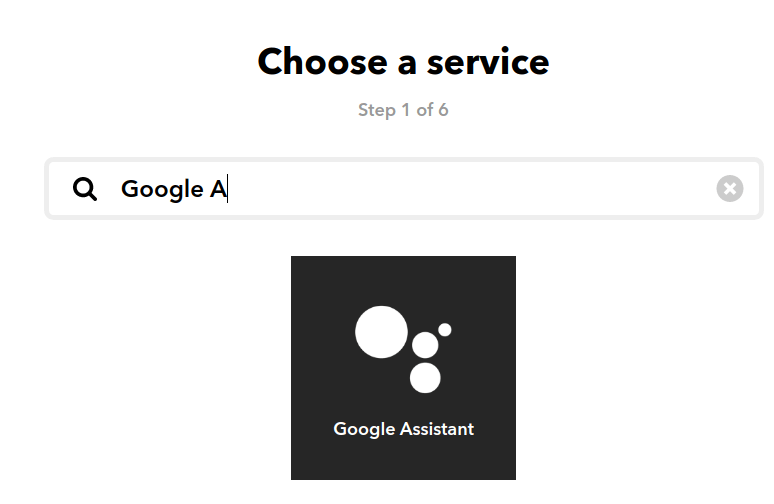
We will use IFTTT to connect Google Assistant to Adafruit IO in order to control our IoT Relay controller with voice commands.
Let us start our project.
Start the Arduino IDE, and make sure that you have enabled support for NodeMCU or other ESP32 based processors.
You also need to load the libraries for Adafruit IO.
After you have done that, open the “adafruitio_07_digital_out” sketch from the Examples folder for Adafruit IO. We will modify this example to suit our needs, as well as save some time on coding.
Change the Example to the following:
Remember to change the pins to reflect your particular setup.
include “config.h”
define LED_PIN 17
define Relay 27
// set up the ‘readinglight’ feed
AdafruitIO_Feed *readinglight = io.feed(“readinglight”);
void setup() {
pinMode(LED_PIN, OUTPUT);
pinMode(Relay, OUTPUT);
// start the serial connection
Serial.begin(115200);
// wait for serial monitor to open
while(! Serial);
// connect to io.adafruit.com
Serial.print(“Connecting to Adafruit IO”);
io.connect();
// set up a message handler for the ‘readinglight’ feed.
// the handleMessage function (defined below)
// will be called whenever a message is
// received from adafruit io.
readinglight->onMessage(handleMessage); // Handler for our FEED
// wait for a connection
while(io.status() < AIO_CONNECTED) {
Serial.print(“.”);
delay(500);
}
// we are connected
Serial.println();
Serial.println(io.statusText());
readinglight->get();
}
void loop() {
// io.run(); is required for all sketches.
// it should always be present at the top of your loop
// function. it keeps the client connected to
// io.adafruit.com, and processes any incoming data.
io.run();
}
// this function is called whenever an ‘readinglight’ feed message
// is received from Adafruit IO. it was attached to
// the ‘digital’ feed in the setup() function above.
void handleMessage(AdafruitIO_Data *data) {
Serial.print(“received <- “);
if(data->toPinLevel() == HIGH)
Serial.println(“HIGH”);
else
Serial.println(“LOW”);
digitalWrite(LED_PIN, !data->toPinLevel()); // We inverse the logic on the LED, we want it on //when the relay is on, and off when the relay is off
digitalWrite(Relay, data->toPinLevel()); // My Relay Module is Active LOW, so this is correct.
//reverse the logic if your module is Active High
}
Another very important step is that you need to set your Adafruit IO IO-Key in the config.h file. Your Wifi SSID and Password also needs to be supplied here, to enable your ESP32 based processor to connect to Adafruit through your WiFi connection.
Config.h
/ Adafruit IO Config */
define IO_USERNAME “your AdafruitIO username”
define IO_KEY “your AdafruitIO IO Key”
define WIFI_SSID “your wifi ssid”
define WIFI_PASS “your wifi password”
Leave everything else as is in the config.h file
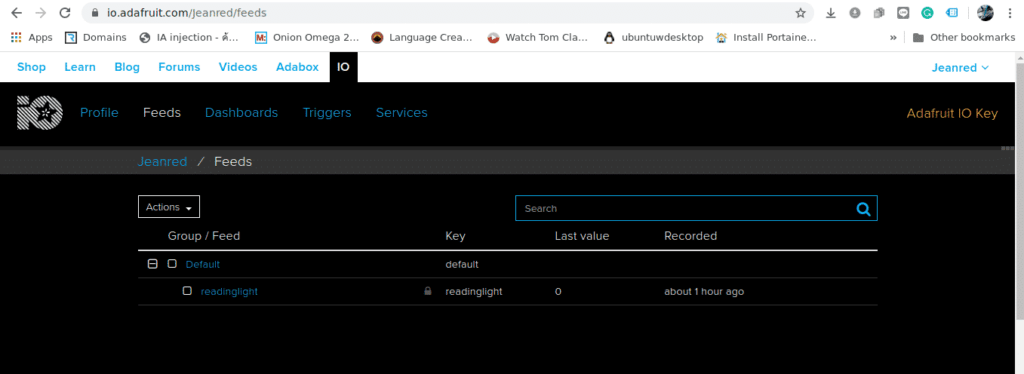
Now login to Adafruit IO, or create a new account if you have not done so already.
Create a new feed, in my case called readinglight, under your feeds.
Click on the Adafruit IO Key button ( top right corner ) and copy your IO Key and Username into the config.h file in the Arduino IDE. Don’t upload your code yet.
Now go to IFTTT, and login or create a new account if you don’t have one already.
After you have logged in, in a new window, go to https://www.ifttt.com/adafruit
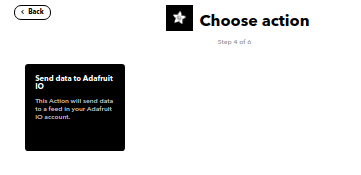
Make sure to connect Adafruit and IFTTT, and allow IFTTT to send messages to Adafruit IO.
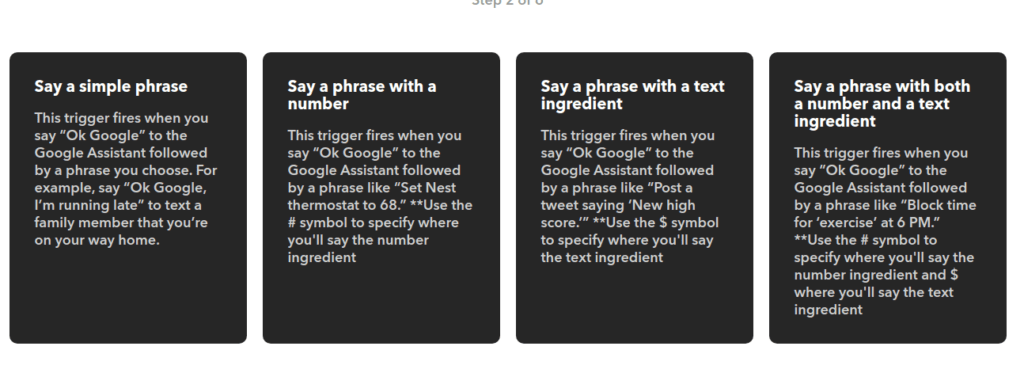
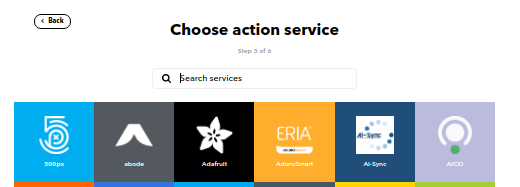
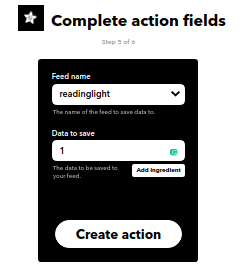
Then, follow the pictures, and create your first applet.

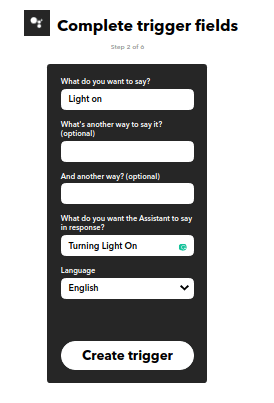

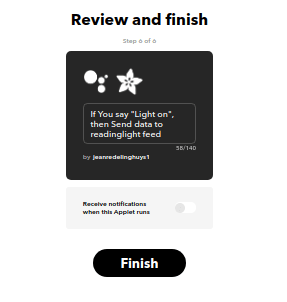
Now create another Applet, Doing exactly the same, but change your wording to “Light OFF” and the Adafruit IO Data to 0. This applet will be used to switch off the Relay.
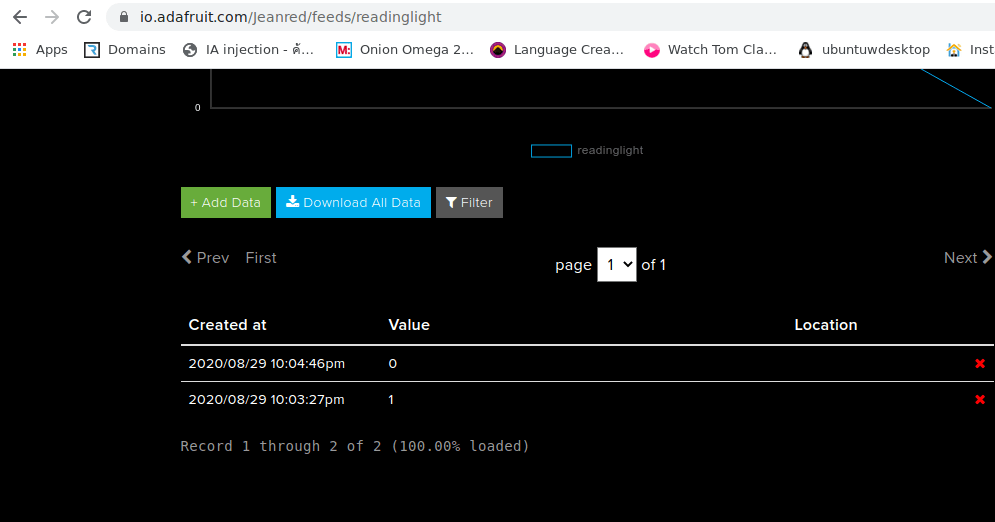
Go back to the Feed window in Adafruit IO, and then test Google Assistant by saying your command, like “Hey Google, Light On” and “Hey Google, Light Off”
You should see data arriving in your feed window after each command. A 1 for On and a 0 for Off.
Now go back to your Arduino IDE, Open the Serial Monitor, and Compile and Upload your Code. Test it again, but now you should see data arriving in the Serial Monitor as well.
If all of this is working, You can connect your Relay to the board, and test it again.
When you are happy that all is working as it should, Connect a load to the relay, and enjoy your new Voice-Activated IoT Relay Controller.
It is also easy to add another feed to the existing code. Ask me how if you don’t understand, but it should be quite easy to figure out from the code as well 🙂