Introduction
In my previous post, I showed you how to use AJAX and JavaScript to make a very responsive Web server on Arduino. In Part 2, we will look at making some important modifications.
Arduino has limited storage space – Use an SD Card
As all of us already know, the Arduino, especially the Uno and Nano, has very limited storage space. If we want to create a truly useful IoT Web server device, we need to do something to increase the available storage space on our Arduino Device.
We can however not increase the program memory. What we can do is store our static HTML page, as well as any images and icons, on a SD-CARD. These come in many sizes,
but for our example, I will use a 2gb card, not that we will use all of it anyway.
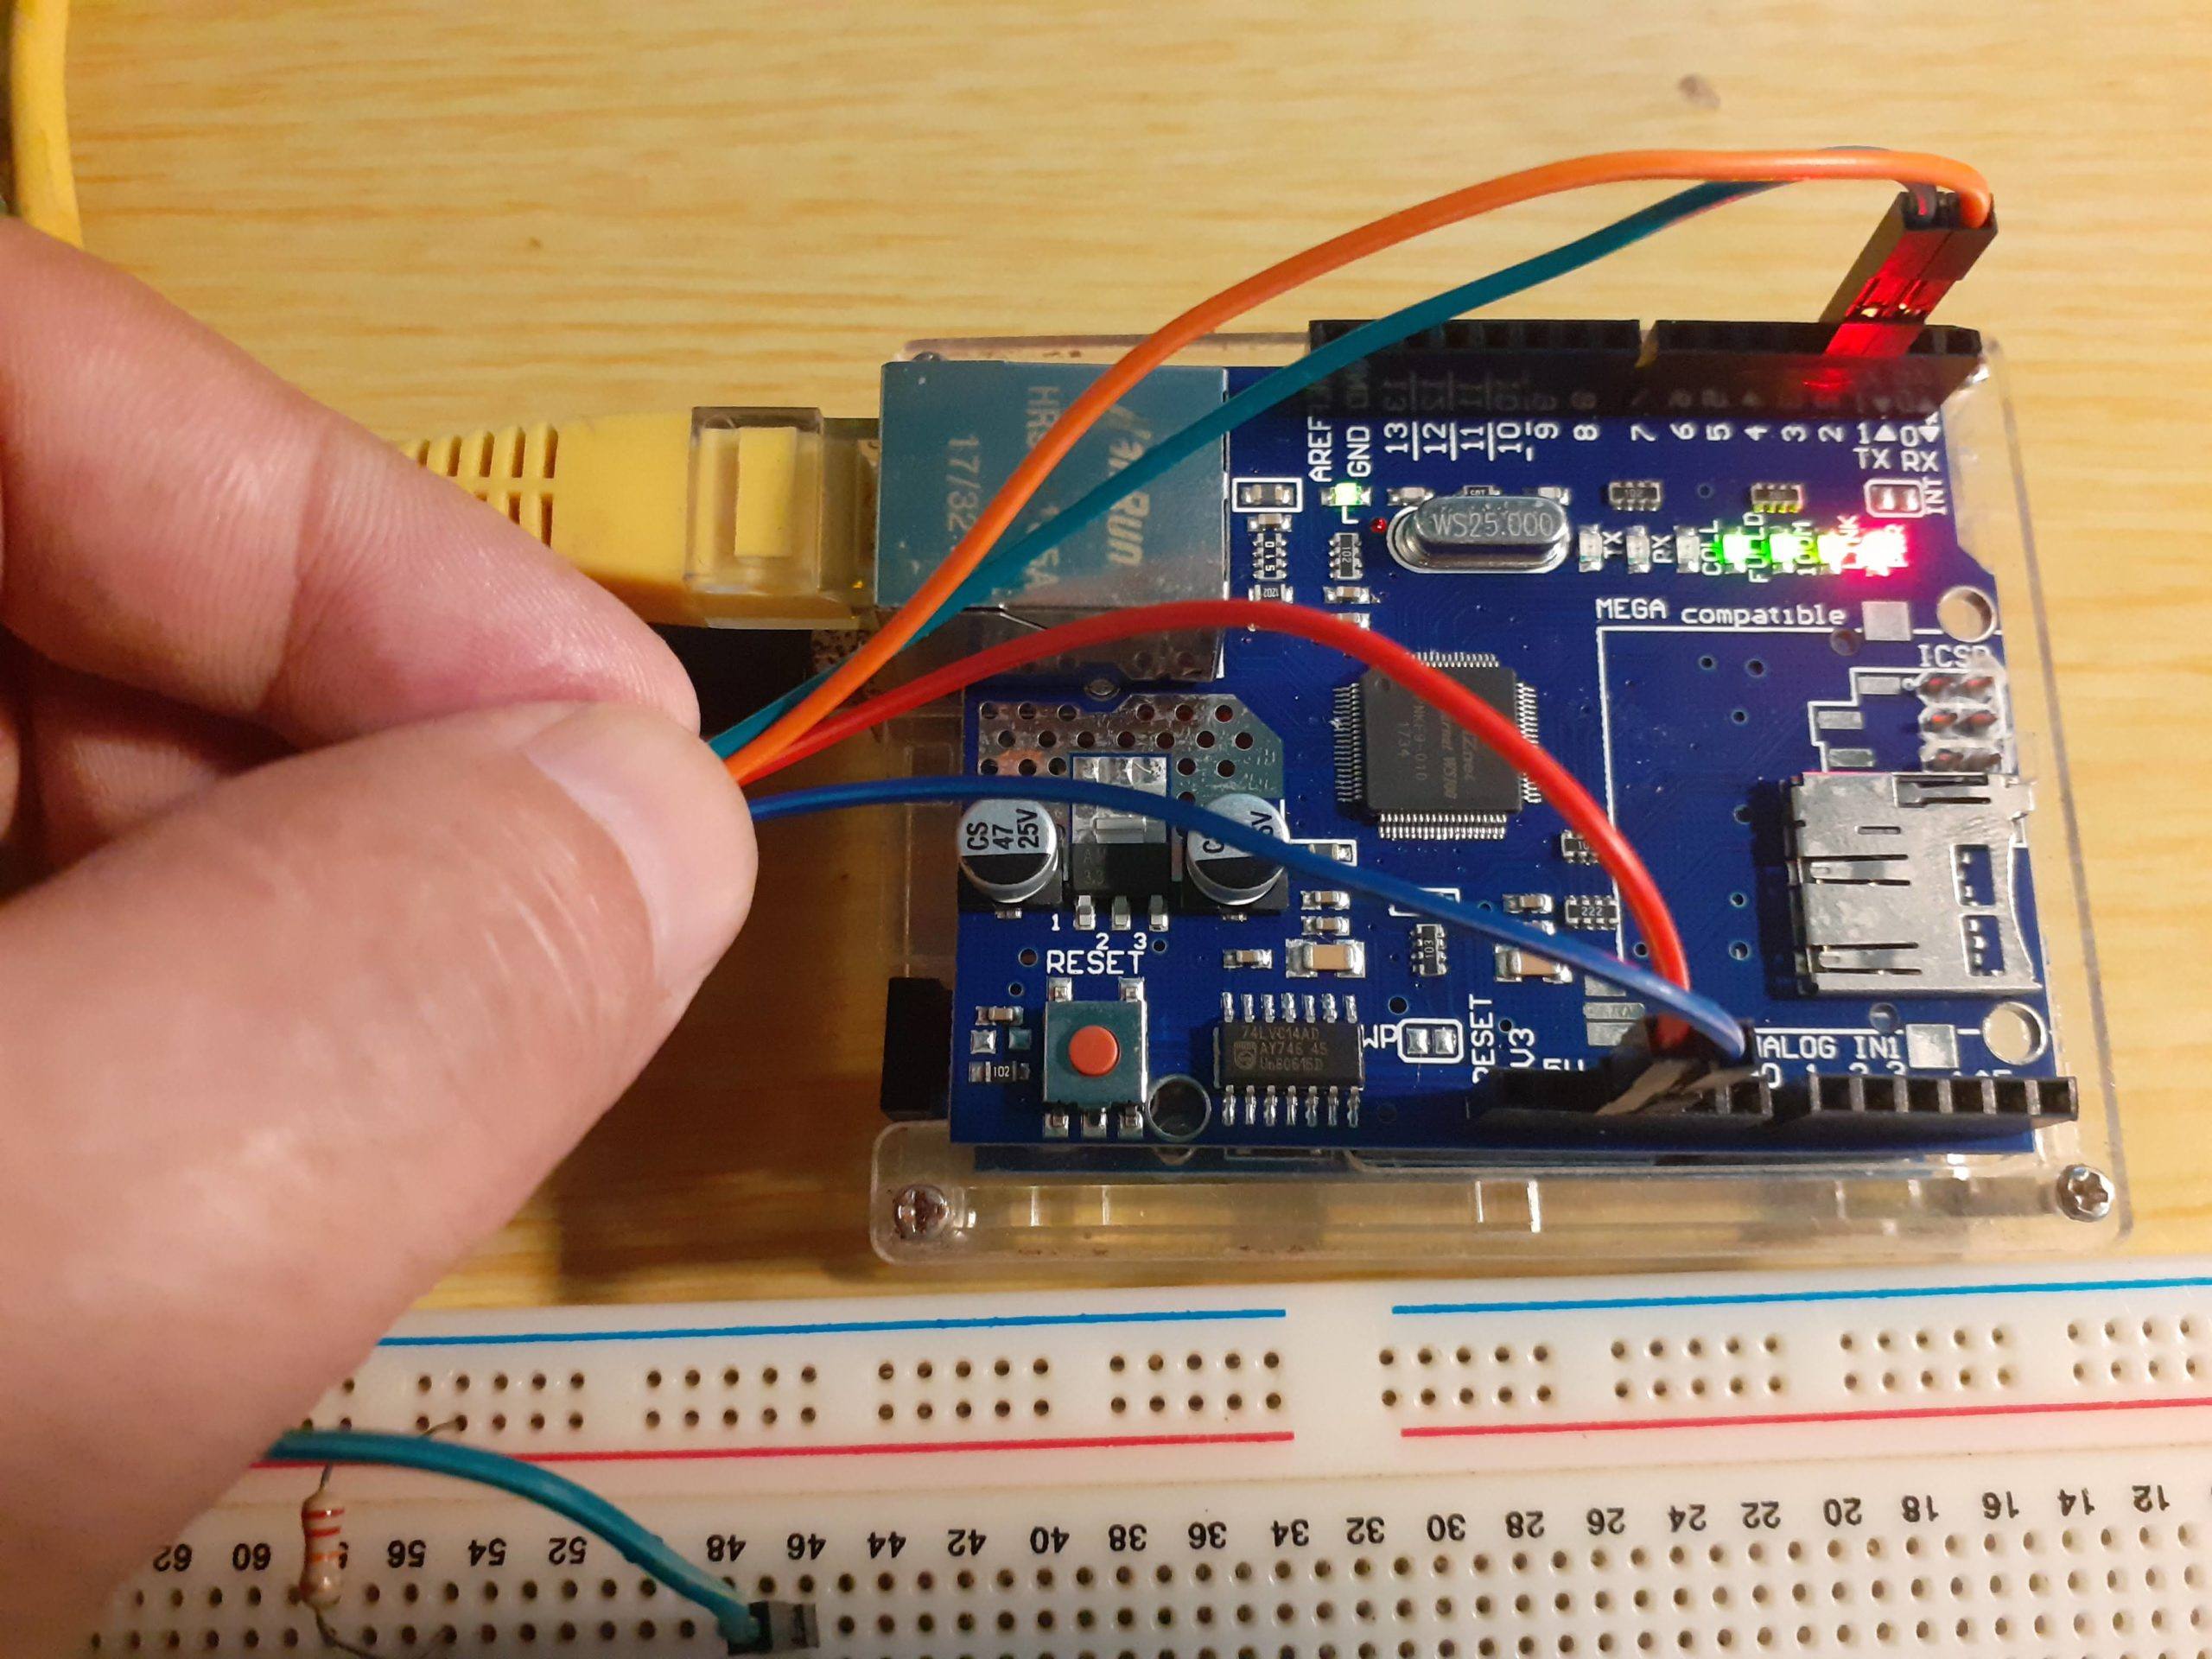
The standard Arduino Ethernet Shield also comes standard with a SD-CARD reader slot already built in.
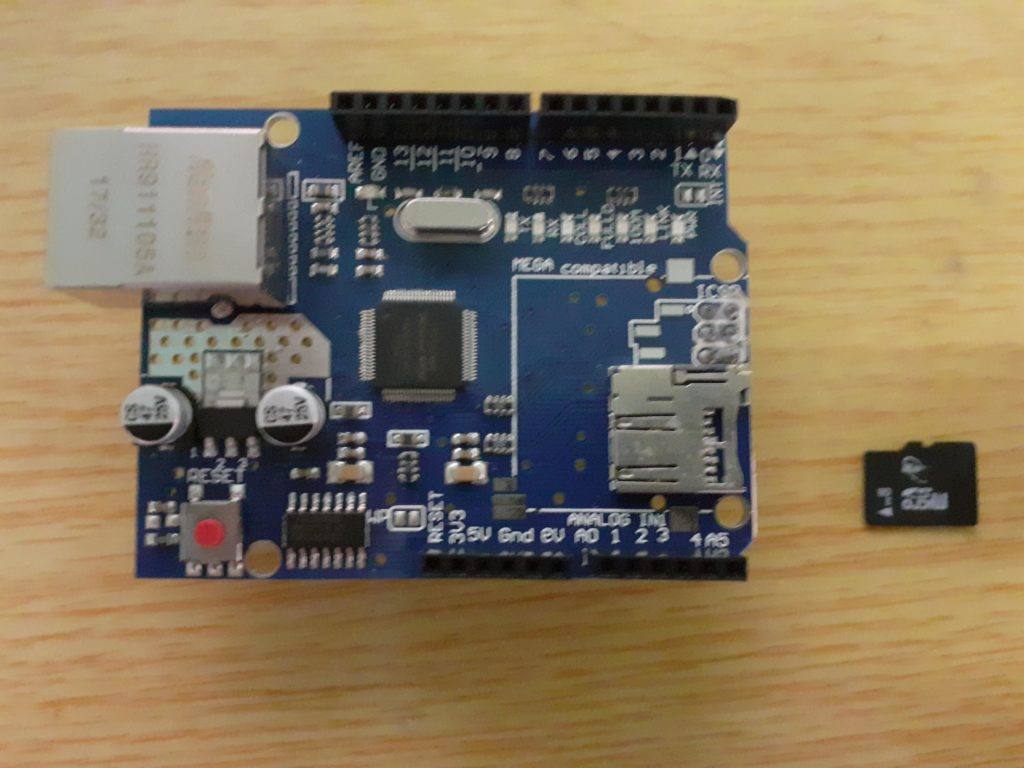
This makes our lives a lot easier. You can also buy a stand-alone SPI SD Card module for a few bucks online. This will be needed if you try to make this project using an Arduino Nano.
Preparing the Card for use
You should format your card using your computer, and a suitable adapter. The card should be formatted to the FAT filesystem. NTFS or other filesystems does unfortunately not work as far as I know.
SD Card IO – How to use the SD Card in Arduino
The Arduino IDE already includes an SD Card library. You can also download additional libraries from the internet that allows more specialized control and functionality. The standard library will however be sufficient for our needs.
It is also easy to test if your card is working or not. The code below is from the “CardInfo” example that ships with the Arduino IDE
/*
SD card test
This example shows how use the utility libraries on which the'
SD library is based in order to get info about your SD card.
Very useful for testing a card when you're not sure whether its working or not.
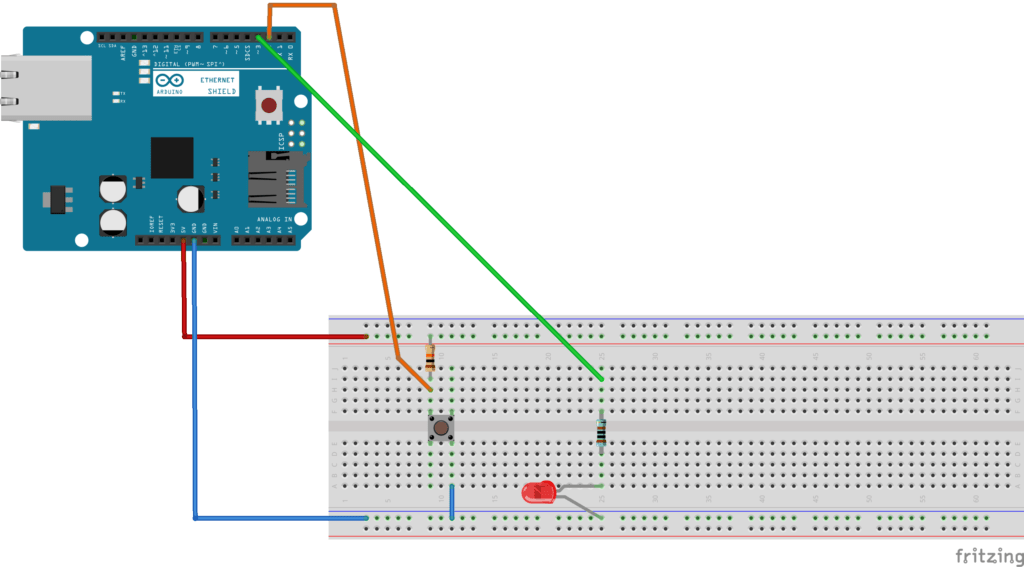
The circuit:
SD card attached to SPI bus as follows:
** MOSI - pin 11 on Arduino Uno/Duemilanove/Diecimila
** MISO - pin 12 on Arduino Uno/Duemilanove/Diecimila
** CLK - pin 13 on Arduino Uno/Duemilanove/Diecimila
** CS - depends on your SD card shield or module.
Pin 4 used here for consistency with other Arduino examples
created 28 Mar 2011
by Limor Fried
modified 9 Apr 2012
by Tom Igoe
*/
// include the SD library:
#include <SPI.h>
#include <SD.h>
// set up variables using the SD utility library functions:
Sd2Card card;
SdVolume volume;
SdFile root;
// change this to match your SD shield or module;
// Arduino Ethernet shield: pin 4
// Adafruit SD shields and modules: pin 10
// Sparkfun SD shield: pin 8
// MKRZero SD: SDCARD_SS_PIN
const int chipSelect = 4;
void setup() {
// Open serial communications and wait for port to open:
Serial.begin(9600);
while (!Serial) {
; // wait for serial port to connect. Needed for native USB port only
}
Serial.print("\nInitializing SD card...");
// we'll use the initialization code from the utility libraries
// since we're just testing if the card is working!
if (!card.init(SPI_HALF_SPEED, chipSelect)) {
Serial.println("initialization failed. Things to check:");
Serial.println("* is a card inserted?");
Serial.println("* is your wiring correct?");
Serial.println("* did you change the chipSelect pin to match your shield or module?");
while (1);
} else {
Serial.println("Wiring is correct and a card is present.");
}
// print the type of card
Serial.println();
Serial.print("Card type: ");
switch (card.type()) {
case SD_CARD_TYPE_SD1:
Serial.println("SD1");
break;
case SD_CARD_TYPE_SD2:
Serial.println("SD2");
break;
case SD_CARD_TYPE_SDHC:
Serial.println("SDHC");
break;
default:
Serial.println("Unknown");
}
// Now we will try to open the 'volume'/'partition' - it should be FAT16 or FAT32
if (!volume.init(card)) {
Serial.println("Could not find FAT16/FAT32 partition.\nMake sure you've formatted the card");
while (1);
}
Serial.print("Clusters: ");
Serial.println(volume.clusterCount());
Serial.print("Blocks x Cluster: ");
Serial.println(volume.blocksPerCluster());
Serial.print("Total Blocks: ");
Serial.println(volume.blocksPerCluster() * volume.clusterCount());
Serial.println();
// print the type and size of the first FAT-type volume
uint32_t volumesize;
Serial.print("Volume type is: FAT");
Serial.println(volume.fatType(), DEC);
volumesize = volume.blocksPerCluster(); // clusters are collections of blocks
volumesize *= volume.clusterCount(); // we'll have a lot of clusters
volumesize /= 2; // SD card blocks are always 512 bytes (2 blocks are 1KB)
Serial.print("Volume size (Kb): ");
Serial.println(volumesize);
Serial.print("Volume size (Mb): ");
volumesize /= 1024;
Serial.println(volumesize);
Serial.print("Volume size (Gb): ");
Serial.println((float)volumesize / 1024.0);
Serial.println("\nFiles found on the card (name, date and size in bytes): ");
root.openRoot(volume);
// list all files in the card with date and size
root.ls(LS_R | LS_DATE | LS_SIZE);
}
void loop(void) {
}Open this example in your Arduino IDE, and then make sure that the CS pin is set to the correct pin for your Ethernet Shield ( Pin 10 is for Ethernet, Pin 4 is usually for the SD Card).
Both of these devices will be connected to the SPI bus on your Arduino, and the CS pin will determine which device is active, by being pulled LOW.
Insert your formatted card into the slot, power on the Arduino, and upload the sketch to the Arduino. Open the Serial monitor. If all goes well, you should see information about your SD Card ( Size, sectors etc being displayed ). If your card was already formatted to the FAT file system and contained other files, the names of these files will also be displayed.
Create your Web Page
Power down the Arduino, and remove the SD Card. Put it into the relevant adapter and connect it to your computer.
Now, open a plain text editor, notepad on windows, or any other specialized html editor, as long as you feel comfortable with it, and create a simple html file. Feel free to use my example below, and modify it to your liking
<!DOCTYPE html>
<html>
    <head>
        <title>Arduino SD Card Web Page EXAMPLE - Maker and IOT Ideas</title>
    </head>
    <body>
        <h1>Welcome to your Arduino Based Web Server</h1>
        <p>This page is stored on the SD Card connected to your Arduino.</p>
        <p>Please do not remove the card while the Arduino is connected to a power source</p>

    </body>
</html>
Save this file as index.htm, and remove the card from your computer, making sure that you properly stop it as per the standard procedures for your operating system.
Put it back into the slot on the Arduino Ethernet Shield, open the serial monitor, and apply power to your Arduino. make sure that you see the file, index.htm listed in the output.
Coding your Webserver
Our next step will be to write the code to create our Arduino Web Server. This code will be similar to the code in part 1 of this series, but I recommend that you start fresh, open a new sketch, and copy-paste my code into the IDE. you can always modify it later to suit your needs…
#include <SPI.h>
#include <Ethernet.h>
#include <SD.h>
// MAC address from Ethernet shield sticker under board
byte mac[] = { 0xDE, 0xAD, 0xBE, 0xEF, 0xFE, 0xED };
IPAddress ip(192, 168, 100, 32); // IP address, may need to change depending on network
EthernetServer server(80); // create a server at port 80
File webFile;
void setup()
{
// initialize SD card
Serial.println("Initializing SD card...");
if (!SD.begin(4)) {
Serial.println("ERROR - SD card initialization failed!");
return; // init failed
}
Serial.println("SD card initialized. [OK]");
// check for index.htm file
if (!SD.exists("index.htm")) {
Serial.println("ERROR - Can't find index.htm file!");
return; // can't find index file
}
Serial.println("index.htm file found - Starting Webserver");
Ethernet.begin(mac, ip); // initialize Ethernet device
server.begin(); // start to listen for clients
Serial.begin(9600); // for debugging
}
void loop()
{
EthernetClient client = server.available(); // try to get client
if (client) { // got client?
boolean currentLineIsBlank = true;
while (client.connected()) {
if (client.available()) { // client data available to read
char c = client.read(); // read 1 byte (character) from client
// last line of client request is blank and ends with \n
// respond to client only after last line received
if (c == '\n' && currentLineIsBlank) {
// send a standard http response header
client.println("HTTP/1.1 200 OK");
client.println("Content-Type: text/html");
client.println("Connection: close");
client.println();
// send web page
webFile = SD.open("index.htm"); // open web page file
if (webFile) {
while(webFile.available()) {
client.write(webFile.read()); // send web page to client
}
webFile.close();
}
break;
}
// every line of text received from the client ends with \r\n
if (c == '\n') {
// last character on line of received text
// starting new line with next character read
currentLineIsBlank = true;
}
else if (c != '\r') {
// a text character was received from client
currentLineIsBlank = false;
}
} // end if (client.available())
} // end while (client.connected())
delay(1); // give the web browser time to receive the data
client.stop(); // close the connection
} // end if (client)
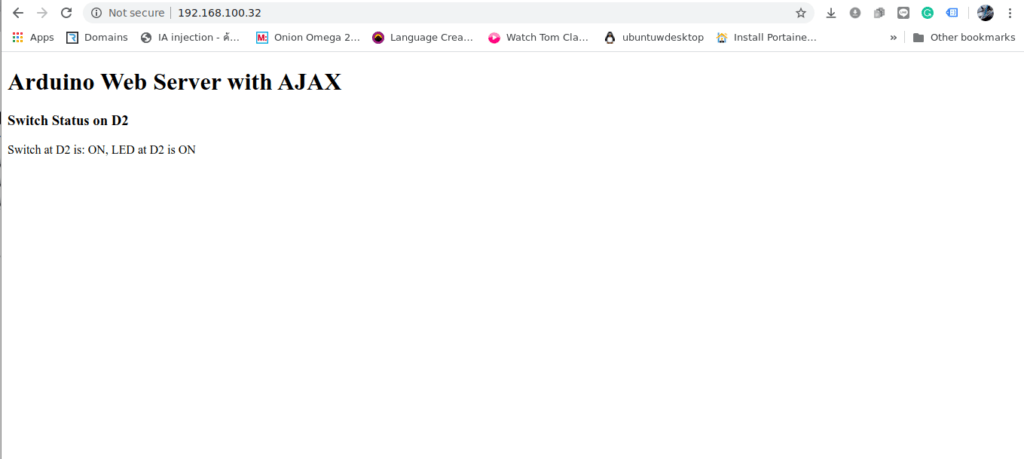
}Upload the sketch to your Arduino and navigate to the IP Address of the server using your browser. You should see the page displayed as you coded it.
What to do from here
You can now modify your page to include links and even images and CSS styling. You should however remember that the Arduino also does not have a lot of RAM memory.
You should thus not add extremely large images or pages. Those will take a long time to display, or may even time-out and not display at all
In the next part of this series, I will show you how to add links, images and CSS to make your page look a bit more visually appealing. We will also integrate the AJAX and JavaScript
functionality from the previous part of the series, to allow our server to interact with the inputs and outputs on the Arduino.