
Official Arduino IDE support for the Raspberry Pi Pico is finally here. It took a while,and those of us that could not be bothered with Micro-Python, or complex C tool-chains, can finally take out Pico’s out of the drawer, and start putting them through their paces…
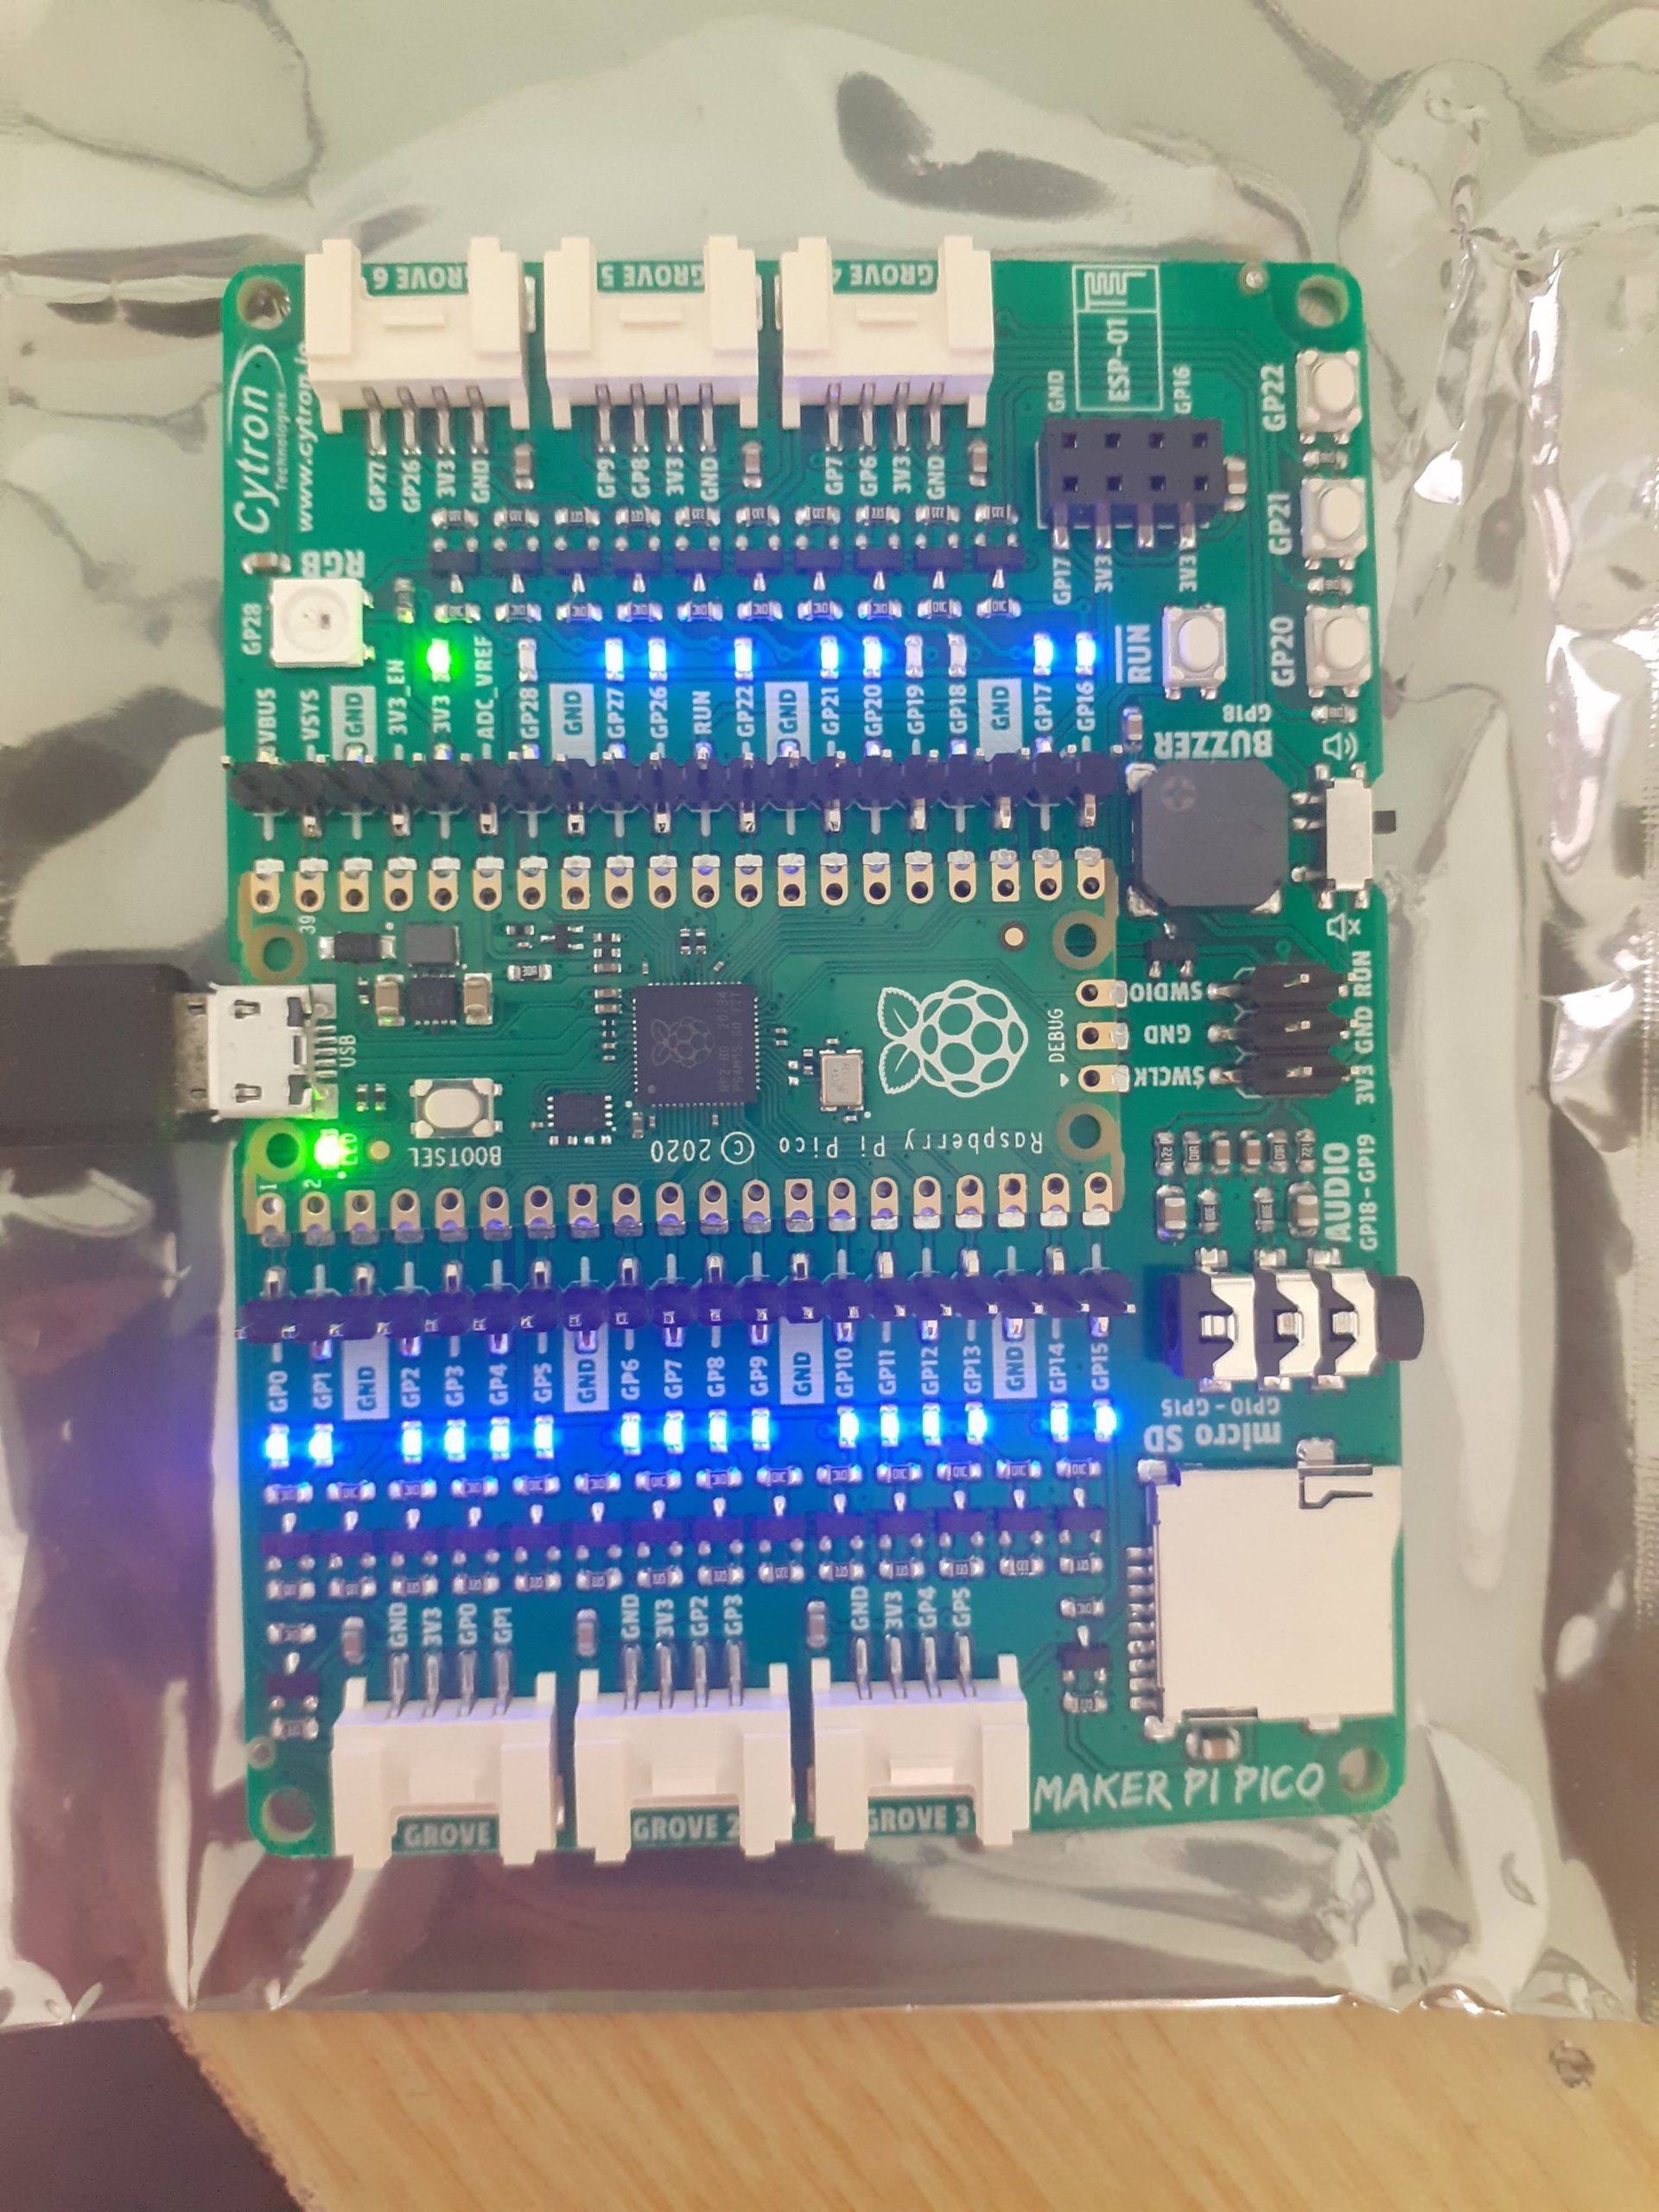
This is also an excellent opportunity to really push the Maker Pi Pico, from Cytron Technologies, so its limits, as the rich library environment from the Arduino IDE, will definitely allow quick and fast access to all of the Maker Pi Pico’s built in hardware…
Adding Pico Support to the Arduino IDE
Before we can use the Pico with the Arduino IDE, we first have to add support for the board into the Arduino IDE.
This is done with the Boards Manager, Although very easy, there are however a few things that you have to take note of. You have to remove support for ALL other Pi Pico boads packages that you may have installed into the Arduino IDE, previously, as well as any additional board url’s in the preferences menu…
Then, after removing that all, restart your Arduino IDE, go to the Tools menu, and then Boards _> Boards Manager.
Type Pico into the search box. Press Enter…
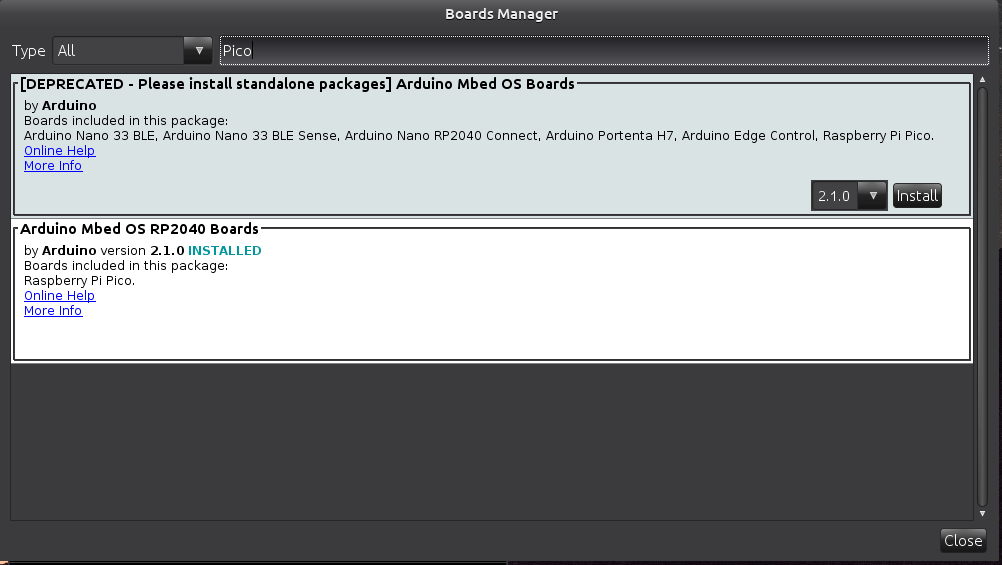
Select and Install the “Arduino MBed OS RP2040 Boards”…
Wait for this to install, It will take a while, depending on your internet speed…
When this is finished, we can configure your Pico board.
Please Note:
On Linux operating systems, like Ubuntu, you will have to perform an additional step. This is because of permissions on hardware devices. You will have to start the Arduino IDE as a superuser, i.e. with sudo, from the command line, and then install the RP2040 support AS WELL…. Once that is done, keep the IDE open, and continue with the rest of this guide….

To do this do the following:
Open a Terminal Window
go to the Arduino installation folder, on my system ( Ubuntu 20.04 LTS it is /home/jean/Downloads/arduino-1.8.13 )
and then issue the command $ sudo ./arduino
You will get a similar display as above …
Now open the boards manager again, and install the “Arduino MBed OS RP2040 Boards” board support files ….
Continue to the next step below…
Uploading your first sketch to the Pico
DO NOT PLUG THE PICO INTO A USB PORT YET
With the Arduino IDE Open, ( As superuser on Ubuntu or other Linux), open a blank sketch, and select the Raspberry Pi Pico, from the Boards menu under Tools ( It will be under Arduino MBed OS RP2040)
Open a blank sketch, or the standard blink example sketch.
Now, while holding the BOOTSEL button on the PICO pressed in, plug in your PICO, and then release the button.
The Pico will open a File Dialog on your computer, similar to when you loaded Micro-Python Support.
Do NOT search for a Com port at this stage, it will not exist yet !
Ignore the File window, and click on the upload button in the Arduino IDE.
The sketch will upload, and the PICO will reset automatically.
UBUNTU or other Linux Users, If this was successful, you can close the Arduino IDE as superuser, and open your standard Arduino IDE.
After this step, you will not have to hold down BOOTSEL every time to upload a sketch, even if you have unplugged the PICO, but you will have to select a valid COM port in the Arduino IDE… On Ubuntu, it will be /dev/ttyACM0 or similar, please look in the ports menu under tools in the Arduino IDE.
You can now make use of all the existing Arduino libraries with your Raspberry Pi Pico…
A few points to note:
I2C is on GP6 (SCL) and GP7 (SDA) -> confirmed as definitely working ( i2c1, not i2c0 !)
SPI is as mentioned in this post -> GitHUB ( Please note that there seem to still be a bit of teething problems, your mileage may vary )