
There are many ways to use Arduino to create your own IoT device. One of the easiest is to configure your Arduino as a Web Server. This way, you can connect to it from any browser capable device on your home network. It is also quite a bit safer to do it this way, as you don’t have to expose your device to the internet, reducing the security implications of many of the other methods available.
It does, however, have the disadvantage of not being able to connect to your device from outside your home network. ( In a later part of this series, I will show you how to do this relatively safely, but take note that you still won’t have SSH encryption to the device, that is a huge security risk in today’s online world.
What use will this kind of IoT device have?
You can use an Arduino based web server to monitor various devices in your home, as well as control them. Many of us have old Android tablets and other devices lying around, that may be to old to run the newest Android Operating System. Such a Tablet can however be mounted to a wall, to provide a permanent display and control device. You will only be limited by your imagination, as well as your skill with interfacing your devices with electronics and Arduino.
A few examples of this can be
– controlling lights
– controlling a fan
– measuring temperature and light levels using various sensors, and performing actions based on those values
But Arduino Web Servers are slow
The normal Arduino web servers that we have all seen in various projects on the internet are indeed slow and cumbersome. This is because they usually have to refresh and reload the entire page to display every single update of a switch or output. We can however take advantage of technology used on computer web servers, as well as the browser of the end user.
Ajax and Javascript
What is AJAX?
AJAX stands for Asynchronous JavaScript and XML.
AJAX is basically the use of JavaScript functions for getting information from the webserver (Your Arduino). This means that data on a web page can be updated without fetching the whole page each time.
This means that only the relevant part of the web page will be updated, either automatically, or when the end user performs an action, like click on a button, or when an input on the actual Arduino changes state.
What is JavaScript?
JavaScript is a client-side scripting language. This means that the code will run on the web browser. Meaning on the end-user computer or mobile device.
The JavaScript is included in the HTML page that will be served by the Arduino Webserver. When you load the web page hosted by the Arduino, the page and the JavaScript is loaded to your browser. Your browser then runs the JavaScript code (provided that you have not disabled JavaScript in your browser).
What will we need to do this?
You will need the following hardware and software to do this project
– Arduino UNO or Compatible
– Arduino Ethernet Shield with NO SD-Card Inserted
– Breadboard
– 1K resistor
– LED
– 10k OR 22k Resistor
– Hookup Wire (5 pieces)
– Push Button
The Circuit
Wire the following circuit on your breadboard
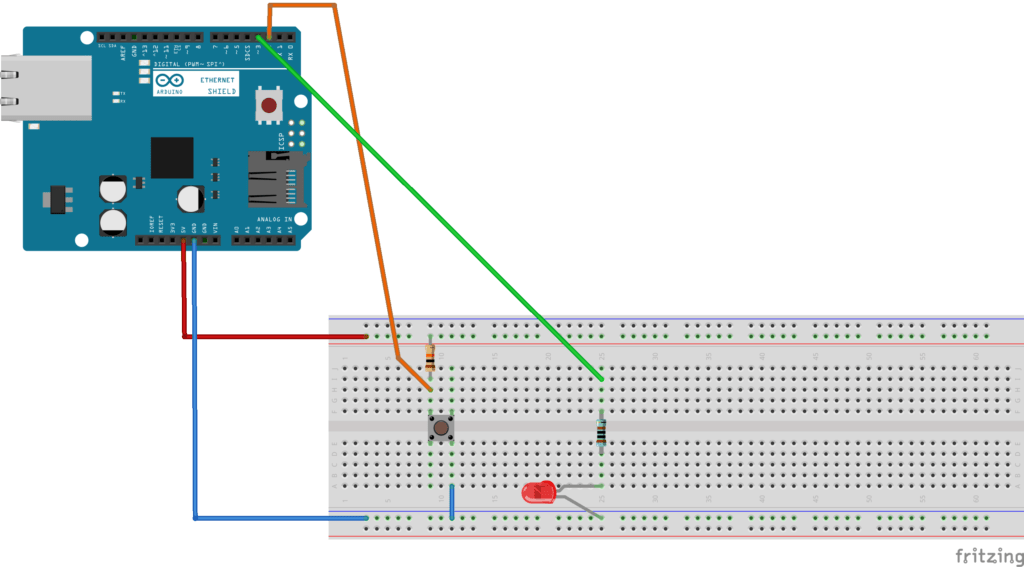
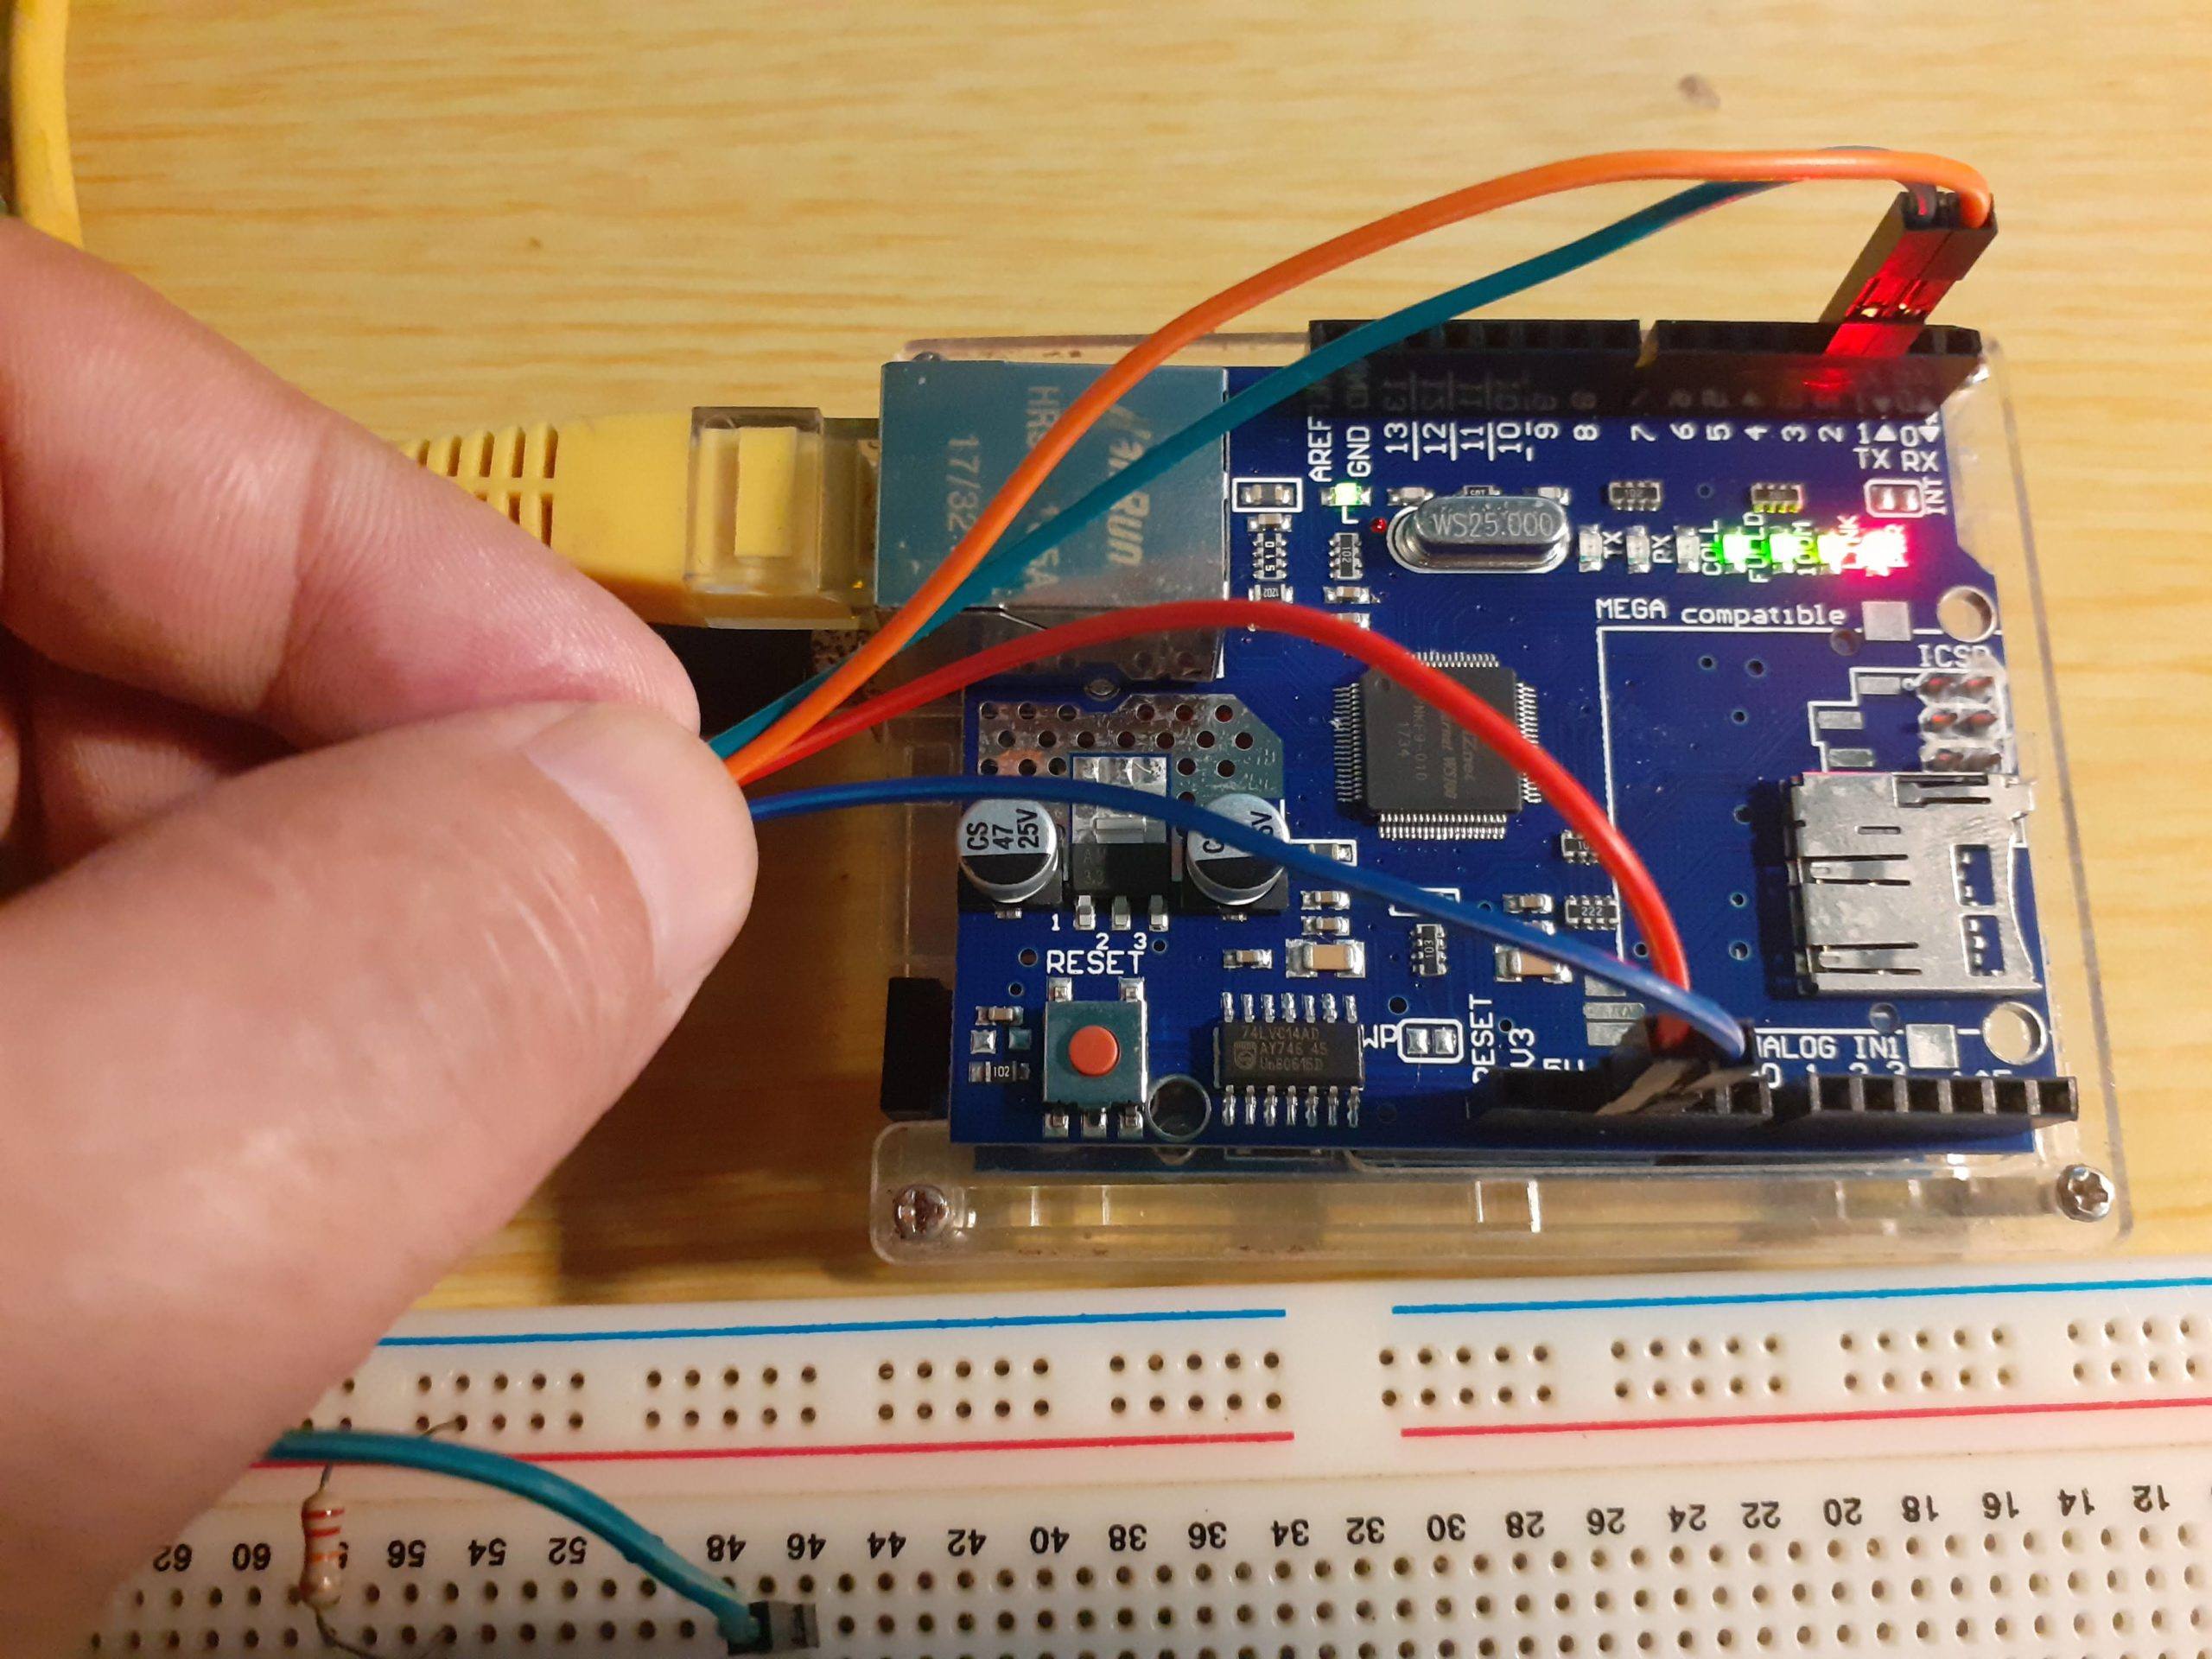
Connect your Ethernet Shield to the Arduino Uno.
Connect the Resistors, LED and push-button Switch as shown.
Connect +5v from Arduino to Red Line, Gnd From Arduino to Blue line
Connect Orange Wire from Arduino Pin 2 to a hole BETWEEN the 10k resistor and the switch ( See Diagram).
Connect Green Wire from Arduino Pin 3 to a hole above the 1k resistor ( See Diagram)
The Code
Copy the following code into your Arduino IDE, Or download the file below
#include <SPI.h>
#include <Ethernet.h>
// MAC address from Ethernet shield sticker under board
byte mac[] = { 0xDE, 0xAD, 0xBE, 0xEF, 0xFE, 0xED };
IPAddress ip(192, 168, 100, 32); // IP address, may need to change depending on network
EthernetServer server(80); // create a server at port 80
String HTTP_req; // stores the HTTP request

void setup()
{
Ethernet.begin(mac, ip); // initialize Ethernet device
server.begin(); // start to listen for clients
Serial.begin(9600); // for diagnostics
pinMode(2, INPUT_PULLUP); // switch is attached to Arduino pin 2
pinMode(3, OUTPUT);
digitalWrite(3,LOW);
}

void loop()
{
EthernetClient client = server.available(); // try to get client
if (client) { // got client?
boolean currentLineIsBlank = true;
while (client.connected())
{ if (client.available())
{ // client data available to read char c = client.read(); // read 1 byte (character) from client HTTP_req += c; // save the HTTP request 1 char at a time
// last line of client request is blank and ends with \n
// respond to client only after last line received
if (c == '\n' && currentLineIsBlank) { // send a standard http response header client.println("HTTP/1.1 200 OK");
client.println("Content-Type: text/html");
client.println("Connection: keep-alive");
client.println(); // AJAX request for switch state
if (HTTP_req.indexOf("ajax_switch") > -1)
{
// read switch state and send appropriate paragraph text
GetSwitchState(client);
} else
{
// HTTP request for web page // send web page - contains JavaScript with AJAX calls
client.println("<!DOCTYPE html>");
client.println("<html>");
client.println("<head>");
client.println("<title>Arduino Web Page with AJAX - Maker and IoT Ideas</title>");
client.println("<script>");
client.println("function GetSwitchState() {");
client.println("nocache = \"&nocache=\"\ + Math.random() * 1000000;");
client.println("var request = new XMLHttpRequest();");
client.println("request.onreadystatechange = function() {");
client.println("if (this.readyState == 4) {");
client.println("if (this.status == 200) {");
client.println("if (this.responseText != null) {"); client.println("document.getElementById(\"switch_txt\")\.innerHTML =this.responseText;");

client.println("}}}}");
client.println("request.open(\"GET\", \"ajax_switch\" + nocache, true);");
client.println("request.send(null);");
client.println("setTimeout('GetSwitchState()', 1000);");
client.println("}");
client.println("");
client.println("");
client.println("");
client.println("Arduino Web Server with AJAX");
client.println("Switch Status on D2");
client.println( "Switch state: Not requested…");
client.println("");
client.println("");
}
// display received HTTP request on serial port
Serial.print(HTTP_req);
HTTP_req = ""; // finished with request, empty string
break;
}
// every line of text received from the client ends with \r\n
if (c == '\n') {
// last character on line of received text
// starting new line with next character read
currentLineIsBlank = true;
}
else if (c != '\r') {
// a text character was received from client
currentLineIsBlank = false;
}
} // end if (client.available())
} // end while (client.connected())
delay(1); // give the web browser time to receive the data
client.stop(); // close the connection
} // end if (client)
}

// send the state of the switch to the web browser
void GetSwitchState(EthernetClient cl)
{
if (digitalRead(2)) {
cl.println("Switch at D2 is: OFF, LED at D3 is OFF");
digitalWrite(3,LOW);
}
else {
cl.println("Switch at D2 is: ON, LED at D2 is ON");
digitalWrite(3,HIGH);
}
}
Upload the code to your Arduino
Testing the results
Open a web browser and go to the IP Address of the server ( the one you set in your code).
If you did everything correctly, you should see a screen similar to this.

Now press the button
The web page should immediately update and tell you that the button is On, and the LED is ON
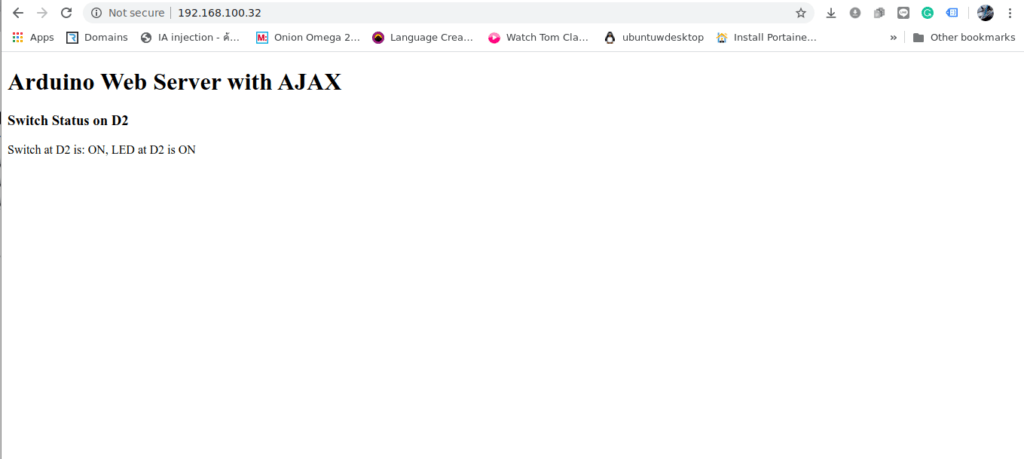
Ajax Web Server showing Status of Button and LED as ON
The Generated HTML will look like this
<!DOCTYPE html>

<html>

<head>

<title>Arduino Web Page with AJAX - Maker and IoT Ideas</title>

<script>

function GetSwitchState() {

nocache = "&nocache=" + Math.random() * 1000000;

var request = new XMLHttpRequest();

request.onreadystatechange = function() {

if (this.readyState == 4) {

if (this.status == 200) {

if (this.responseText != null) {

document.getElementById("switch_txt").innerHTML = this.responseText;

}}}}

request.open("GET", "ajax_switch" + nocache, true);

request.send(null);

setTimeout('GetSwitchState()', 1000);

}

</script>

</head>

<body onload="GetSwitchState()">

<h1>Arduino Web Server with AJAX</h1>

<h3>Switch Status on D2</h3>

<p id="switch_txt">Switch state: Not requested...</p>

</body>

</html>
Images of the Working Hardware


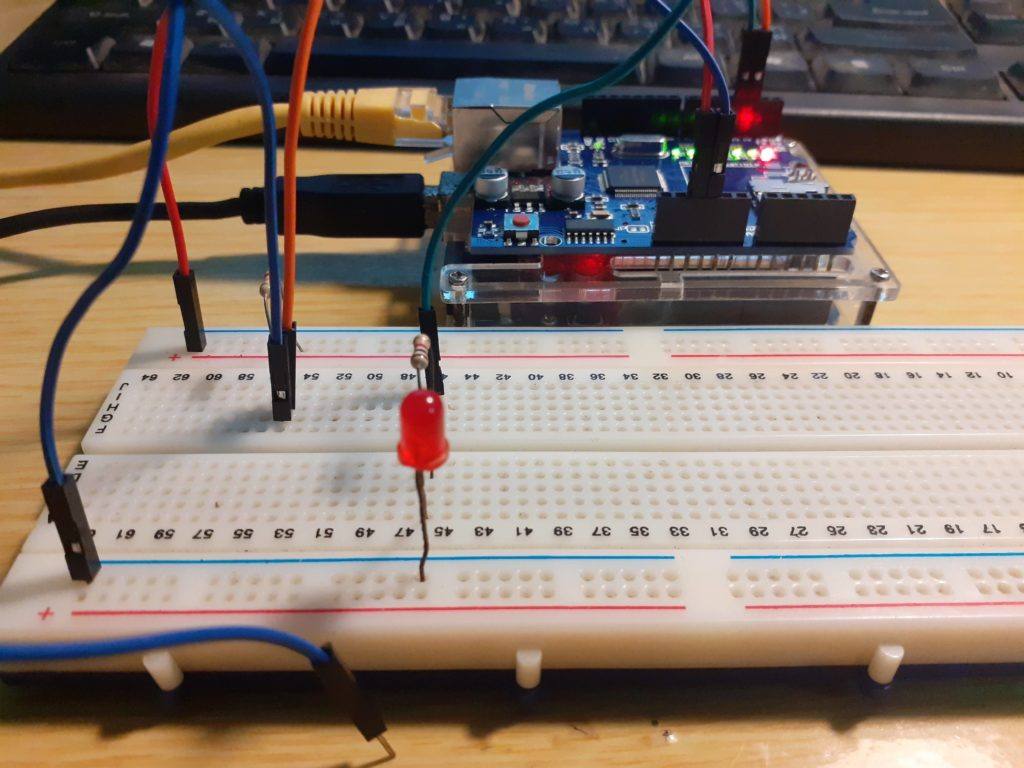
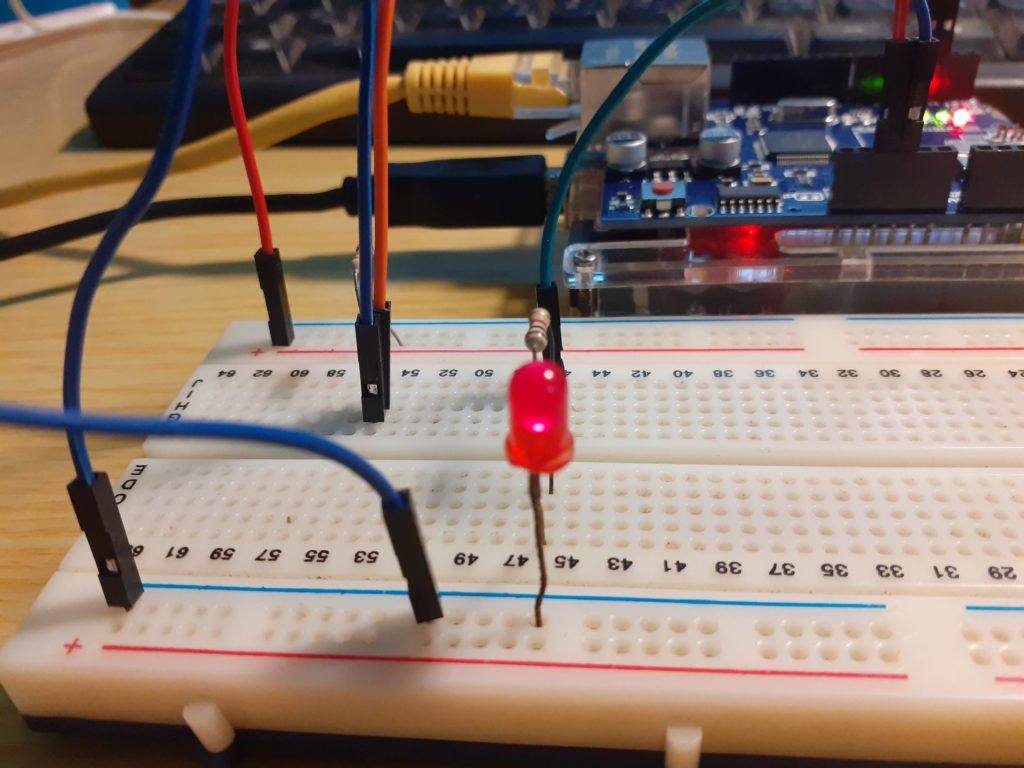

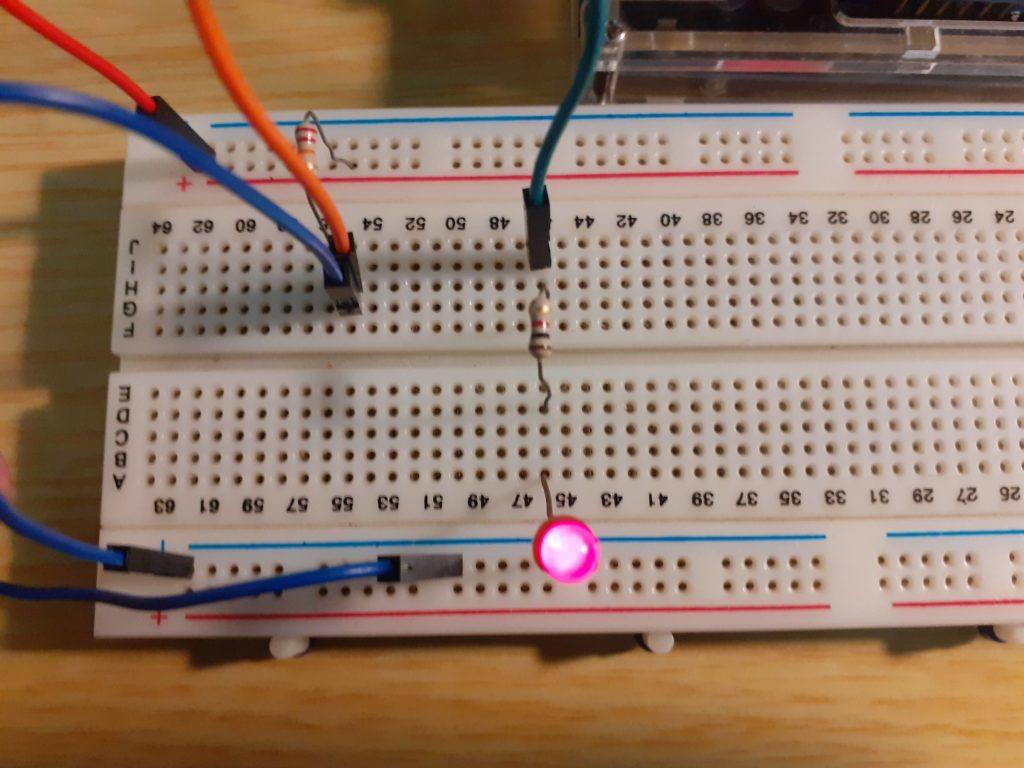
Please note that I did not use a push button switch in my example. I have just used a piece of hookup wire to connect the pulled-up pin to ground, as it is easier to photograph that way, without my finger being in the way on a button. 🙂
Conclusion
This concludes part 1 of this series. This example can very easily be extended to be more useful, as well as be modified to work on other platforms, like ESP32.
In further parts, I will show you how to extend this very simple server into becoming something much more useful. Please visit again to see the rest of this series.